Hello Card – Clean and Simple Design

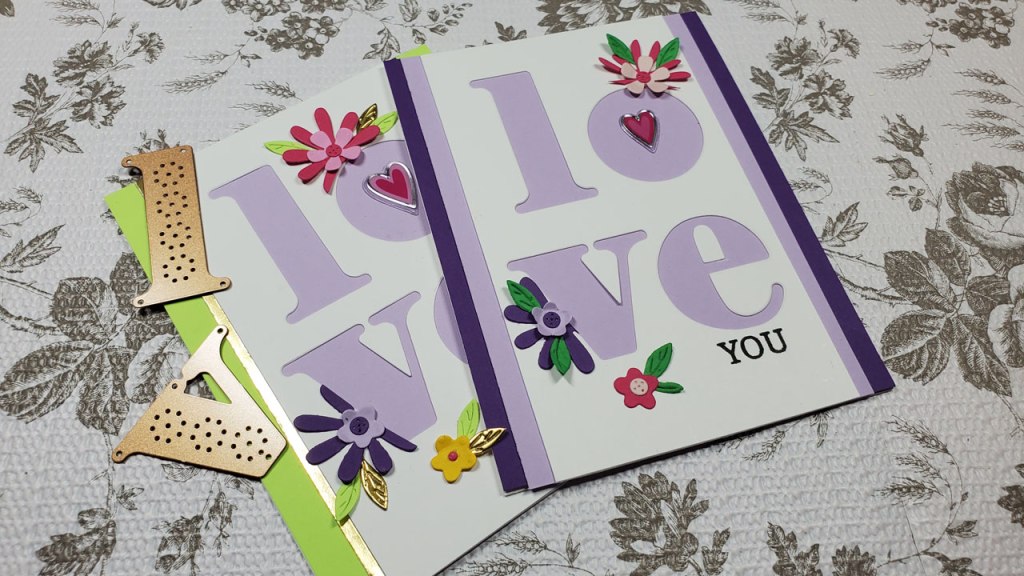
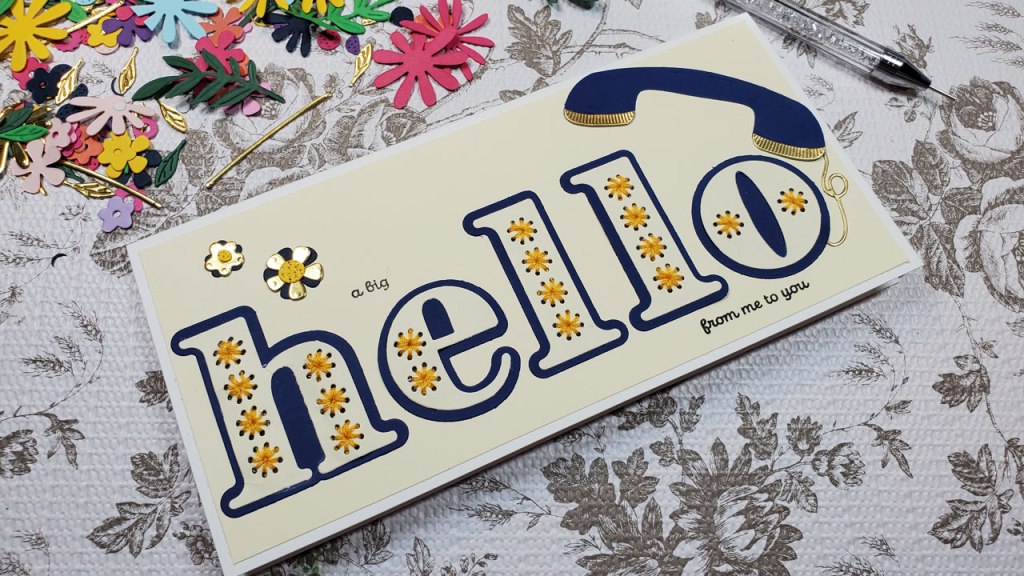
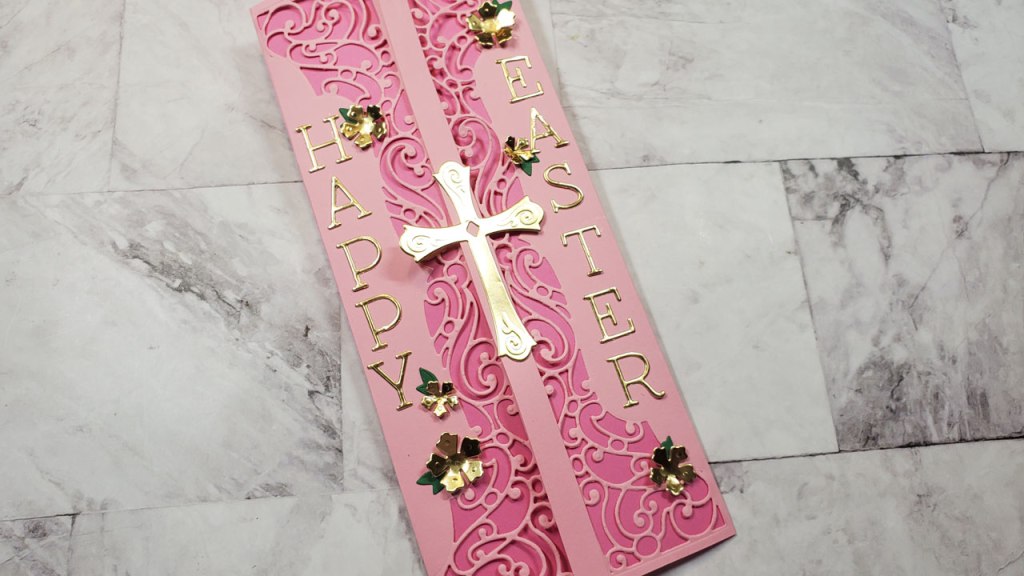
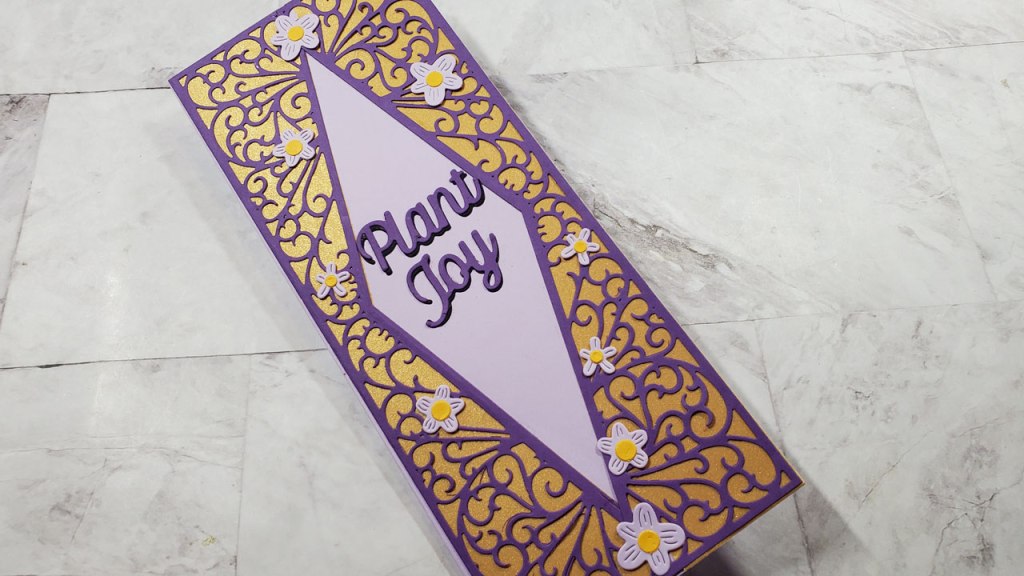
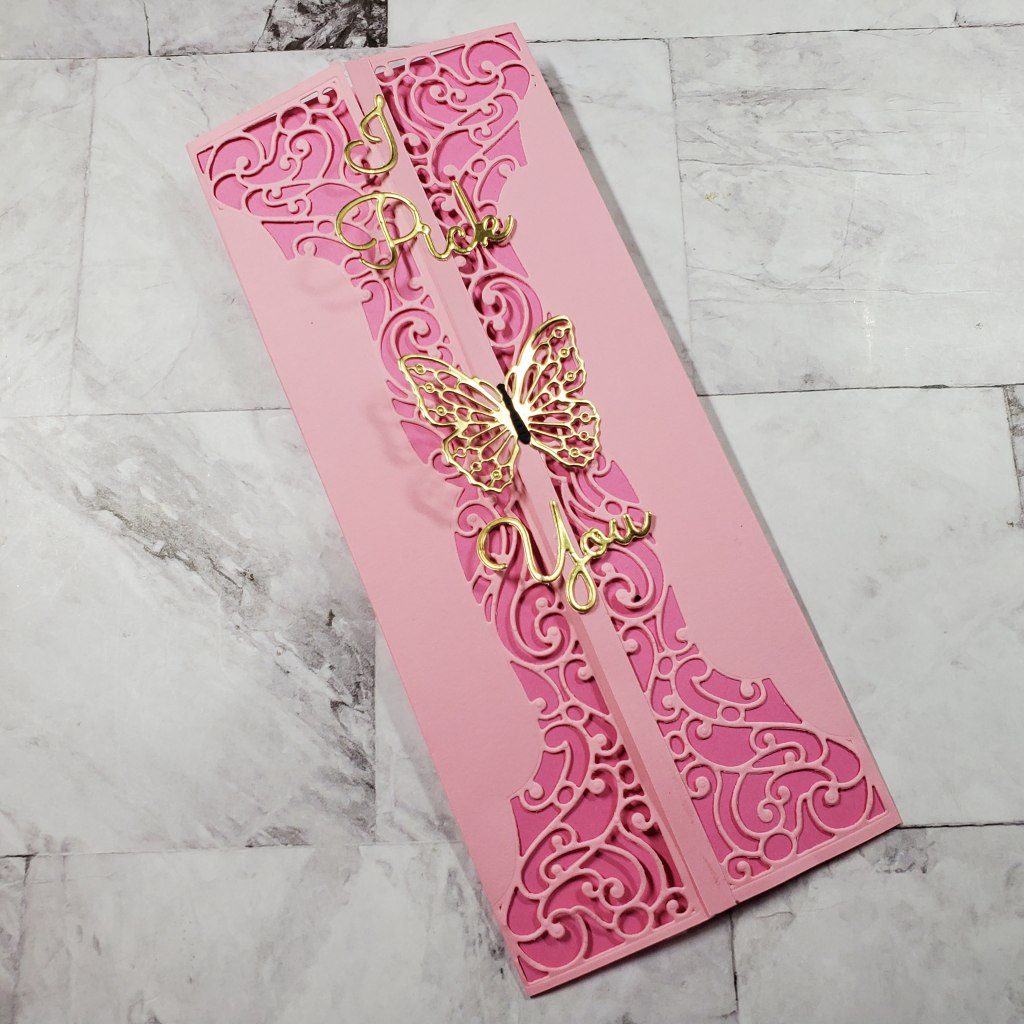
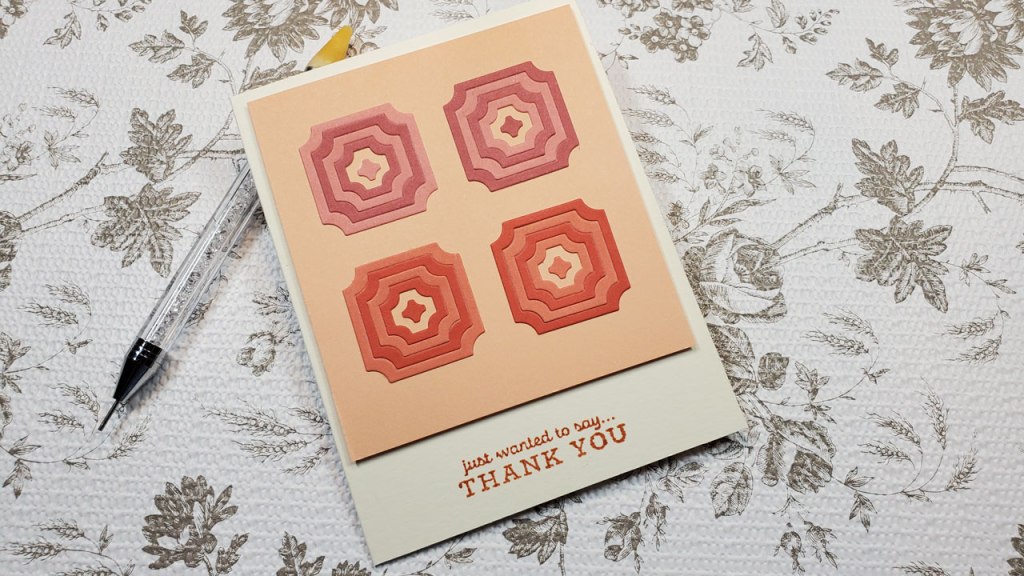
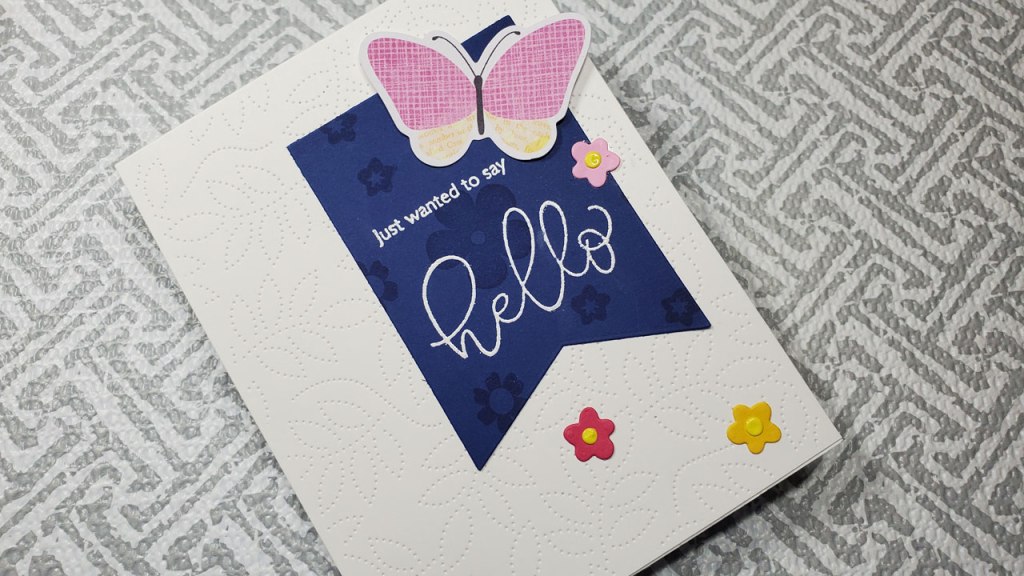
My card for today is in the style known as clean and simple. There is a lot of “white-space”. This term can be confusing. It doesn’t mean there is a lot of the color white (although in my card for today, that is the case). It simply means a large area without any pictures or prints. It’s basically the background. Here are some examples:

I truly love this style. It lends itself to pretty or elegant cards. In my opinion, there are a few things you should keep in mind when doing the clean and simple style:

The white space doesn’t have to be white.

The focus should be the shining star. Everything else should support it, but not detract from it.

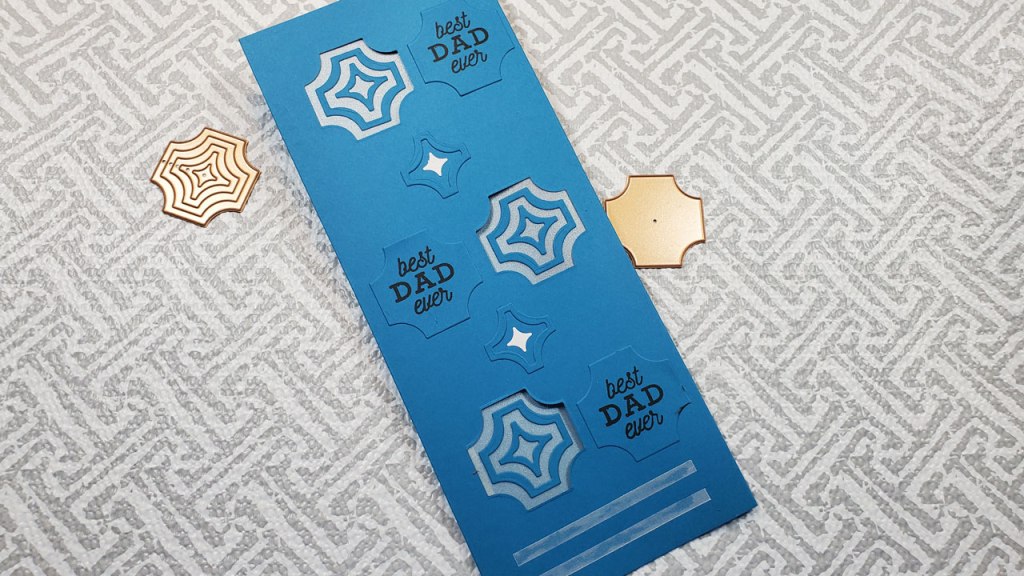
The background should be cohesive, but it doesn’t have to be bland. In my card, I chose to use a background die to imprint a leaf design. It doesn’t detract from the main focus of the card however. No fancy, bold, bright patterns or designs here!

Use elements to guide your viewer’s eye to where you want them to go. On my card I used the tiny, colorful flowers to create a triangle that causes the viewer’s eye to go from the butterfly to the sentiment to the inside of the card.

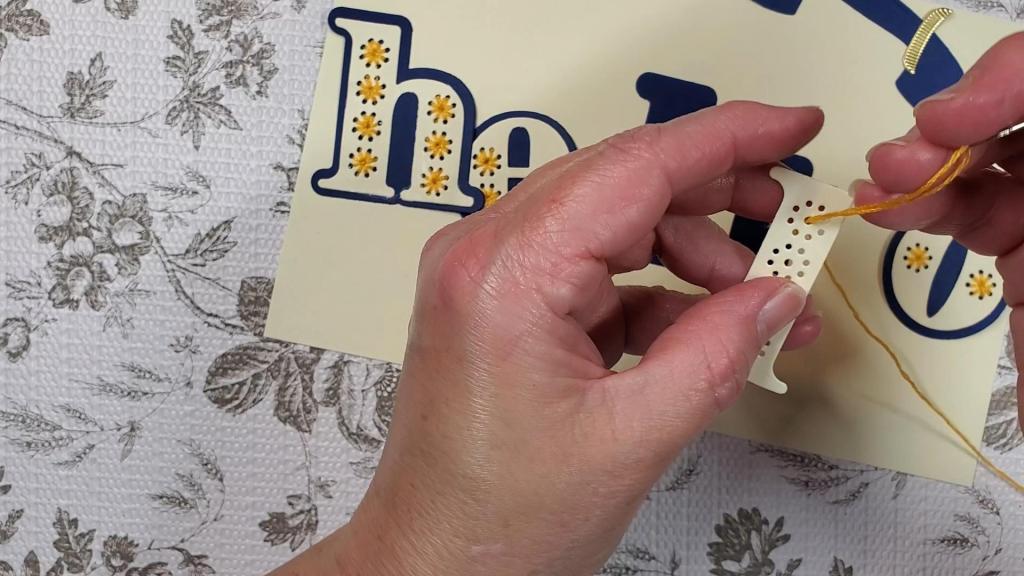
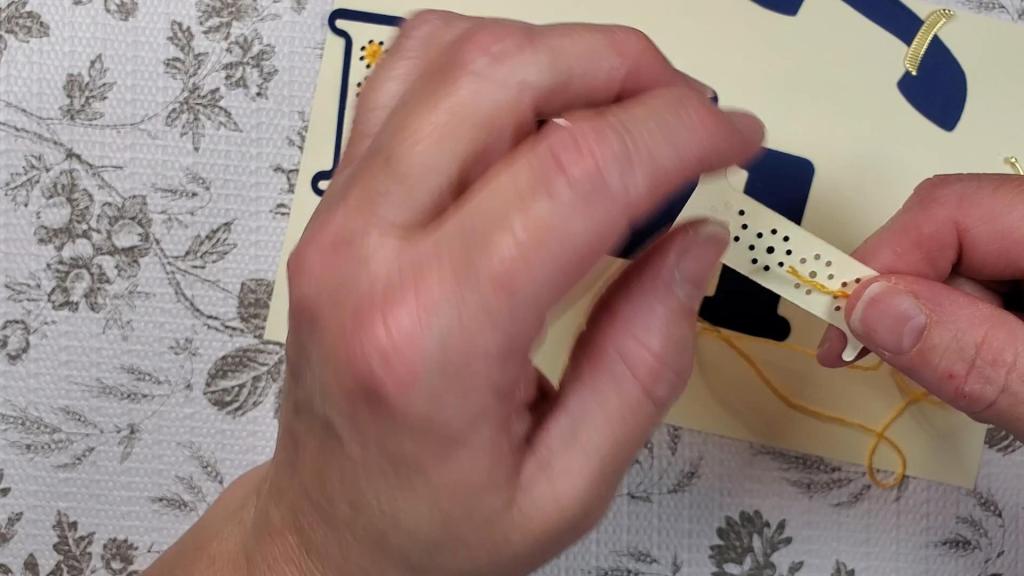
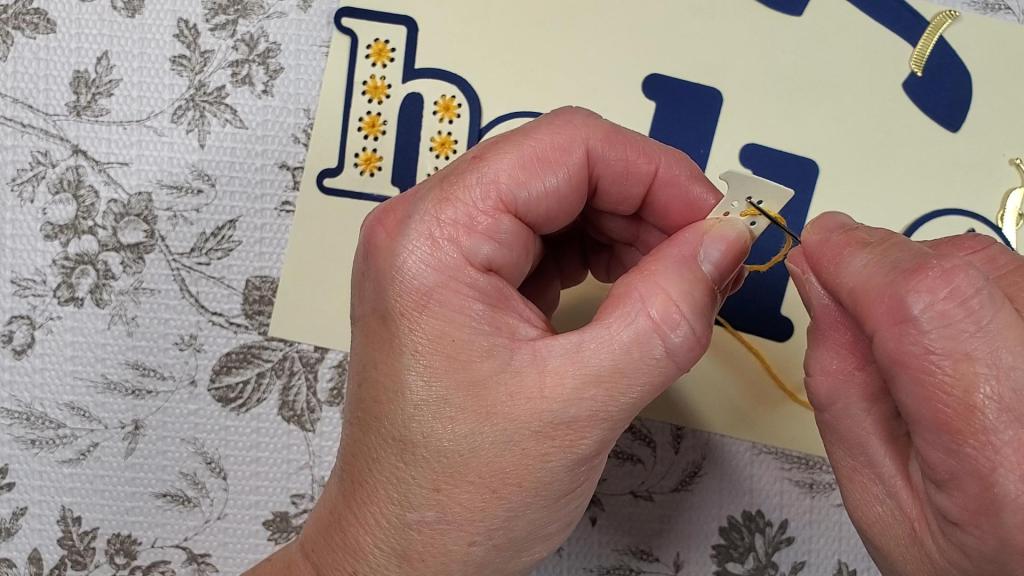
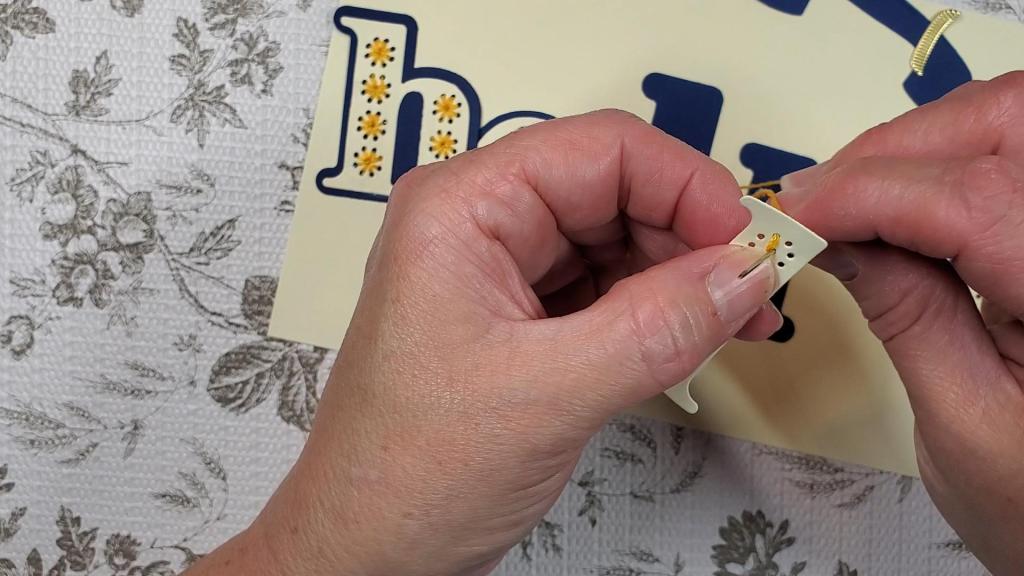
Enjoy the video below to see a demonstration of the card being made:

Affiliate Links
These links are FREE for you to use and I will receive a small portion of any purchases you make using Amazon and Share a Sale links. As an Amazon Associate I earn from qualifying purchases.

Link to subscribe to the SCT Sampler: https://scrapbookandcards.com/sct-sampler/ (I’m not an affiliate with SCT. I just subscribe to the sampler with my own money).

American Crafts Sweet Rush collection by Vicki Boutin: https://shrsl.com/3jblz

Background Dies from Amazon- CutDIES: https://amzn.to/3wM7oEL

Scrapbook.com Banner Dies: https://shrsl.com/3jbyk

StudioLight Basic Wishes Clear Stamp set: https://amzn.to/3MOlAUy

Scrapbook.com Pops of Color Gloss Sunshine: https://shrsl.com/3jbyq

Kingston Crafts Spring Stamps and Ink Pad Bundle:
https://www.hsn.com/products/kingston-crafts-spring-stamps-and-ink-pad-bundle/9819014

VersaMark for embossing: https://amzn.to/39k9uRz

We R Memory Keepers Precision Press Stamping Platform
https://amzn.to/3pmcItB

Nicapa Standard Grip Cutting Mat (12×12 inch,3 Mats): https://amzn.to/30C3i26
(I cut these into 4 pieces and use them in my stamping platform…linked above)

Judikins Opaque White Embossing Powder: https://amzn.to/3a9O4pl

Anti-static pouch: https://amzn.to/3cgrTk5

Tidy Tray to catch embossing powder: https://amzn.to/3t1gBX2

Heat Tool for Heat Embossing, comes with 4 embossing powders: https://amzn.to/2LIstw2

Anti-static pouch: https://amzn.to/3cgrTk5

Expo Erasers: https://amzn.to/3sTh2nI

Scrapbook.com – Clear Double Sided Adhesive Roll – 1/4 Inch x 81 Feet – Permanent – 1 Roll: https://shrsl.com/3atfh

Tombow Mono Liquid Adhesive: https://amzn.to/37DhjRI

EK Success Craft Tweezers (reverse): https://amzn.to/3tFzPBS

Unboxing the May 2022 SCT Sampler

Today, I’m going to be unboxing the SCT Sampler. This is a monthly subscription from Scrapbook and Cards Today magazine which brings you a sampling of the products from two different papercrafting/scrapbooking brands. This month, the two brands are Pinkfresh Studios with their Happy Heart collection and American Crafts with their Sweet Rush collection by Vicki Boutin.. Since it is a sampling, you will get a random selection of the products, so the items each person receives will not be exactly the same. However, you can get a general idea of the product in case you want to purchase more from the collections. Furthermore, you will receive codes for discounts for papercrafting supplies!

I’m new to this subscription this year, but it’s been around for a while. They have other kits you can subscribe to as well.

The video below not only shows the unboxing, but also shows the process I go through to pair the different pieces from the collections together for future projects. While editing the video, I was inspired with even more ideas by just watching my own process.

Key takeaway: When you get new products, take some time to go through them and generate ideas. Then, put it down for a time (length of time is up to you) so you can come back to it with fresh eyes and generate even more ideas!

Please enjoy the video of the unboxing below and the links to the products below that.

Affiliate Links
These links are FREE for you to use and I will receive a small portion of any purchases you make using Amazon and Share a Sale links. As an Amazon Associate I earn from qualifying purchases.

Link to subscribe to the SCT Sampler: https://scrapbookandcards.com/sct-sampler/ (I’m not an affiliate with SCT. I just subscribe to the sampler with my own money).

Pinkfresh Stuio Happy Heart Collection: https://shrsl.com/3jbm1

American Crafts Sweet Rush collection by Vicki Boutin: https://shrsl.com/3jblz

Elegant Notecard with Spellbinders Glimmer Hot Foil Machine

I’m making a beautiful, elegant notecard today with the help of the Spellbinders Glimmer Hot Foil Machine. The machine requires the use of a die cutting machine as well, which is sold separately.

Don’t be intimidated by the Glimmer machine. This is the first time I used it, and I had great success after an initial two or three practice runs. Some things to keep in mind:

  • Use the proper foil. Regular foil will not work. You need the kind designed for this machine.
  • Place your paper down on a surface.
  • Place your Glimmer plate where you want it, face down. Use a small piece of low tack tape only on the tips of the top of the place create a kind of a hinge and hold it in place.
  • Cut your foil to the proper size using scissors or the Spellbinders Quick Trimmer.
  • Slide your foil under the Glimmer plate and on top of the paper with the pretty, shiny side up.
  • I find the best results happen if I flip this “sandwich” upside down before I place it on the Glimmer machine.
  • When the ready indicator light lights up solid, you can place the thin shim and then the spacer pad on top and remove it to run it through your die cutting machine.

The foil plates I used for this project are the Spellbinders Stitched Alphabet Notecard Sentiments (with the words: “Be Bold” and “a note from me to you.”) and the Diamond Floral Frame. In addition, the Stitched Alphabet die in the letter z was used. In case you weren’t aware, you can foil with most metal wafer thin dies (0.8 mm thick), not just glimmer plates!

In case you didn’t also know, you can use the glimmer plates and foil machine to foil on fabric, ribbon, and leather in addition to cardstock and watercolor paper.

Please enjoy the video to see how it’s done.

You may also find more information here: You can learn more about this machine here: https://www.spellbinderspaperarts.com/getting-started-with-glimmer/#glimmer-faq.

Affiliate Links
These links are FREE for you to use and I will receive a small portion of any purchases you make using Amazon and Share a Sale links. As an Amazon Associate I earn from qualifying purchases.

Spellbinders Platinum 6 Machine: https://shrsl.com/3fh78 (Small one)

Spellbinders Stitched Alphabet Dies: https://shrsl.com/3it7j

Spellbinders Glimmer Hot Foil Machine: https://shrsl.com/3j5no

Spellbinders Glimmer Hot Foil in Blush Color: https://shrsl.com/3j5np

Spellbinders Quick Trimmer for foil and paper: https://shrsl.com/3j5nq

Neenah Exact Vellum Bristol, 8.5″ x 11″, 67 lb/147 GSM, White, 94 Brightness, 250 Sheets (80218) https://amzn.to/3LB4wjj

Tombow Mono Sand Eraser (for erasing over-foiling): https://amzn.to/3PCIos8

Electric Eraser: https://amzn.to/3sPCYQx

Core’dinations Cardstock in Purple: unavailable (it was 65lb, but you may want a heavier weight fore the card base)

Self adhesive rhinestones and pearls in various sizes: https://amzn.to/3wyEPvz

Spectrum Noir Alcohol Marker set of 24: https://amzn.to/3sOZUzy Or the set of 6:
https://amzn.to/3Nqz4W9 ( I used LV3, which is included with both of these sets).

Teflon bone folder (it is supposed to not leave a burnishing mark or shine on the paper: https://amzn.to/2QYdHE5

EK Success Craft Tweezers (reverse): https://amzn.to/3tFzPBS

Tombow Mono Liquid Adhesive: https://amzn.to/37DhjRI

Love You Card with Stitched Alphabet Dies (without the stitching!)

Today’s cards are similar to the last card in that the same dies were used to create the card. I always love it when you can get a two for one! In order to accomplish this, I am going to use the negative space created when cutting with the dies instead of the actual die cut letter.

You will need:

Spellbinders’ Stitched Alphabet Dies in the letters: l, o, v, e

Flower dies-I used dies from the Spellbinders Card Kit of the Month-April 2021 called, “Sincerely Yours”

White cardstock 65lb to 80lb for the front panel

White cardstock 110lb for the card base

Spring color cardstock: I chose a light purple and bright green as well as a dark pink and purple

Mirrored Gold Cardstock for the leaves and left/right border lines

Black dye ink

Spellbinders stamp set “Let’s Celebrate Sentiments” STP-102

How to make it:

Create the top-folding A2 sized card base

  • cut an 8.5″ x 11″ piece of 110lb white cardstock in half lengthwise at 4.25 inches (you should have two long pieces of cardstock that measure 4.25″ across and 8.5″ long)
  • rotate the long piece of cardstock and score at 5.5″
  • fold it so that the “bump” is on the inside of the card.

Cut the front panel

  • cut an piece of white cardstock to 3.5″ x 5.5″
  • align the letter dies on the cardstock to spell “love”
    • by placing the l and o on the top line and the v and e on the bottom line (center the letters)
    • Save the cut out letters for another project. You will only use the cardstock panel for this project. Save the inserts for the letter o and e because we will glue them into the letters later.

Cut the light purple cardstock to 4″ by 5.5″. This will be adhered tot he back of your card panel out of which you just cut the letters.

Cut the dark purple cardstock to 4.25″ by 5.5″. This will be your background.

Cut the flowers from the dark purple, light purple, dark pink, light pink cardstocks.

Cut the leaves from the gold mirrored cardstock and the bright green cardstock.

Cut two strips of gold mirrored cardstock with a paper trimmer to 1/8th of an inch x 5.5 inches.

Assemble your card:

  • adhere the dark purple (or bright green) to the card base
  • adhere the light purple to the back of the “love” panel
  • adhere the inserts into the letters o and e ( I used a heart sticker for the center of the o)
  • adhere the flowers onto the card being sure to trim them so they don’t overlap the letters
  • adhere the leaves behind the flowers
  • for the green card, adhere the two strips of gold mirrored cardstock to both sides of the white “love” panel

Stamp your greeting using black ink

Please enjoy the video below:

Affiliate Links
These links are FREE for you to use and I will receive a small portion of any purchases you make using Amazon and Share a Sale links. As an Amazon Associate I earn from qualifying purchases.

Spellbinders Platinum 6 Machine: https://shrsl.com/3fh78 (Small one)

Spellbinders Stitched Alphabet Dies: https://shrsl.com/3it7j

Spellbinders Flower Dies from the Card Kit of the Month, “Sincerely Yours” April 2021 is unavailable…here is an alternative: https://shrsl.com/3it7x

Gold Mirror Cardstock: https://shrsl.com/3fj6l (If you buy one of the card kits, the gold cardstock will be in it)

Teflon bone folder (it is supposed to not leave a burnishing mark or shine on the paper: https://amzn.to/2QYdHE5

Rhinestone Picker/aka Crystal Katana: https://amzn.to/3i8CIqY

EK Success Craft Tweezers (reverse): https://amzn.to/3tFzPBS

Tool ‘n One (to remove pieces from dies and die cut shapes): https://shrsl.com/38b28

Tombow Mono Liquid Adhesive: https://amzn.to/37DhjRI

Hello Card with Stitched Alphabet Dies

This lovely card was a lot of fun to make…and that surprised me because I don’t normally enjoy sewing. However, the stitched alphabet dies from Spellbinders made it super simple and easy. What’s nice about these dies is there are several choices on how you can use them. If you don’t want to sew, you don’t have too…just let the color of the background shine through! You can use them with material as well to create a keepsake ornament instead of a card or to monogram something for someone.

The first step in making this card is to gather all your supplies:

  • die cutting machine ( I used the Spellbinders Platinum 6 machine)
  • stitched alphabet dies
  • 8.5″ x 11″ blue and light yellow/cream colored cardstock to make the letters
  • mirrored gold cardstock for the phone and flowers
  • 110lb cardstock (I used Neenah solar white)
  • thread or embossing floss If you choose to sew the letters
  • an embroidery needle, which has a blunt tip so it it will not pierce your skin or the paper
  • adhesive (I used a liquid adhesive)
  • Stamping platform or acrylic blocks
  • Spellbinders’ “Sentiments for You” clear stamps or any greeting stamps you want to use
  • Black dye ink to stamp your greeting
  • Spellbinders flower dies from the April 2021 Card Kit of the Month called, “Sincerely Yours”
  • Spellbinders phone dies from the September 2021 Card Kit of the Month called, “Together is the Best”

To make the cardbase, trim your 110lb cardstock from 11″ to 8.25″. Then, rotate it and trim from 8.5″ to 8.25″. Then, score it at 4 1/8th inch.

Cut the blue and yellow/cream cardstock in half at the 5.5″ inch mark so you have two pieces that measure 8.5″ by 5.5″.

Use one of the pieces of the blue cardstock to cut out the background letter and the phone.

Use one of the pieces of the yellow/cream cardstock to cut out the main letters.

Use the mirrored gold cardstock to cut out the phone cord and the end caps for the phone.

Cut a length of 20″ of embossing floss and thread your embossing needle.

Stitch the letters. Then, adhere them to the blue backgrounds. To stich them, start by threading your embroidery needle and leave about two inches of thread on one side.

Then, coming up from the back, bring your needle through the center hole.

Be sure to leave some excess thread on the back. I hold it with my finger while sewing, but you could tape it down.

Once it’s through the center hole, go through the top hole on the outside ring.

Come back through the center hole.

Go through the next available top hole on the outside ring. Repeat these steps until all stitching is complete.

Tie off the string by using your needle to go under one of the stictches on the back side and then going through the loop before you pull it taunt. You can do this twice to make sure it’s secure. Then, cut the string.

Do this for all your letters. Then, set them aside so you can assemble the card.

Trim the second piece of yellow cardstock to 8″ by 3.75″. Adhere it to the cardbase.

Use a stamping platform to stamp the greeting on the card. I placed the letters on the card without glue so I could be sure to place the greeting in the proper spot. I moved them out of the way once the greeting stamp as in place.

Adhere the letters, phone, and flowers to the card.

Please enjoy the video:

Affiliate Links
These links are FREE for you to use and I will receive a small portion of any purchases you make using Amazon and Share a Sale links. As an Amazon Associate I earn from qualifying purchases.

Spellbinders Platinum 6 Machine: https://shrsl.com/3fh78 (Small one)

Spellbinders Stitched Alphabet Dies: https://shrsl.com/3it7j

Spellbinders Embroidery Floss: https://shrsl.com/3it7n

Large Eye Blunt Needles for Stitching: https://amzn.to/3wpB8IF

Spellbinders Flower Dies from the Card Kit of the Month, “Sincerely Yours” April 2021 is unavailable…here is an alternative: https://shrsl.com/3it7x

Phone die from the Spellbinders Card Kit of the Month, “Together is Best” September 2021: https://shrsl.com/3it81

Gold Mirror Cardstock: https://shrsl.com/3fj6l (If you buy one of the card kits, the gold cardstock will be in it)

Teflon bone folder (it is supposed to not leave a burnishing mark or shine on the paper: https://amzn.to/2QYdHE5

Rhinestone Picker/aka Crystal Katana: https://amzn.to/3i8CIqY

EK Success Craft Tweezers (reverse): https://amzn.to/3tFzPBS

Tool ‘n One (to remove pieces from dies and die cut shapes): https://shrsl.com/38b28

Tombow Mono Liquid Adhesive: https://amzn.to/37DhjRI

Happy Easter with Spellbinders Half Slimline Bracket Etched Dies

Hello and Happy Easter! Today’s card features the beautiful dies from Spellbinders called, “Half Slimline Bracket Etched Dies” from the Layered Fleur Bouquet Slimline Collection by Becca Feeken. This die set comes with the inlaid die, the cut out die, and some words: “I Pick You.”

There are several choices you have with these dies. You can use the intricate die by itself which will create an inlaid look. This is what I’ve done with the card shown above. You also have the option of cutting them out entirely by using both dies together. Then, you can adhere it to another sheet of cardstock to create a different look, which is what I did in yesterday’s card with a similar Spellbinders die called, “Half Slimline Diamond Etched Dies” below:

For today’s card, though, I chose to create two versions. One with the words,, “I Pick You,” and one with a cross for Easter. Here is the one with the words:

Please note that I chose to cut the die from the inside of the two panels instead of flipping them and cutting them from the edges. This way, I created some solid space on the edges of the card. For the Easter card, this was important because I needed that space to spell HAPPY EASTER with the gold letters, “H-A-P-P-Y E-A-S-T-E-R.” For the I Pick You card, it may have been better to flip the dies so the words have more solid space to stick to. Oh, well. You live, you learn. That doesn’t mean I won’t make the same mistake again, ha, ha.

I used two additional Spellbinders dies to create the Easter card: Crosses Two and One Kind Word Alphabet Collage. As of the posting of this blog, the first is still available, the second is not. To adhere the cross and flowers to the card, I used my Tombow Mono Liquid Adhesive and my reverse tweezers and a katana tool which has a wax tip in order to make picking up and placing the pieces easier.

You’ll need to use larger Spellbinders die cutting machine (the 8.5″ platform) because the Platinum 6 will not fit an 8.5 inch piece of cardstock. When cutting this design into the card panels, you’ll need to flip the cardstock to the back side. This is because the two side card panels fold forward to the center of the card. As I mentioned above, I chose to cut the die from the inside of the panel, BUT when you are flipping the cardstock, it appears that it is the outer edge. Once you fold the flaps to the front, you’ll see that it is actually the inside area.

Enjoy the video below:

Affiliate Links
These links are FREE for you to use and I will receive a small portion of any purchases you make using Amazon and Share a Sale links. As an Amazon Associate I earn from qualifying purchases.

Spellbinders Platinum 6 Machine: https://shrsl.com/3fh78 (Small one)

Spellbinders Platinum Die Cutting and Embossing Machine – 8.5″ Platform
https://shrsl.com/3e1u4 (Large one)

Half Slimline Bracket Etched Dies from the Layered Fleur Bouquet Slimlines Collection by Becca Feeken: https://shrsl.com/3h6r4

Shapeabilities Crosses Two Etched Dies:https://shrsl.com/3h76g

One Kind Word Alphabet Collage DOMAPG-OCT19: unavailable

Assorted Pack Color Essentials Cardstock 8.5″ x 11″ – 20 Pack: https://shrsl.com/387n0

Gold Mirror Cardstock: https://shrsl.com/3fj6l

Beauty is Everywhere – Card Kit of the Month Club: https://shrsl.com/3fh4o

Teflon bone folder (it is supposed to not leave a burnishing mark or shine on the paper: https://amzn.to/2QYdHE5

Rhinestone Picker/aka Crystal Katana: https://amzn.to/3i8CIqY

EK Success Craft Tweezers (reverse): https://amzn.to/3tFzPBS

Tool ‘n One (to remove pieces from dies and die cut shapes): https://shrsl.com/38b28

Tombow Mono Liquid Adhesive: https://amzn.to/37DhjRI

Plant Joy Card with Spellbinders Half Slimline Diamond Dies

I’m making an any occasion card today. It would make a beautiful Easter card…just substitute the words on this card with “Happy Easter!” I used the new dies from Spellbinders called: Half Slimline Diamond Dies from the Layered Fleur Boquet Slimline Collection available now. As you probably guessed from the name of the dies, this card is a slimline card, which measures 3.5″ x 8.5″. I just trimmed an 8.5″ x 11″ sheet of cardstock to 7 inches along the 11 inch side and then scored it at 3.5″.

These dies can be used to inlay the cut or you can use the “cut-out” die that comes in the set to cut the design out (which is what I did for this card) and adhere the pieces to another piece of cardstock or specialty paper. In this case, I adhered it to some gold vellum.

The set comes with the words, “Plant Joy.” I cut them out of the same dark purple that I used for the decorative die and I also cut it from black cardstock and adhered the purple and black layers together with the black slightly askew so it creates a shadow for the words.

Finally, I die cut some flowers and their centers to dress up the front of the card. The flower dies are also from Spellbinders. I subscribed to the card kit of the month last year, and this one was the August 2021 card kit called, “Art School,” which had dies to cut out these 3 sizes of flowers as well as an art pallet and paint tubes and brushes (which I didn’t use). I used the light purple cardstock to cut out the flowers and some yellow cardstock for the centers.

Please enjoy the video below:

Affiliate Links
These links are FREE for you to use and I will receive a small portion of any purchases you make using Amazon and Share a Sale links. As an Amazon Associate I earn from qualifying purchases.

Spellbinders Platinum 6 Machine: https://shrsl.com/3fh78 (Small one)

Spellbinders Platinum Die Cutting and Embossing Machine – 8.5″ Platform
https://shrsl.com/3e1u4 (Large one)

Half Slimline Diamond Etched Dies from the Layered Fleur Bouquet Slimlines Collection by Becca Feeken:
https://shrsl.com/3h6r3

Purple Mist Color Essentials Cardstock 8.5″ x 11″ – 10 Pack: https://shrsl.com/3h6r5

Royal Amethyst Color Essentials Cardstock 8.5″ x 11″ – 10 Pack: https://shrsl.com/3h6r9

Paper Junkie Colored Vellum Gold: https://amzn.to/2LE8AX6

Art School Card Kit of the Month Club: https://shrsl.com/3h6rb

Teflon bone folder (it is supposed to not leave a burnishing mark or shine on the paper: https://amzn.to/2QYdHE5

EK Success Craft Tweezers (reverse): https://amzn.to/3tFzPBS

Tool ‘n One (to remove pieces from dies and die cut shapes): https://shrsl.com/38b28

Tombow Mono Liquid Adhesive: https://amzn.to/37DhjRI

Thank You Card with Spellbinders Mini Inverted Squares Dies

This card features a geometric pattern created using the Spellbinders new dies called, “Mini Inverted Squares” from the Mini Shapes Collection. Geometric patterns are great for anyone, so they are extremely versatile and can be used for almost any occasion or holiday as well as for any person on your list!

As you can see this card could be given to virtually anyone, but you change it’s look by using different colors. I’ve chosen to use colors that are from the same family (next to each other on the color wheel) to create an analogous color scheme. I’ve alternated two colors in one square, but you can choose to use more than two colors if you’d like.

I used liquid adhesive to glue these pieced to my card panel and then I used foam adhesive on the back of the card panel to make it stand up off the card base. To finish the card, I used a thank you stamp from the Spellbinders set called, “Sentiments for You” along with some memento dew drop ink in the color potter’s clay.

Yesterday, I posted a card featuring another die set in this new release called, “Mini Color Block Crosses.” They look very similar to the mini inverted squares, so don’t get the sets confused.

If you’d like to see a demonstration of how this card was made, please check out the video below.

Affiliate Links
These links are FREE for you to use and I will receive a small portion of any purchases you make using Amazon and Share a Sale links. As an Amazon Associate I earn from qualifying purchases.

Color Block Mini Inverted Squares Etched Dies from the Color Block Mini Shapes Collection: https://shrsl.com/3h4mc

Spellbinders Platinum 6 Machine: https://shrsl.com/3fh78

Sentiments for You Clear Stamp Set from the Celebrate You Collection: https://shrsl.com/3fh8j

Alabaster Color Essentials Cardstock 8.5″ x 11″ – 10 Pack: https://shrsl.com/3cvzb

Scrapbook.com – Roses – Smooth Cardstock Paper Pad – A2 – 4.25 x 5.5 – 40 Sheets: https://shrsl.com/3h4mw

Teflon bone folder (it is supposed to not leave a burnishing mark or shine on the paper: https://amzn.to/2QYdHE5

EK Success Craft Tweezers (reverse): https://amzn.to/3tFzPBS

Tool ‘n One (to remove pieces from dies and die cut shapes): https://shrsl.com/38b28

Tombow Mono Liquid Adhesive: https://amzn.to/37DhjRI

Father’s Day Card 2022 with Spellbinders Mini Color Block Crosses

I’m making a slimline card for Father’s Day using the new Spellbinders dies called, “Mini Color Block Crosses.” There are two small dies in this set and they are very inexpensive, but you can do so much with them. They sent me these dies and asked me to create with them. I was more than happy to do so.

These dies have a geometric design, which makes them so versatile. The possibilities are virtually limitless when it comes to color choice and layout design. You can stack them and lay them out side by side or in a staggered, random, or repeating pattern. You can use all of them or just some of them. You can use a mono-chromatic color scheme or choose more of a contrasting color scheme.

For more ideas and images visit Spellbinders.

I chose to go with using only some of the die cuts with a mono-chromatic color scheme in a repeated pattern layout. For the greeting, I used a stamp set that was released by Spellbinders just recently this year called, “Sentiments for You.” The ink is versa-fine black onyx.

I created a pocket in this card and inserted a piece of frosted white vellum which you can see in the image above through the “windows” I created on the card using one of the dies from the Spellbinders Mini Color Block Crosses dies. It was an easy thing to do and you can watch the video of the cardmaking process is below:

Affiliate Links
These links are FREE for you to use and I will receive a small portion of any purchases you make using Amazon and Share a Sale links. As an Amazon Associate I earn from qualifying purchases.

Color Block Mini Crosses Etched Dies from the Color Block Mini Shapes Collection
https://shrsl.com/3guz9

Spellbinders Platinum Die Cutting and Embossing Machine – 8.5″ Platform: https://shrsl.com/38b1y

Sentiments for You Clear Stamp Set from the Celebrate You Collection: https://shrsl.com/3fh8j

Teflon bone folder (it is supposed to not leave a burnishing mark or shine on the paper: https://amzn.to/2QYdHE5

EK Success Craft Tweezers (reverse): https://amzn.to/3tFzPBS

Paper Junkie Colored Vellum Assorted Colors (included the white frosted vellum I used: https://amzn.to/2LE8AX6

Teal Cardstock from Darice Smooth Texture Acid and Lignin Free Item #: GX-2222-07
Brand: Core’dinations UNAVAILABLE

Happy Mother’s Day with Spellbinders Dies and Stamps

Spellbinders has released a new collection called, “Celebrate You” with lots of dies and stamps. They asked me to create for them using the stamp set called, “Sentiments for You.”

This is the perfect stamp set for this time of year, with greetings appropriate for many Spring occasions. I’m making a Mother’s Day card with the stamp set, along with a die set they released last year called, “Elegant Twist Squares” and some of their mirror gold cardstock.

You can see in the image above the embossed greeting, “Happy Mother’s Day” This is one of the stamps that comes in the “Sentiments for You” stamp set. This card looks very elegant, but the dies make it a simple card to make.

You’ll need:

  • Spellbinders Clear Stamp Set: Sentiments for You
  • Spellbinders Die set: Elegant Twist Squares
  • Spellbinders Color Essentials Cardstock in Alabaster
  • Spellbinders Mirror Gold Cardstock
  • Gold Embossing Powder
  • Versa Mark Ink Pad
  • Heat Tool
  • Anti-static powder
  • Ribbon
  • Paper Trimmer
  • Die Cutting Machine
  • Glue Dots
  • Double Sided Adhesive
  • Gold Ribbon

I used my paper trimmer to cut the 8.5″ x 11″ alabaster cardstock in half at the 5.5″ mark. I rotated one piece and scored it at 4.25″ to create my cardbase. I trimmed the second piece down to 4″ x 5.25″ which will be my cover. The mirror gold cardstock was trimmed just shy of the 4″ x 5.25″ so it would create that gold background for the open twists. I used the Elegant Twists Squares dies to cut the design into the alabaster cover and to cut out the center square. Then, I adhered the mirror gold cardstock to the back of the alabaster cover.

I used gold embossing powder, versa mark ink pad, anti-static powder, and a heat tool to emboss the sentiment from the “Sentiments for You” stamp set onto the center square. To add some dimension, I used foam adhesive behind the square to “pop it up.”

Finally, I used gold ribbon and tied a bow. I adhered it using glue dots.

Here is the video:

Affiliate Links
These links are FREE for you to use and I will receive a small portion of any purchases you make using Amazon and Share a Sale links. As an Amazon Associate I earn from qualifying purchases.

Sentiments for You Clear Stamp Set from the Celebrate You Collection: https://shrsl.com/3fh8j

Spellbinders Color Essentials Cardstock in Alabaster: https://shrsl.com/3cvzb

Spellbinders Mirror Gold Cardstock: https://shrsl.com/3fj6l

Spellbinders Platinum 6 Machine: https://shrsl.com/3fh78

Spellbinders Tool in One: https://shrsl.com/38b28

Spellbinders Mirror Gold Cardstock 8 1/2″ x 11 – 10 Pack: https://shrsl.com/3fj6l

Sentiments for You Clear Stamp Set from the Celebrate You Collection: https://shrsl.com/3fh8j

Spellbinders Elegant Twists Squares: unavailable, but the following rectangles will create a similar effect as the card shown in this video:
Spellbinders Elegant Twists Rectangles: https://shrsl.com/3fjew

VersaMark for embossing: https://amzn.to/39k9uRz

Heat Tool for Heat Embossing, comes with 4 embossing powders: https://amzn.to/2LIstw2

Anti-Static Embossing Pouch: https://amzn.to/39DLibJ

Tidy Tray to catch embossing powder: https://amzn.to/3t1gBX2

We R Memory Keepers Precision Press Stamping Platform https://amzn.to/3pmcItB

Fiskars Sure Cut 9″ Paper Trimmer: https://amzn.to/2WzlUhq

Fiskars Cut and Score Blades: https://amzn.to/3u0seic

Scrapbook Adhesives by 3L 3L EZ Runner Permanent Adhesive, Value Pack:
https://amzn.to/3c0Uvg4

Elmer’s Glue Spots: https://amzn.to/2L2SQt9