
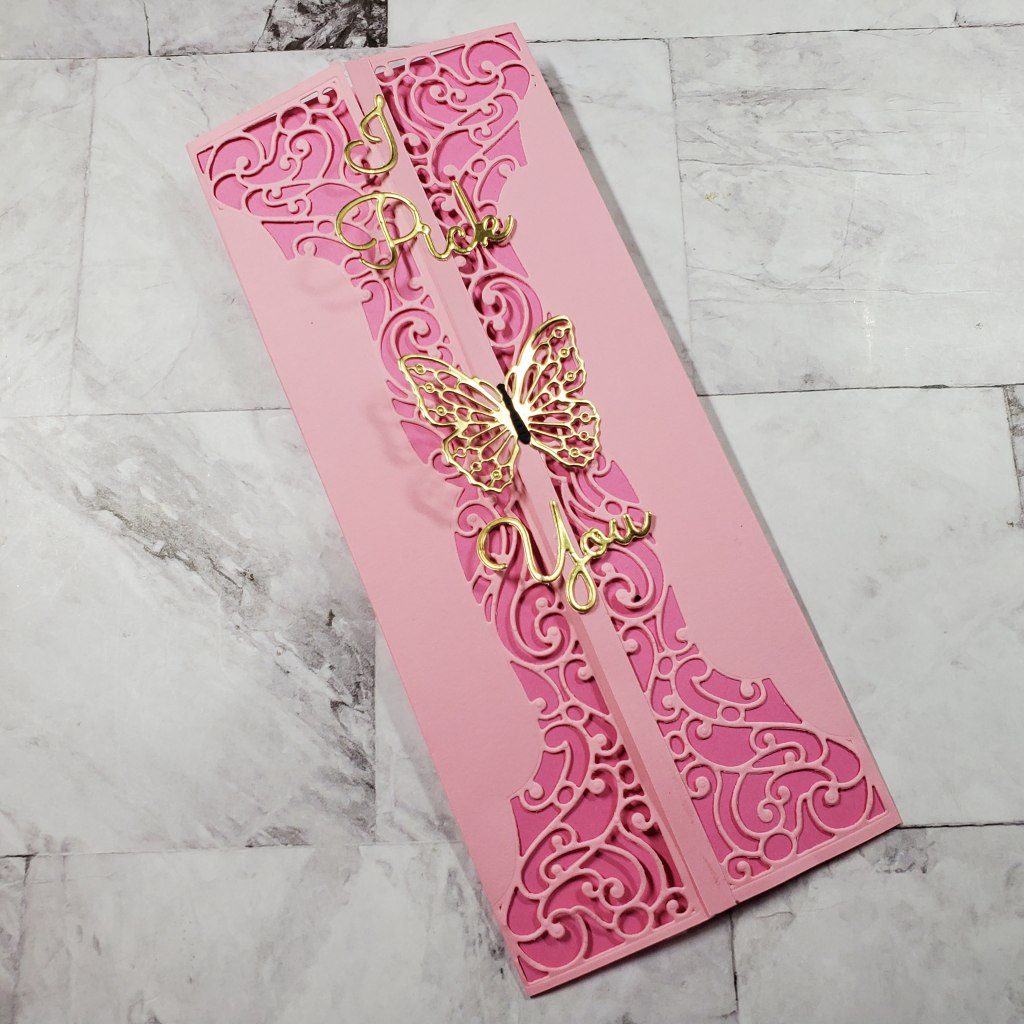
Hello and Happy Easter! Today’s card features the beautiful dies from Spellbinders called, “Half Slimline Bracket Etched Dies” from the Layered Fleur Bouquet Slimline Collection by Becca Feeken. This die set comes with the inlaid die, the cut out die, and some words: “I Pick You.”
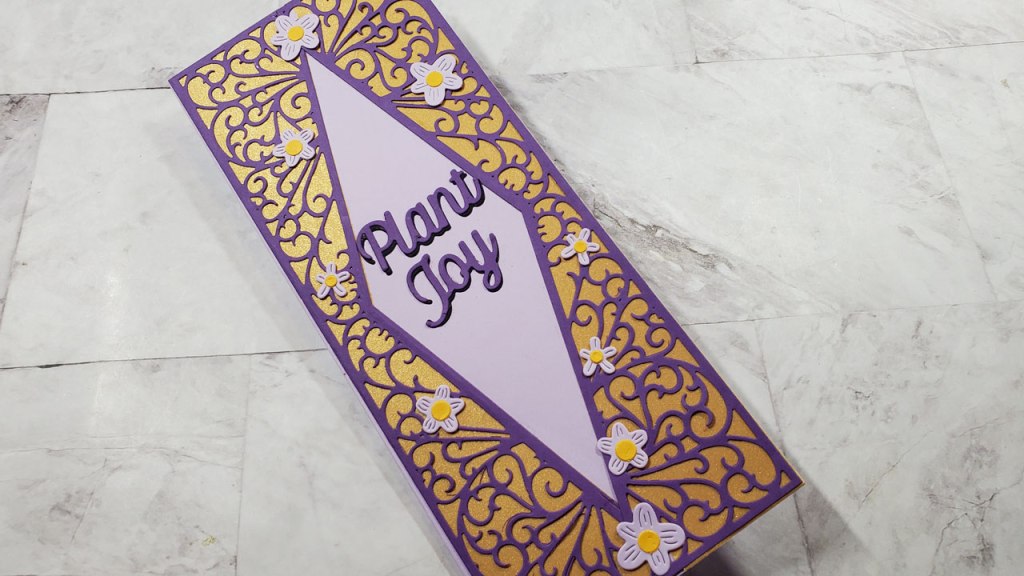
There are several choices you have with these dies. You can use the intricate die by itself which will create an inlaid look. This is what I’ve done with the card shown above. You also have the option of cutting them out entirely by using both dies together. Then, you can adhere it to another sheet of cardstock to create a different look, which is what I did in yesterday’s card with a similar Spellbinders die called, “Half Slimline Diamond Etched Dies” below:
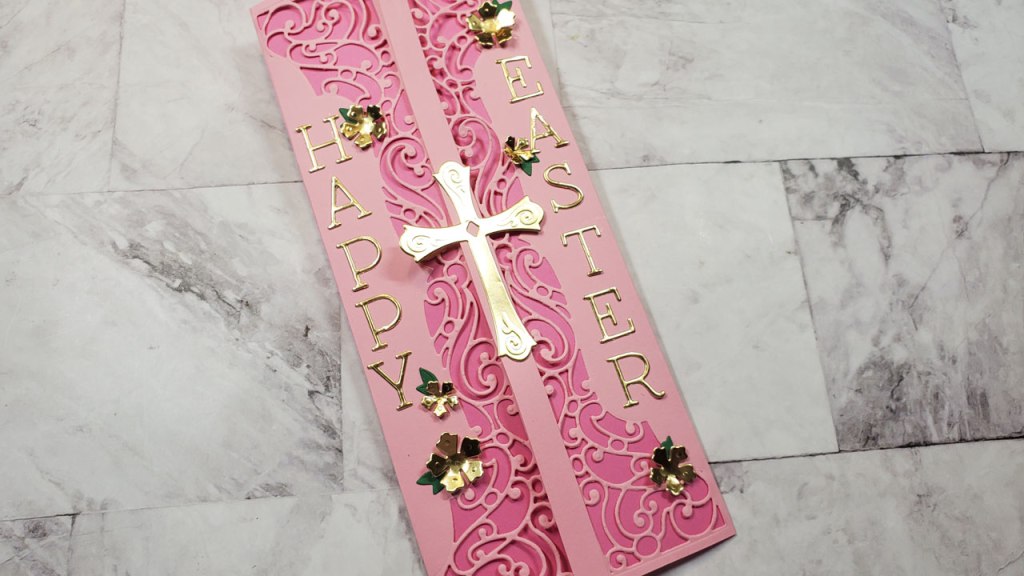
For today’s card, though, I chose to create two versions. One with the words,, “I Pick You,” and one with a cross for Easter. Here is the one with the words:
Please note that I chose to cut the die from the inside of the two panels instead of flipping them and cutting them from the edges. This way, I created some solid space on the edges of the card. For the Easter card, this was important because I needed that space to spell HAPPY EASTER with the gold letters, “H-A-P-P-Y E-A-S-T-E-R.” For the I Pick You card, it may have been better to flip the dies so the words have more solid space to stick to. Oh, well. You live, you learn. That doesn’t mean I won’t make the same mistake again, ha, ha.
I used two additional Spellbinders dies to create the Easter card: Crosses Two and One Kind Word Alphabet Collage. As of the posting of this blog, the first is still available, the second is not. To adhere the cross and flowers to the card, I used my Tombow Mono Liquid Adhesive and my reverse tweezers and a katana tool which has a wax tip in order to make picking up and placing the pieces easier.
You’ll need to use larger Spellbinders die cutting machine (the 8.5″ platform) because the Platinum 6 will not fit an 8.5 inch piece of cardstock. When cutting this design into the card panels, you’ll need to flip the cardstock to the back side. This is because the two side card panels fold forward to the center of the card. As I mentioned above, I chose to cut the die from the inside of the panel, BUT when you are flipping the cardstock, it appears that it is the outer edge. Once you fold the flaps to the front, you’ll see that it is actually the inside area.
Enjoy the video below:
Affiliate Links
These links are FREE for you to use and I will receive a small portion of any purchases you make using Amazon and Share a Sale links. As an Amazon Associate I earn from qualifying purchases.
Spellbinders Platinum 6 Machine: https://shrsl.com/3fh78 (Small one)
Spellbinders Platinum Die Cutting and Embossing Machine – 8.5″ Platform
https://shrsl.com/3e1u4 (Large one)
Half Slimline Bracket Etched Dies from the Layered Fleur Bouquet Slimlines Collection by Becca Feeken: https://shrsl.com/3h6r4
Shapeabilities Crosses Two Etched Dies:https://shrsl.com/3h76g
One Kind Word Alphabet Collage DOMAPG-OCT19: unavailable
Assorted Pack Color Essentials Cardstock 8.5″ x 11″ – 20 Pack: https://shrsl.com/387n0
Gold Mirror Cardstock: https://shrsl.com/3fj6l
Beauty is Everywhere – Card Kit of the Month Club: https://shrsl.com/3fh4o
Teflon bone folder (it is supposed to not leave a burnishing mark or shine on the paper: https://amzn.to/2QYdHE5
Rhinestone Picker/aka Crystal Katana: https://amzn.to/3i8CIqY
EK Success Craft Tweezers (reverse): https://amzn.to/3tFzPBS
Tool ‘n One (to remove pieces from dies and die cut shapes): https://shrsl.com/38b28
Tombow Mono Liquid Adhesive: https://amzn.to/37DhjRI
