
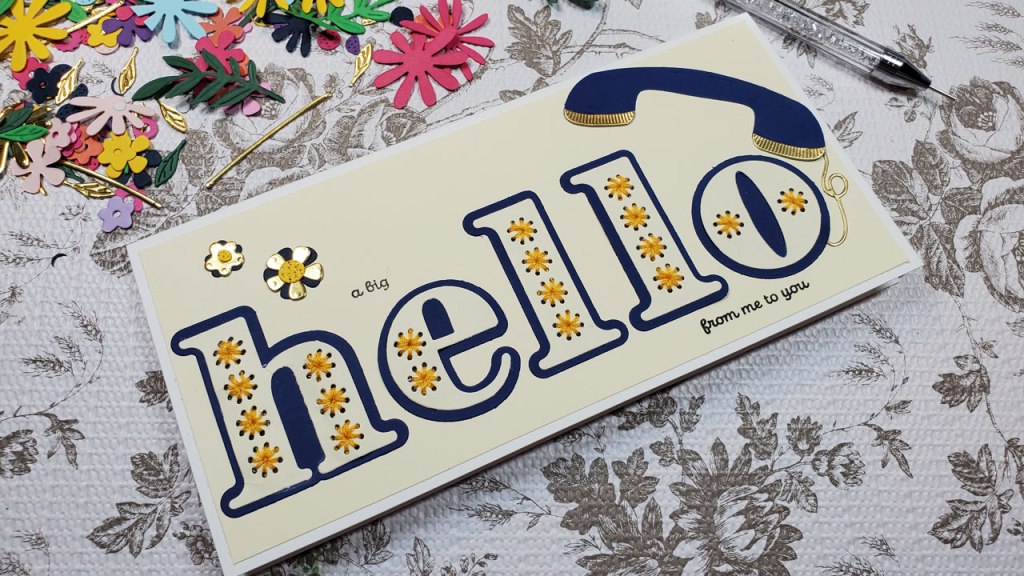
This lovely card was a lot of fun to make…and that surprised me because I don’t normally enjoy sewing. However, the stitched alphabet dies from Spellbinders made it super simple and easy. What’s nice about these dies is there are several choices on how you can use them. If you don’t want to sew, you don’t have too…just let the color of the background shine through! You can use them with material as well to create a keepsake ornament instead of a card or to monogram something for someone.
The first step in making this card is to gather all your supplies:
- die cutting machine ( I used the Spellbinders Platinum 6 machine)
- stitched alphabet dies
- 8.5″ x 11″ blue and light yellow/cream colored cardstock to make the letters
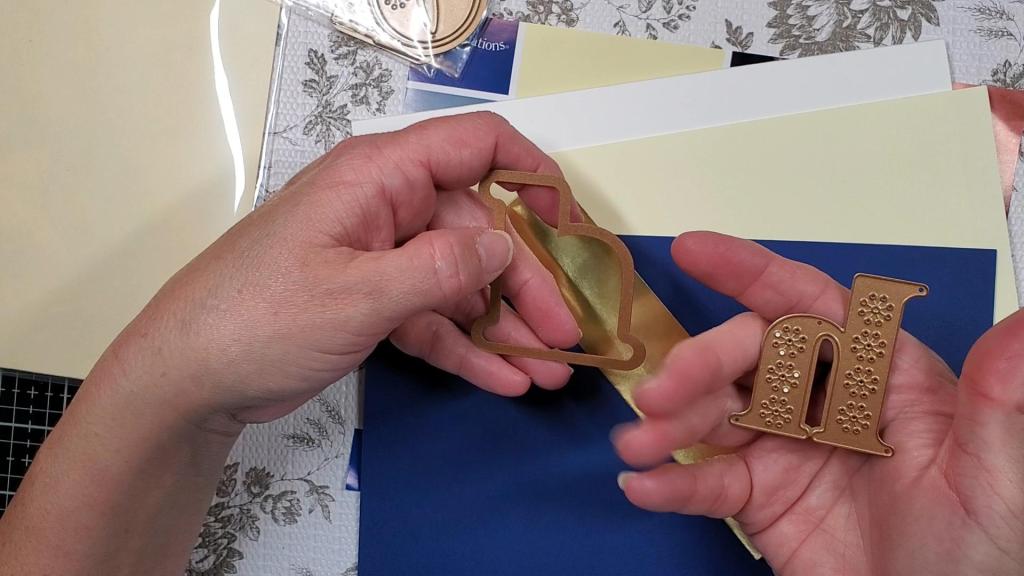
- mirrored gold cardstock for the phone and flowers
- 110lb cardstock (I used Neenah solar white)
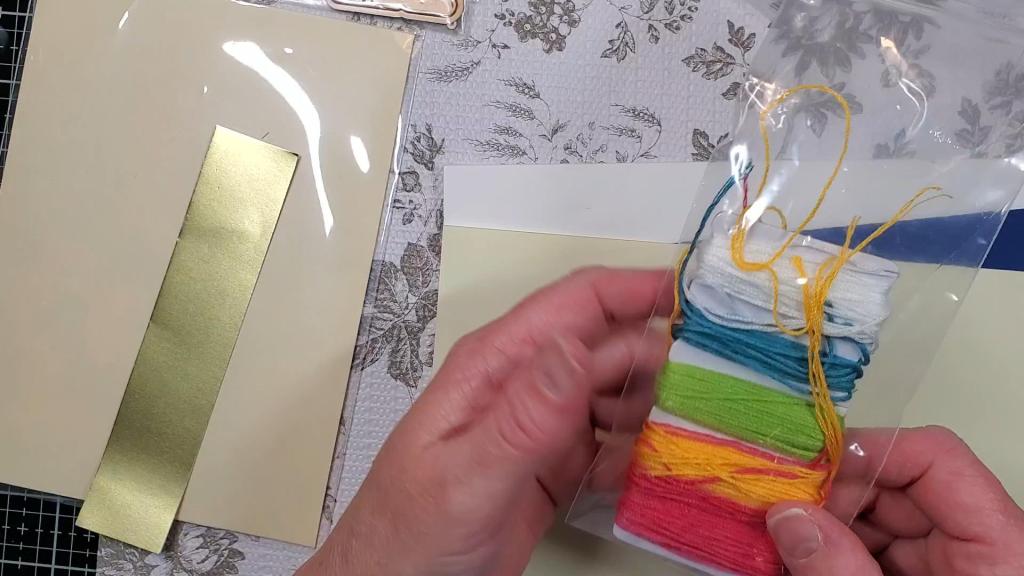
- thread or embossing floss If you choose to sew the letters
- an embroidery needle, which has a blunt tip so it it will not pierce your skin or the paper
- adhesive (I used a liquid adhesive)
- Stamping platform or acrylic blocks
- Spellbinders’ “Sentiments for You” clear stamps or any greeting stamps you want to use
- Black dye ink to stamp your greeting
- Spellbinders flower dies from the April 2021 Card Kit of the Month called, “Sincerely Yours”
- Spellbinders phone dies from the September 2021 Card Kit of the Month called, “Together is the Best”

To make the cardbase, trim your 110lb cardstock from 11″ to 8.25″. Then, rotate it and trim from 8.5″ to 8.25″. Then, score it at 4 1/8th inch.
Cut the blue and yellow/cream cardstock in half at the 5.5″ inch mark so you have two pieces that measure 8.5″ by 5.5″.
Use one of the pieces of the blue cardstock to cut out the background letter and the phone.
Use one of the pieces of the yellow/cream cardstock to cut out the main letters.
Use the mirrored gold cardstock to cut out the phone cord and the end caps for the phone.
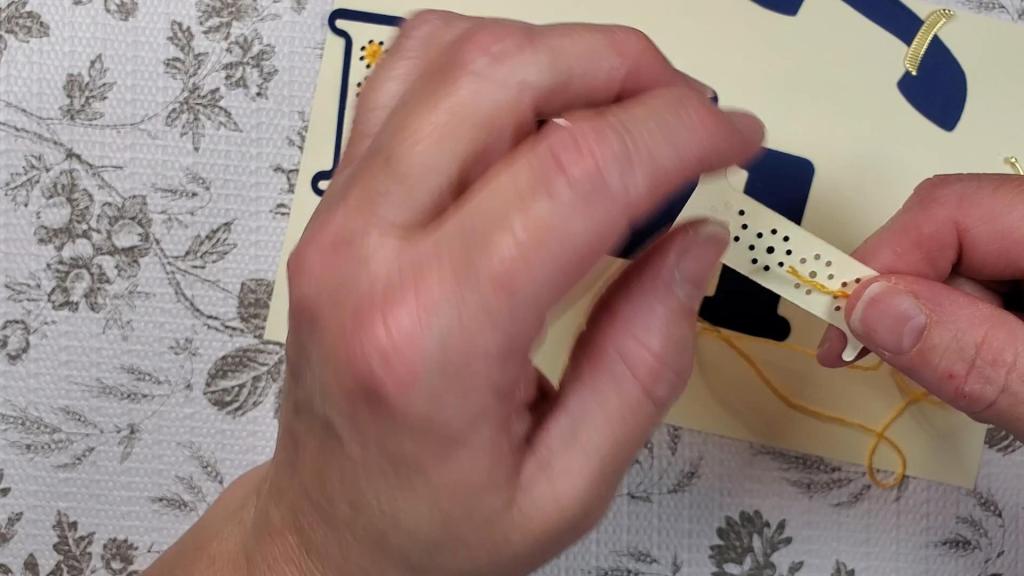
Cut a length of 20″ of embossing floss and thread your embossing needle.
Stitch the letters. Then, adhere them to the blue backgrounds. To stich them, start by threading your embroidery needle and leave about two inches of thread on one side.

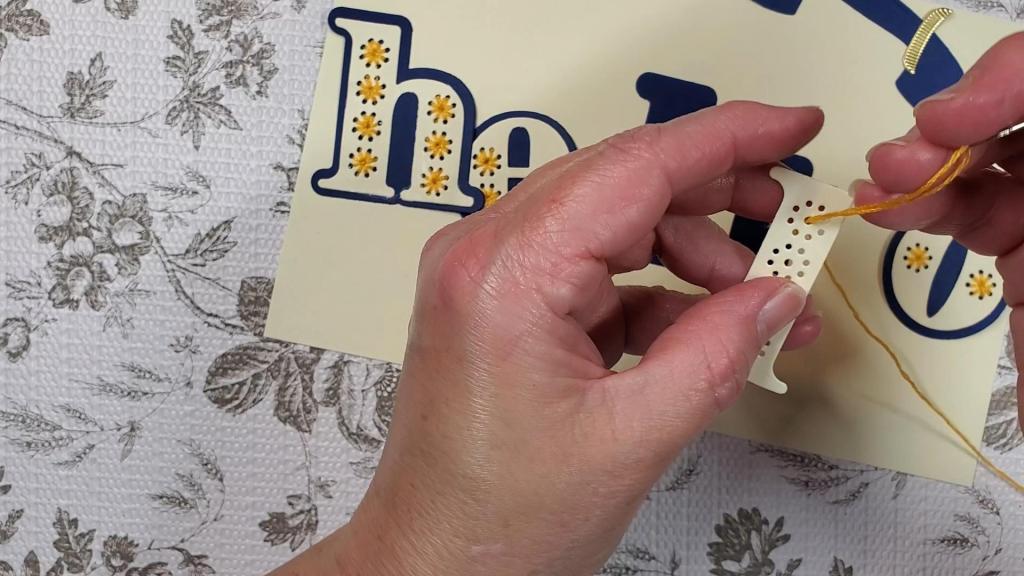
Be sure to leave some excess thread on the back. I hold it with my finger while sewing, but you could tape it down.
Once it’s through the center hole, go through the top hole on the outside ring.
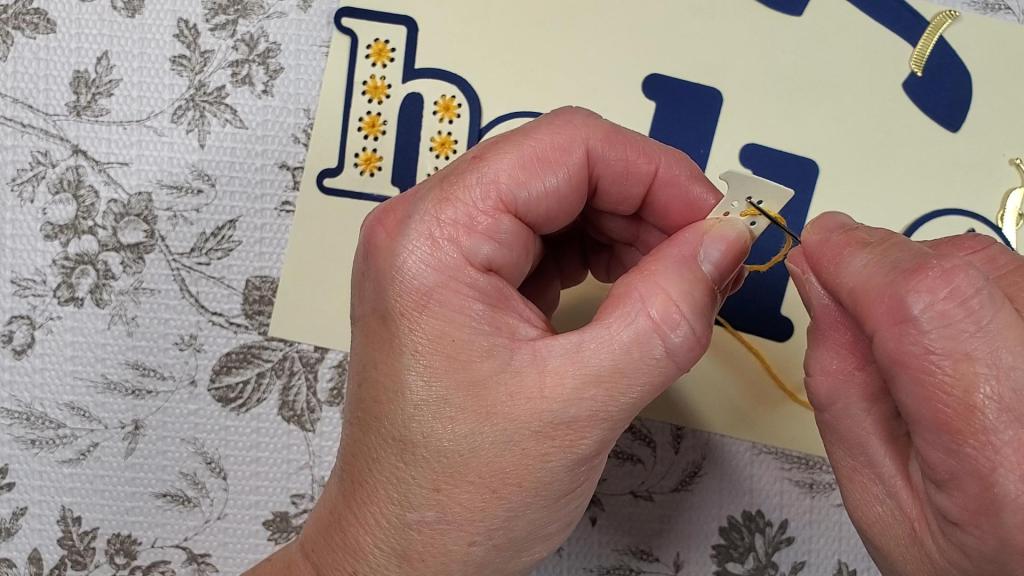
Go through the next available top hole on the outside ring. Repeat these steps until all stitching is complete.
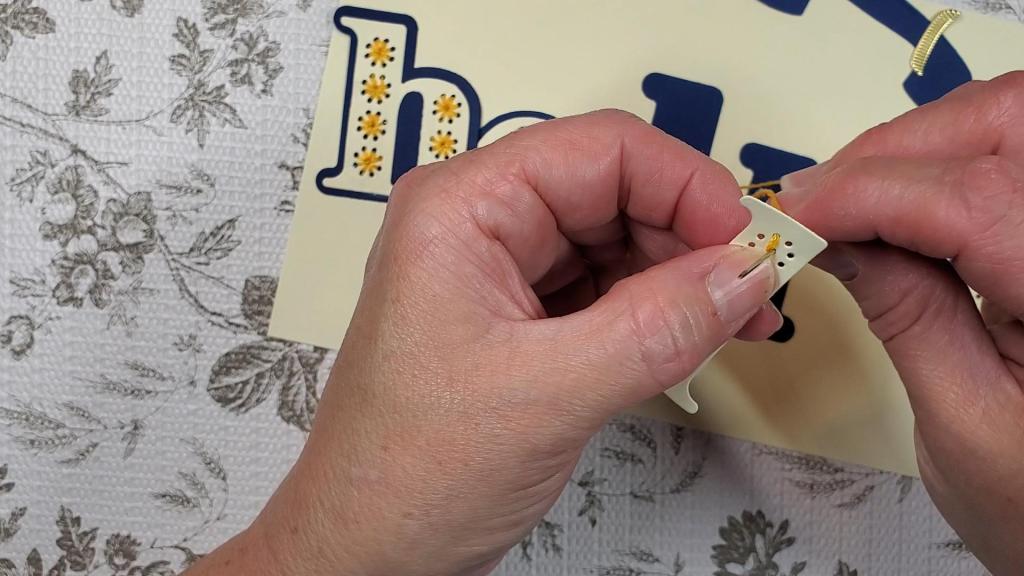
Tie off the string by using your needle to go under one of the stictches on the back side and then going through the loop before you pull it taunt. You can do this twice to make sure it’s secure. Then, cut the string.
Do this for all your letters. Then, set them aside so you can assemble the card.
Trim the second piece of yellow cardstock to 8″ by 3.75″. Adhere it to the cardbase.
Use a stamping platform to stamp the greeting on the card. I placed the letters on the card without glue so I could be sure to place the greeting in the proper spot. I moved them out of the way once the greeting stamp as in place.
Adhere the letters, phone, and flowers to the card.
Please enjoy the video:
Affiliate Links
These links are FREE for you to use and I will receive a small portion of any purchases you make using Amazon and Share a Sale links. As an Amazon Associate I earn from qualifying purchases.
Spellbinders Platinum 6 Machine: https://shrsl.com/3fh78 (Small one)
Spellbinders Stitched Alphabet Dies: https://shrsl.com/3it7j
Spellbinders Embroidery Floss: https://shrsl.com/3it7n
Large Eye Blunt Needles for Stitching: https://amzn.to/3wpB8IF
Spellbinders Flower Dies from the Card Kit of the Month, “Sincerely Yours” April 2021 is unavailable…here is an alternative: https://shrsl.com/3it7x
Phone die from the Spellbinders Card Kit of the Month, “Together is Best” September 2021: https://shrsl.com/3it81
Gold Mirror Cardstock: https://shrsl.com/3fj6l (If you buy one of the card kits, the gold cardstock will be in it)
Teflon bone folder (it is supposed to not leave a burnishing mark or shine on the paper: https://amzn.to/2QYdHE5
Rhinestone Picker/aka Crystal Katana: https://amzn.to/3i8CIqY
EK Success Craft Tweezers (reverse): https://amzn.to/3tFzPBS
Tool ‘n One (to remove pieces from dies and die cut shapes): https://shrsl.com/38b28
Tombow Mono Liquid Adhesive: https://amzn.to/37DhjRI
