
Today’s card features a very cute snowman stamp from Colorado Craft Company called, “Sweetest Snowman Mini.” It is an outline stamp, which means you can color it. Now, I know what you are thinking. Snowmen are white, why do we need to color them. Well, you can bring them to life by using either cool grey colors or ice blue colors.
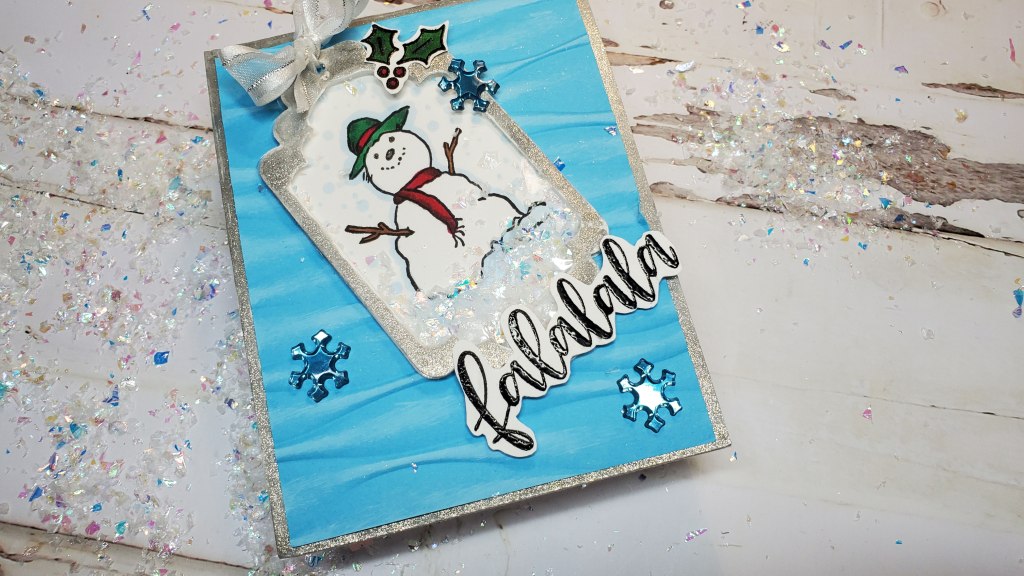
You can color inside the snowman or make a sort of halo around him, which is what I’ve done with this one. It’s very light, but you can see it.
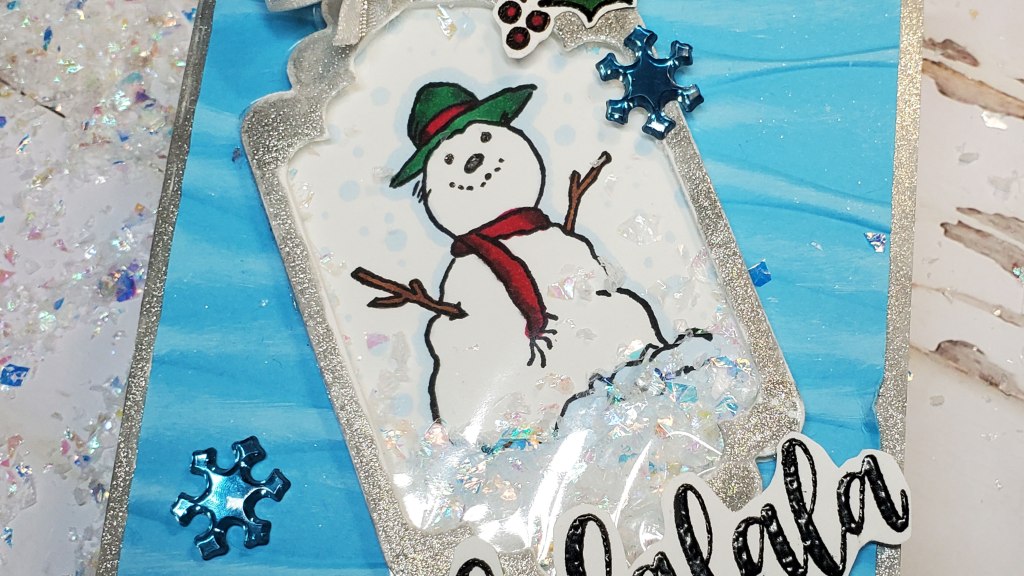
I used my Spectrum Noir alcohol markers on this project, but you can use any coloring medium you have. Specifically, I colored the snowman and snow with TB1. The red scarf with DR3 and DR7. The green hat with JG3 and JG5. The brown arms with TN7. I used a black gel pen for the eyes, nose, and mouth. To create a scene of falling snow, I’ve added varying sizes of dots of the blue(TB1) on the area around the snowman. I decided to create a shaker card by using some tag dies from Amazon.com and some fake iridescent snow. Shaker cards are lots of fun. When you shake the card, the enclosed snow will bounce around…almost like a snow globe. To entrap the snow, I used some clear plastic from some product packaging. You can use acetate sheets, also known as transparency film. If you are unfamiliar with shaker cards you can check out either video below to see one being made:
Shaker Card for Valentine’s Day or any Special Occasion – YouTube
Mother’s Day Shaker Card with Inlaid Die Cuts – YouTube
The greeting is from the Ranger Letter it stamp LEC63087. I stamped it with versmark ink and heat embossed it with some black embossing powder and a heat tool.
To embellish the card, self-adhesive snowflakes were added to the card as well as a bow of silver and white. The background was created using an embossing folder from Altanew called, “Ribbon Waves.” I used the Hero Arts unicorn ink to add some white highlights to the embossed background by lightly swiping the inkpad over the surface of the background…just enough to color the raised portion. Finally, the silver border was created using the Zig wink of stella brush marker in silver color.
There is no video for this card today, but it is fairly simple to make and assemble. I hope you give it a try.
Affiliate Links
These links are FREE for you to use and I will receive a small portion of any purchases you make using Amazon and Share a Sale links. As an Amazon Associate I earn from qualifying purchases
Colorado Craft Company Snowman stamps and die: https://shrsl.com/3nhmi
Ranger LEC63087 Letter It Clear Set 4″X6″ STAMP, Christmas: https://amzn.to/3vTrU6y
Spellbinders Platinum 6 Machine: https://shrsl.com/3fh78 (Small one)
Tag Dies from Amazon: https://amzn.to/3SGLVqY
Scrapbook.com Foam Adhesive strips: https://shrsl.com/3nhn1
Fake Snow: https://amzn.to/3zQGSeZ
Altenew – Embossing Folder – 3D – Ribbon Waves: https://shrsl.com/36xon
Hero Arts Unicorn Pigment Ink: https://shrsl.com/3nhor or https://amzn.to/3p7wwCr
Kuretake ZIG Wink of Stella Brush (Gold, Silver, Gl. Clear): https://amzn.to/3p7wB95
VersaMark for embossing: https://amzn.to/39k9uRz
Heat Tool for Heat Embossing, comes with 4 embossing powders: https://amzn.to/2LIstw2
Neenah Solar White Classic Crest 110lb Cardstock (for the card base): https://amzn.to/3ljFvfv
Neenah Classic Crest Solar White 80lb cardstock for the stamped snowman and shaker: https://amzn.to/3kQtBdn
Teflon bone folder (it is supposed to not leave a burnishing mark or shine on the paper: https://amzn.to/2QYdHE5
Fiskars Sure Cut 9″ Paper Trimmer: https://amzn.to/2HkY02n
