Christmas is on the way and so it is time to start making Christmas greeting cards. Since I love cute die cuts, these sweater dies, which are so adorable and versatile, will be perfect for some playful and sweet Christmas cards. Links to the supplies I used are below the video. Please enjoy watching me make these cards. I hope it sparks some new ideas for you and inspires your creativity.
The Paper Studio Glam Glitter Paper from the Hobby Lobby
Honeybee Stamps Santa’s Village stamps and dies: https://shrsl.com/3tcic (These are on sale at honeybeestamps.com for less money, but when they are gone, they are gone).
The card for today is made with supplies from the October 2022 SCT Sampler and from my craft room. I love the bright yellow frame, which I created with a die set from Spellbinders. As the holidays approach, I’m running behind schedule and so I will simply leave the video below so you can see the card being made as well as links to the products below the video. Enjoy!
Affiliate Links These links are FREE for you to use, and I will receive a small portion of any purchases you make using Amazon and Share a Sale links. As an Amazon Associate, I earn from qualifying purchases. Subscribe to the kit here (I am not an affiliate with them, but I do subscribe to the kit with my own money): https://scrapbookandcards.com/product…
If you’d like to purchase items from these collections separately, you can do so with these links:
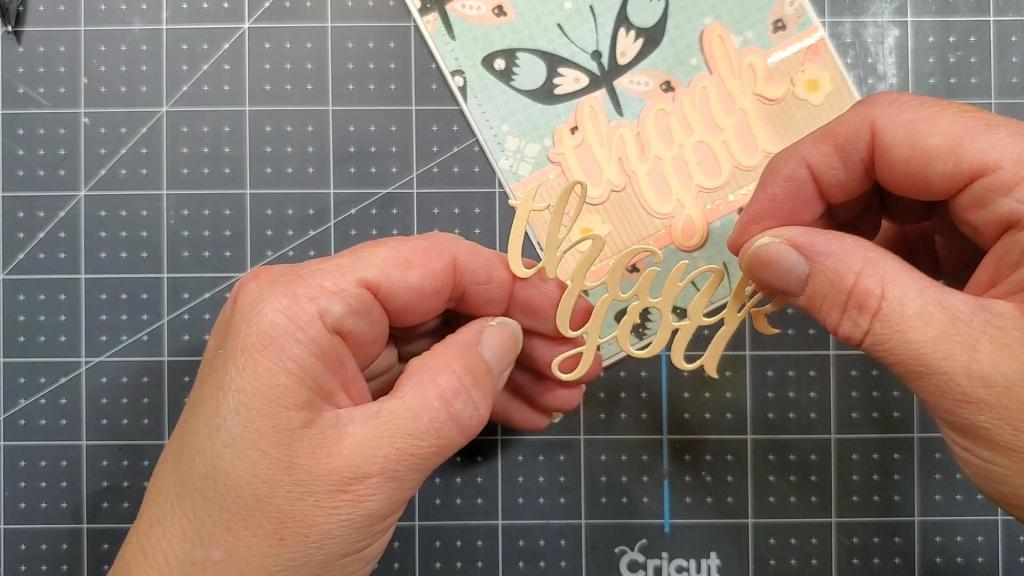
Today, I’m making a Thank You card with supplies from the October 2022 SCT Sampler. This is a monthly subscription with lots of papercrafting goodies that I just love. They always have either stamps or stencils along with a die in addition to samples of patterned papers from current companies in the industry. As I’ve said before, this subscription is a great way to build up your supplies and get fresh inspiration once a month. I don’t work for them and I pay for this subscription with my own money. I think it’s a great value.
My card features a two layer thank you die cut with a shadow background die cut. I think stacking die cuts make them stand out which brings more interest and dimension to the card. You can see the word die and shadow die in the image above and below.
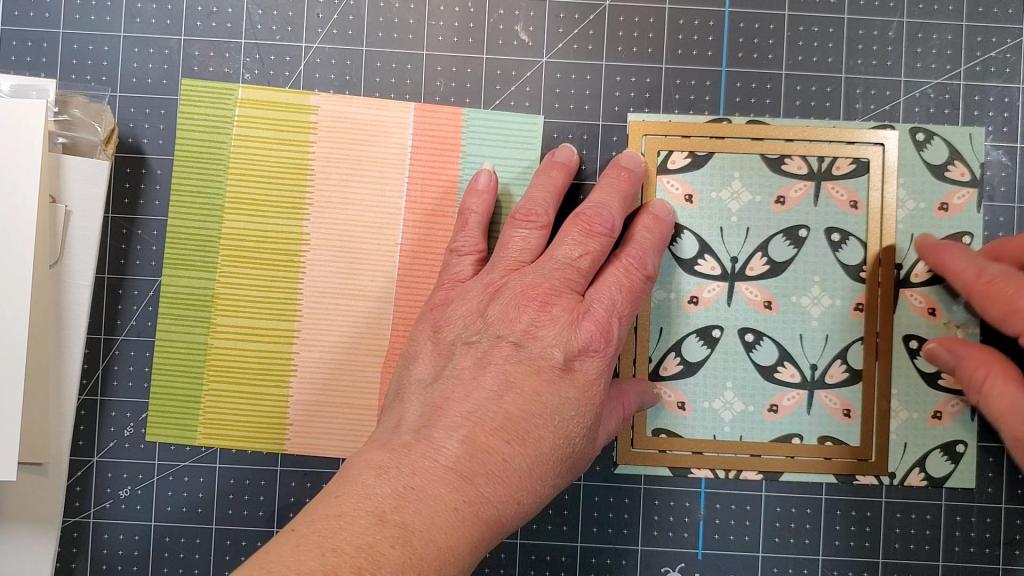
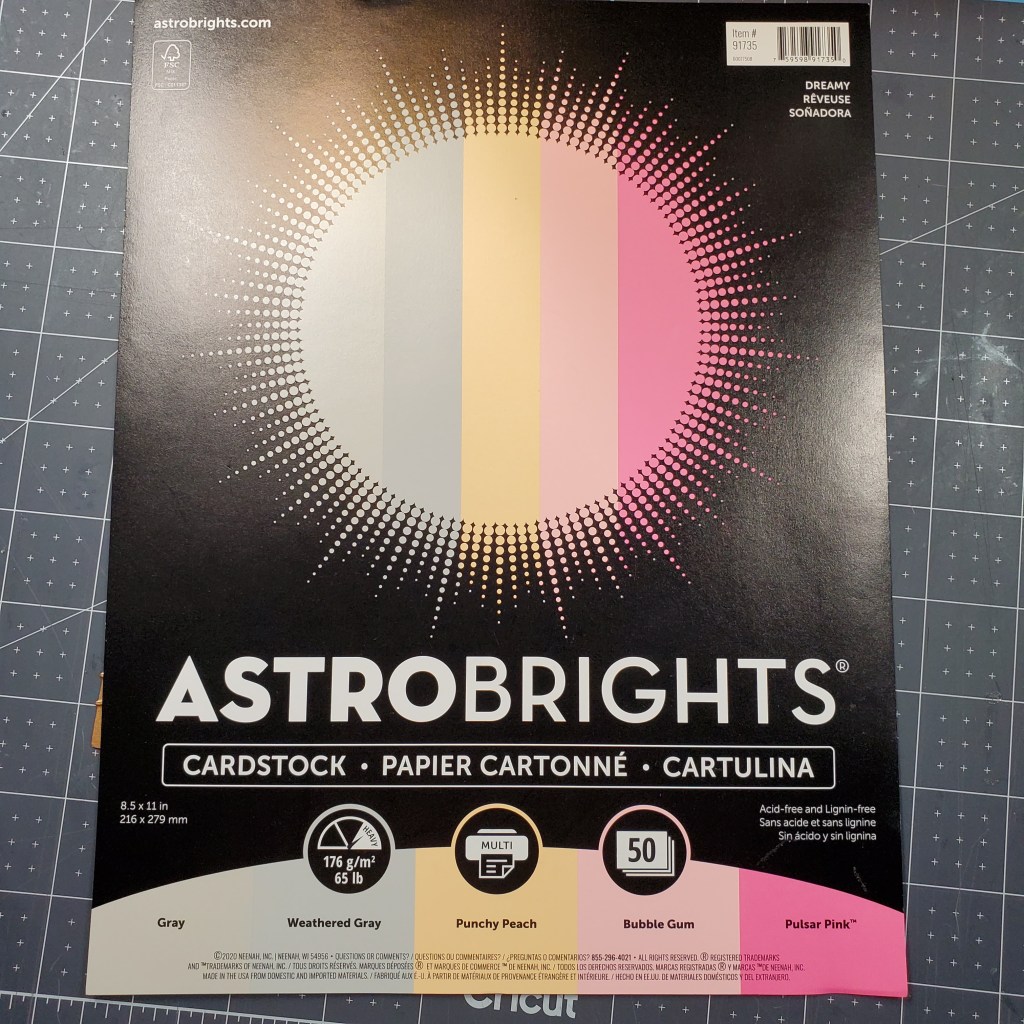
The die cut was cut from 65lb weight cardstock from the Astrobrights Dreamy Cardstock Pack Assorted Colors and the pink background is also from this pack. The patterned paper is from the Print Shop Collection by Vicki Boutin over at American Crafts. There are lots of other goodies in this collection as well, such as pre-printed notecards and envelopes, ephemera and stickers, etc. The flowers were created with a die set from Spellbinders called, “Blooms” in their Be Bold collection.
You may notice the dots around the edge of the butterfly patterned paper. Those are actually perforations made with the Spellbinders Pierced Rectangles die set. This set is an older set I’ve had for a while and it’s no longer available at Spellbinders, but you may be able to get it on eBay or Etsy.
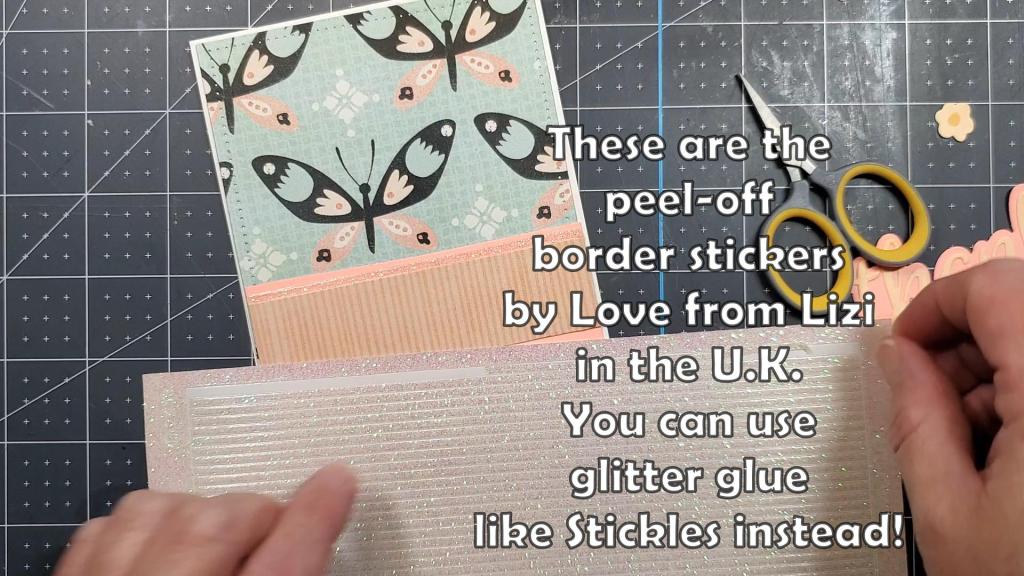
I embellished the card further by adding some iridescent border stickers along the top and bottom of the striped cardstock which mats the thank you word die cut. If you don’t have those, you can use a glitter glue such as Stickles.
Please enjoy the video of the card being made:
Affiliate Links These links are FREE for you to use and I will receive a small portion of any purchases you make using Amazon and Share a Sale links. As an Amazon Associate I earn from qualifying purchases.
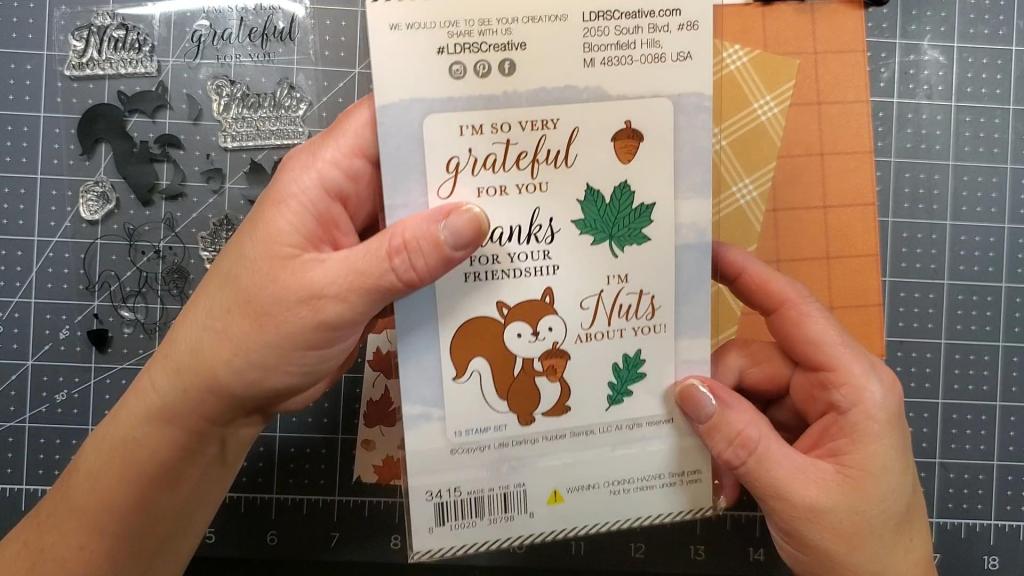
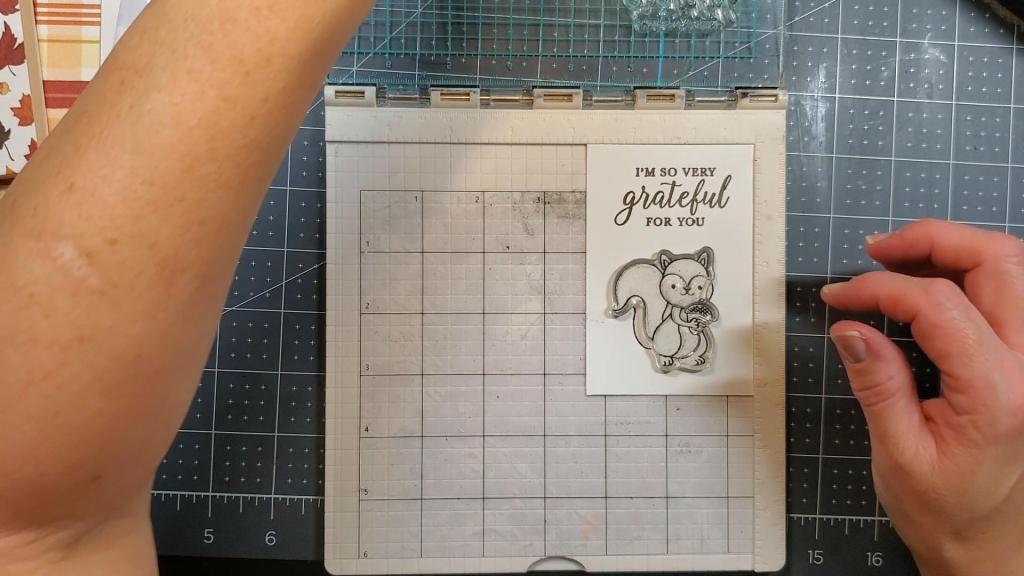
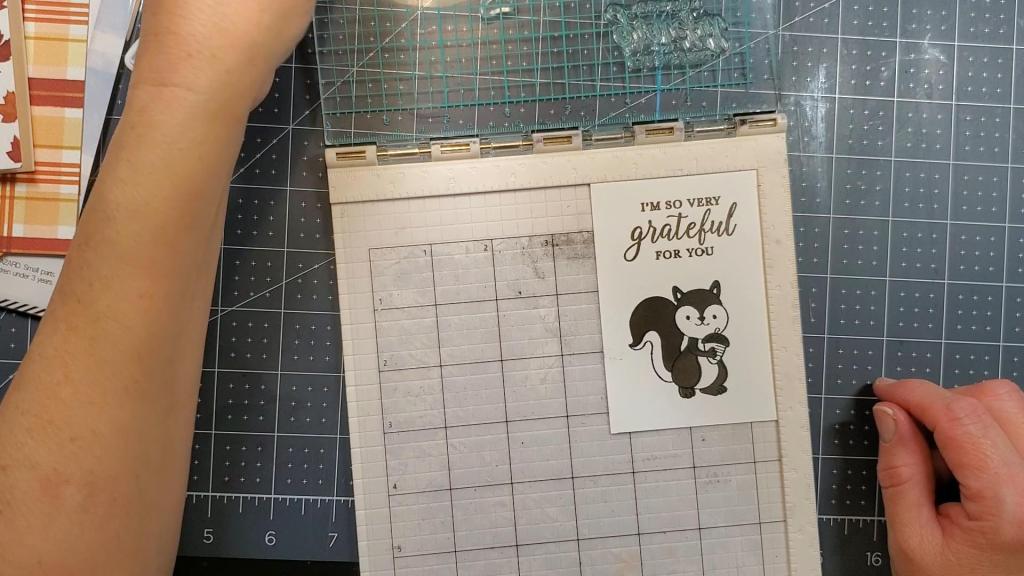
Today’s card features a layering stamp set from LDRS Creative called, “Grateful for You.” There is a cute little critter holding an acorn in this stamp set. I received it in the Scrapbook and Cards Today sampler subscription, which comes monthly and includes samples of many goodies from various companies in the industry. It’s a great way to add to your supplies or build them up if you are just getting started with papercrafting, cardmaking, or scrapbooking.
The patterned paper you see above came in the SCT Sampler for October 2022. You can purchase it elsewhere, such as Scrapbook.com or Amazon.com. (I am an affiliate at these two locations and will receive a small portion from any sale made using these links – at no extra cost to you). It is from the “Welcome Fall” collection by Carta Bella. They always have beautiful, quality paper with a gorgeous texture to them. The photo above doesn’t do them justice. Watch the video below to get a better view.
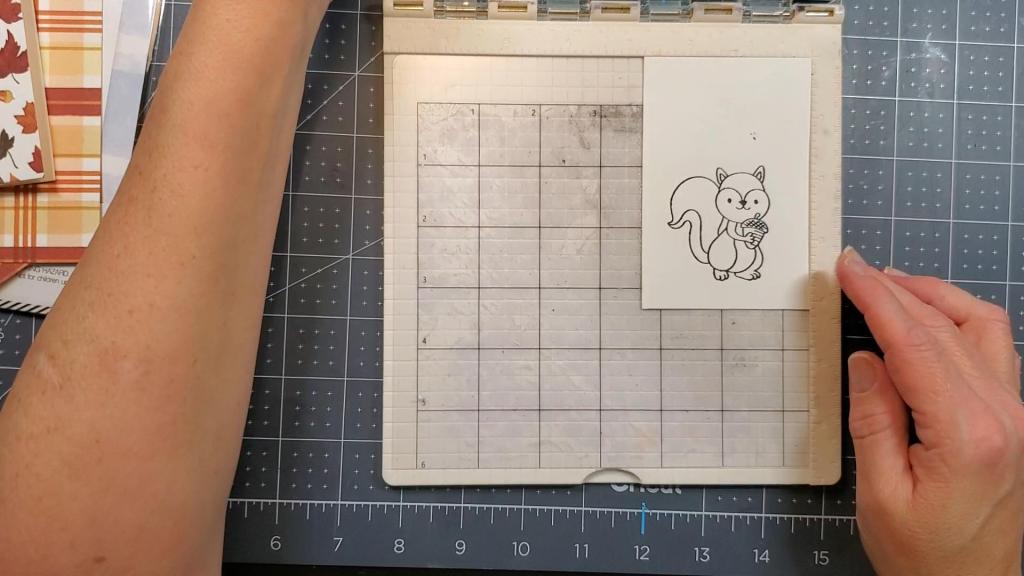
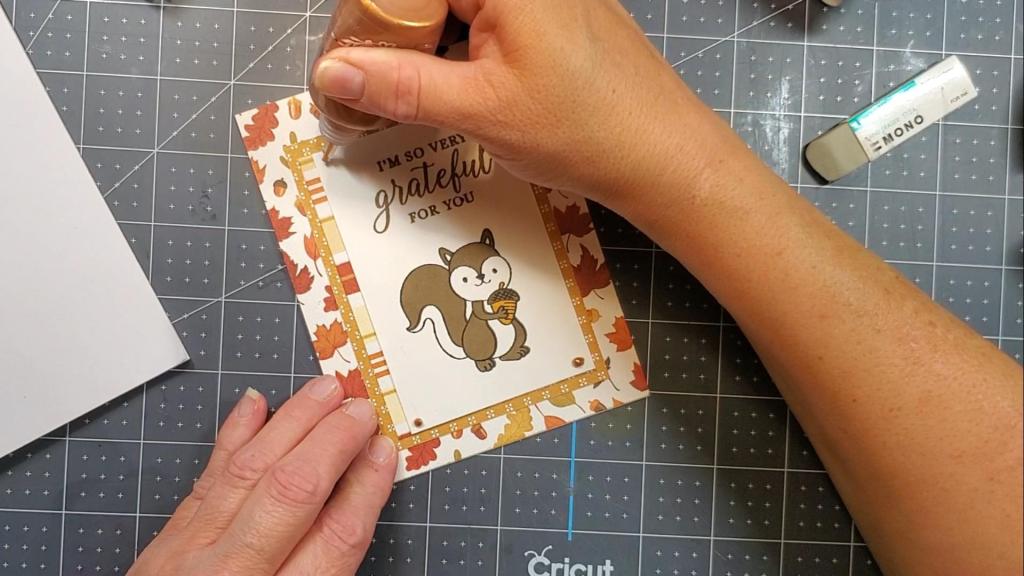
I started by cutting the leaf paper to an A2 size, 4.25″ x 5.5″. I adhered that to my cardbase of the same size made from Neenah Solar White Classic Crest Cardstock 100lb weight. The polka dot pattern paper was cut to 3.25″ x 4.5″ and the white cardstock with the squirrel stamped on it is 2.75″ x 4 and 1/8″.
The squirrel stamp is a laying stamp. The ink for him is the Memento Dew Drop ink in “Rich Cocoa” and the “Peanut Brittle” for the acorn.
All in all, a simple card. Of course you can spruce it up by adding more embellishments or even using more shading on the squirrel by using more than one brown color to give him some life and dimension. Be sure to watch the video below to see the card being made.
Affiliate Links These links are FREE for you to use and I will receive a small portion of any purchases you make using Amazon and Share a Sale links. As an Amazon Associate I earn from qualifying purchases.
If you’d like to purchase items from these collections separately, you can do so with these links:
Welcome Fall by Carta Bella: https://shrsl.com/3rqmj (I used the Fall Foliage paper, the back side of the Hello Fall Signs paper, and the back of the Autumn Blooms paper)
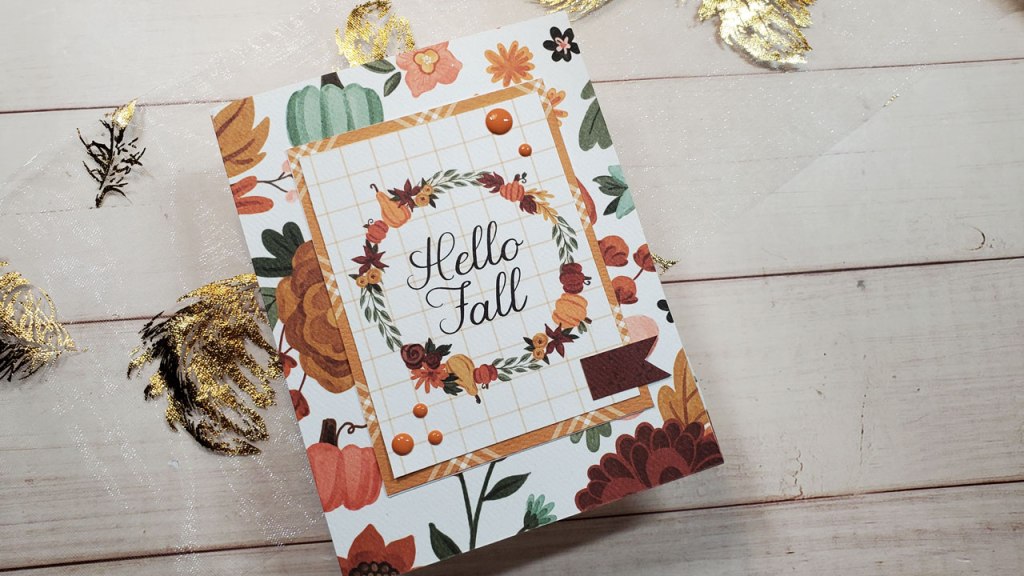
If you’re looking to make a quick greeting card by hand, patterned paper is a key ingredient! Today, I’m making just such a card using supplies from the October 2022 SCT Sampler, which is a monthly subscription from Scrapbook and Cards Today magazine that includes amazing samples of products from the industry. It is a very economical way to add to or build up your supplies since there are always reusable items such as stamps or dies in the subscription. I purchase this subscription myself so I am not receiving anything from them to promote or advertising for them, I just love the products! Here is the card I made.
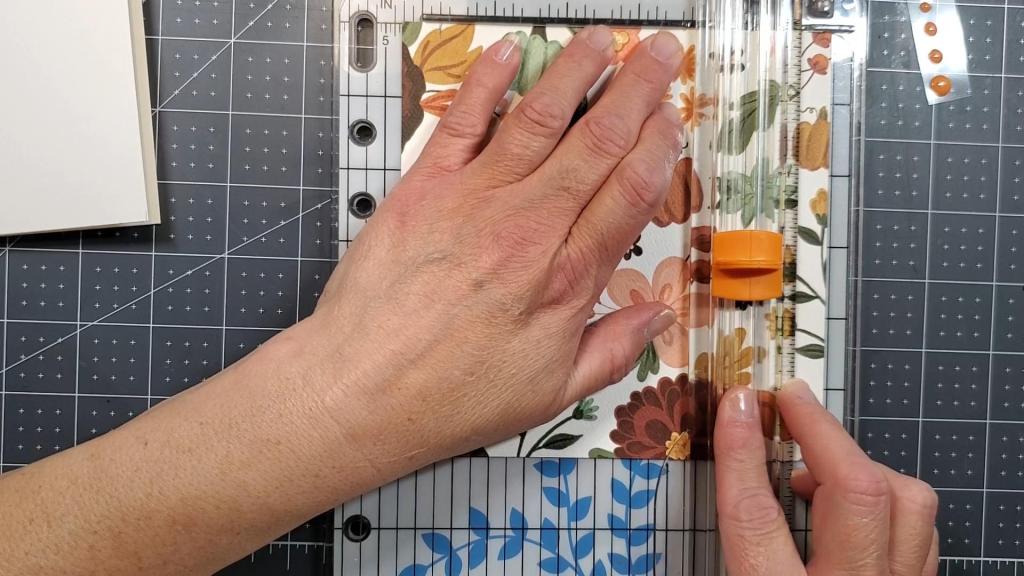
This particular card features patterned paper from Carta Bella called, “Welcome Fall.” I just used my paper trimmer to cut it to the sizes I needed. This is a very traditional looking card with everything centered.
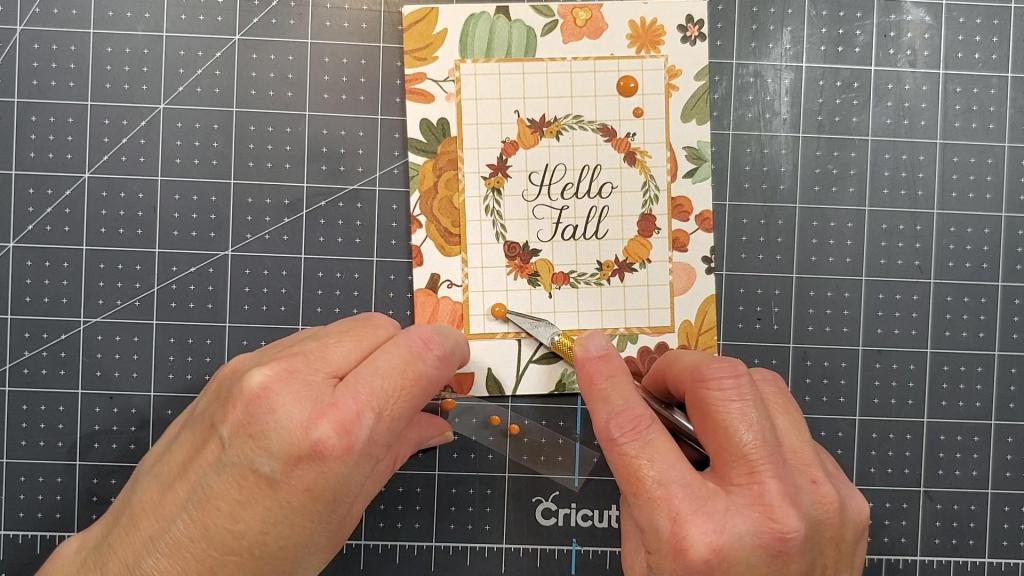
To embellish the card, I used the orange enamel dots that came in the sampler. Of course you can certainly add more embellishments if you’d like. Perhaps you could use some foam tape to pop up the ‘Hello Fall” panel. I didn’t do this because I want to be able to send it through the mail without extra shipping, but I did adhere a piece of cardstock to the back of the “Hello Fall” panel just to give it a bit of dimension.
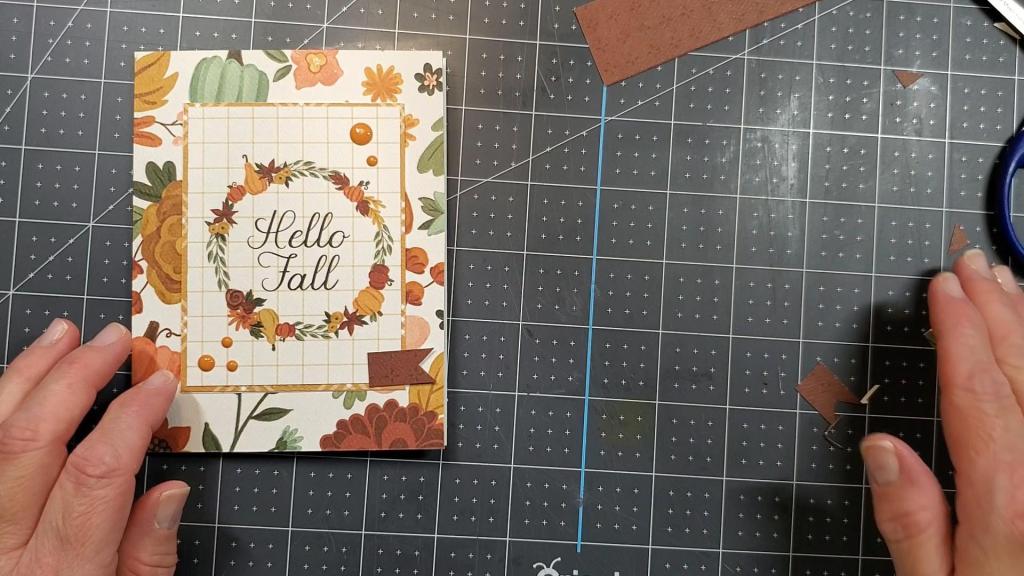
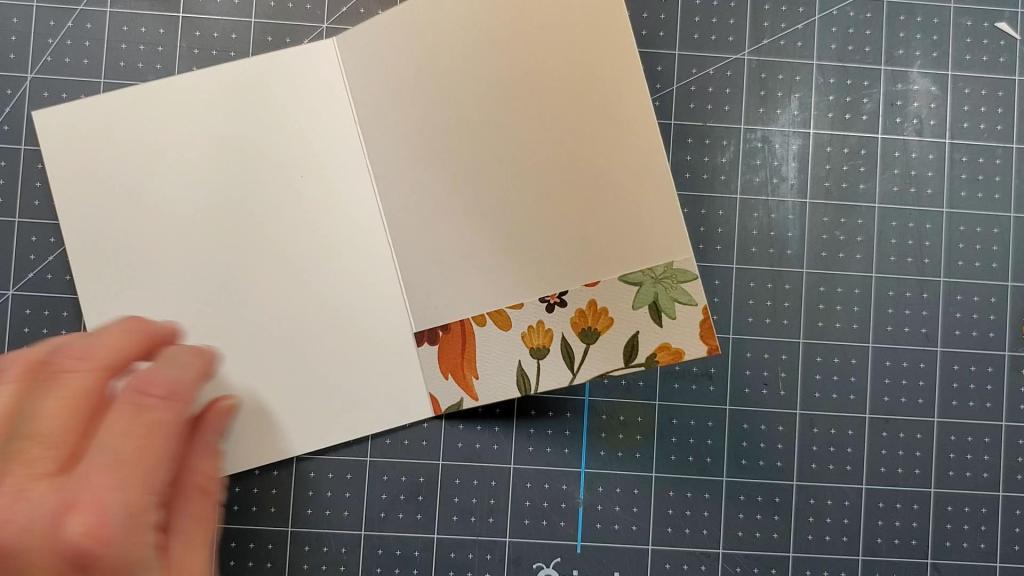
Finallly, I used the back of the patterned paper to cut a tiny tag because I thought the card needed something else. Placing it on the bottom, right corner of the panel helps draw the eye to the inside of the card.
Red tag draws the eye.
Once the front of the card was complete, I added the leftover strip of patterned paper to the inside.
Take a look at the video of the card being made:
Affiliate Links These links are FREE for you to use and I will receive a small portion of any purchases you make using Amazon and Share a Sale links. As an Amazon Associate I earn from qualifying purchases.
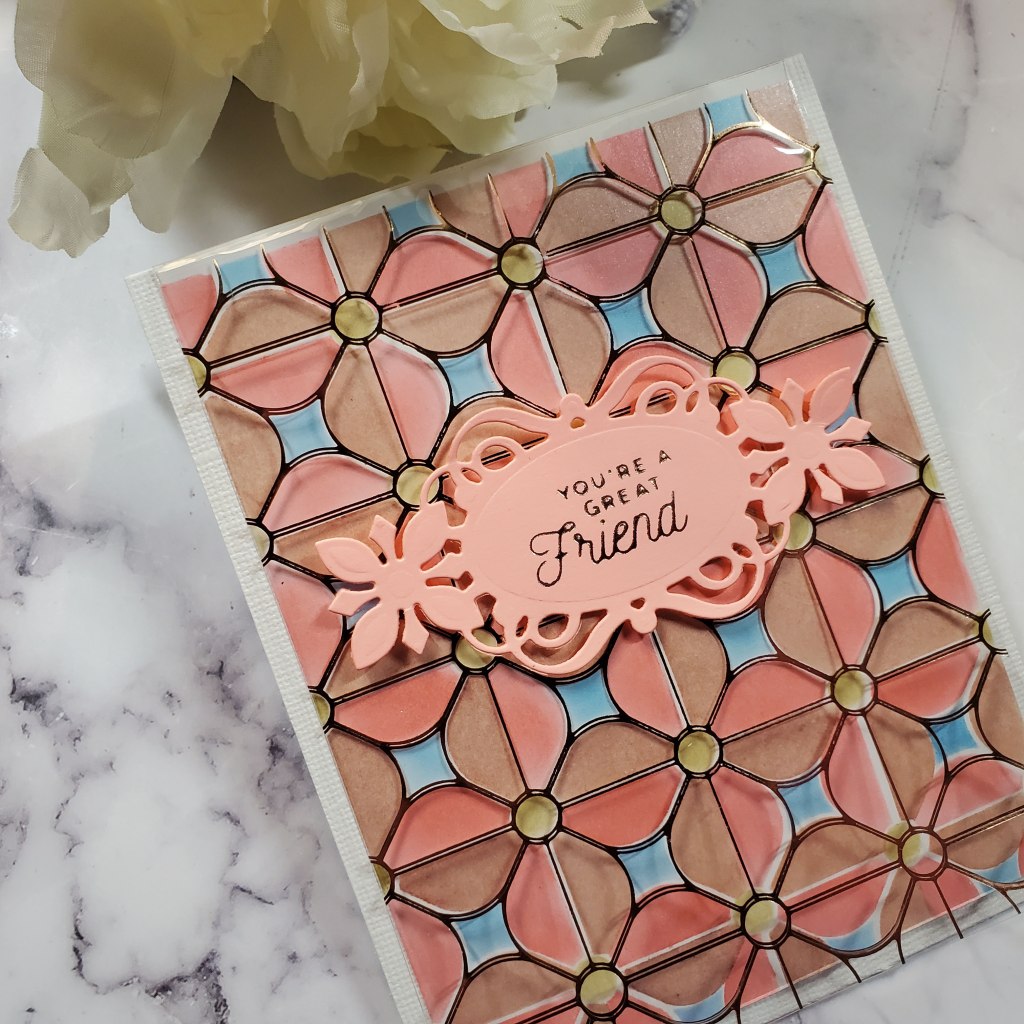
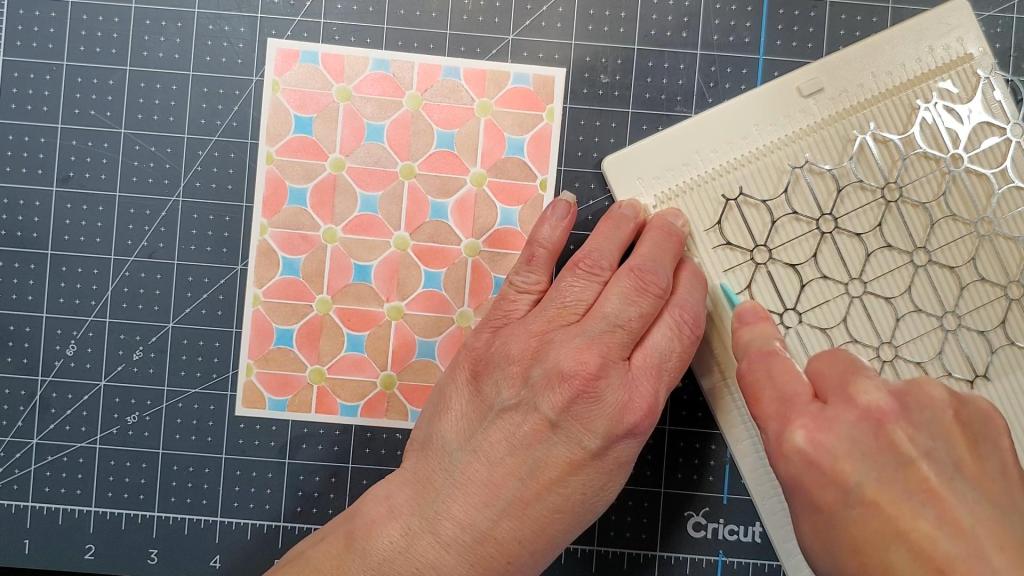
I am in love with the card I made today using the Spellbinders Layered Geometric Flower Stencils. It is just so lovely! This product coordinates with their glimmer hot plate, “Geometric Flower Background.” I used both on my card today, which you can see below.
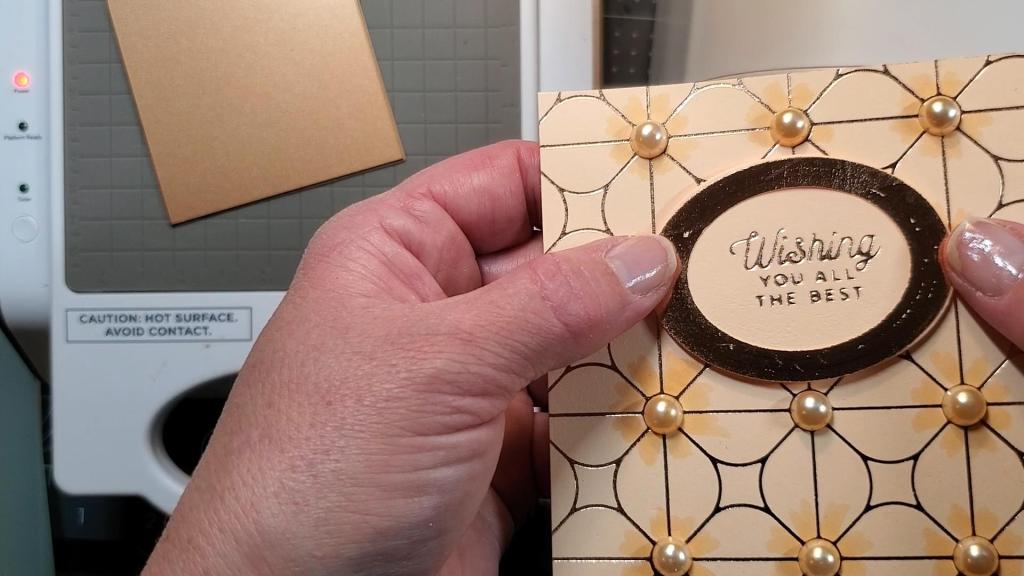
This card has three layers. The top layer is the ornate tag with the glimmered/foiled greeting. The tag was cut from the Spellbinders Renaissance Tag Two dies using Punchy peach cardstock from Astrobrights. I used the Sealed Glimmer Sentiments Glimmer Hot Foil Plates to glimmer/foil my greeting: “You’re a great Friend.” I used foam tape to adhere it to the front of my card so it would stand out.
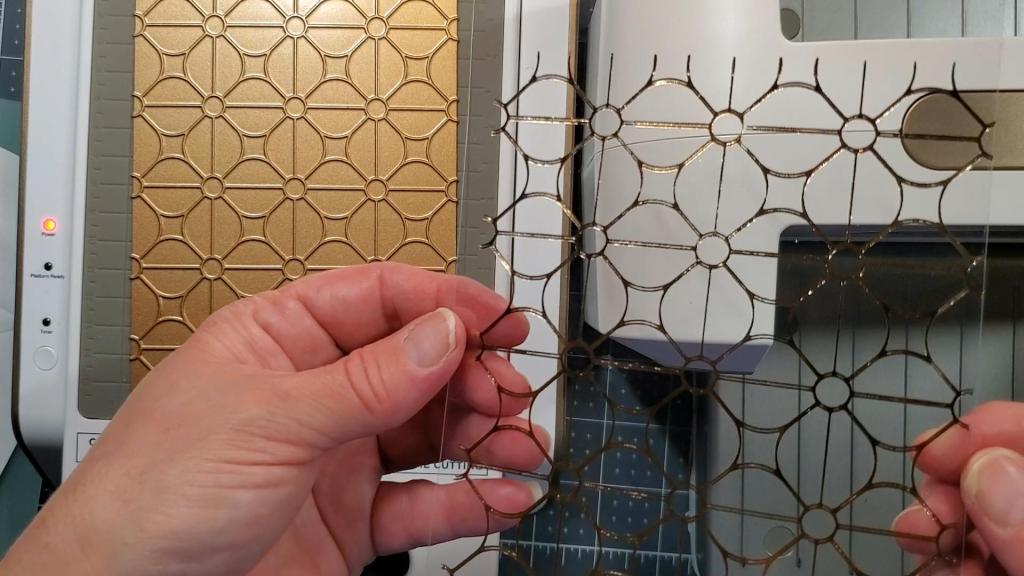
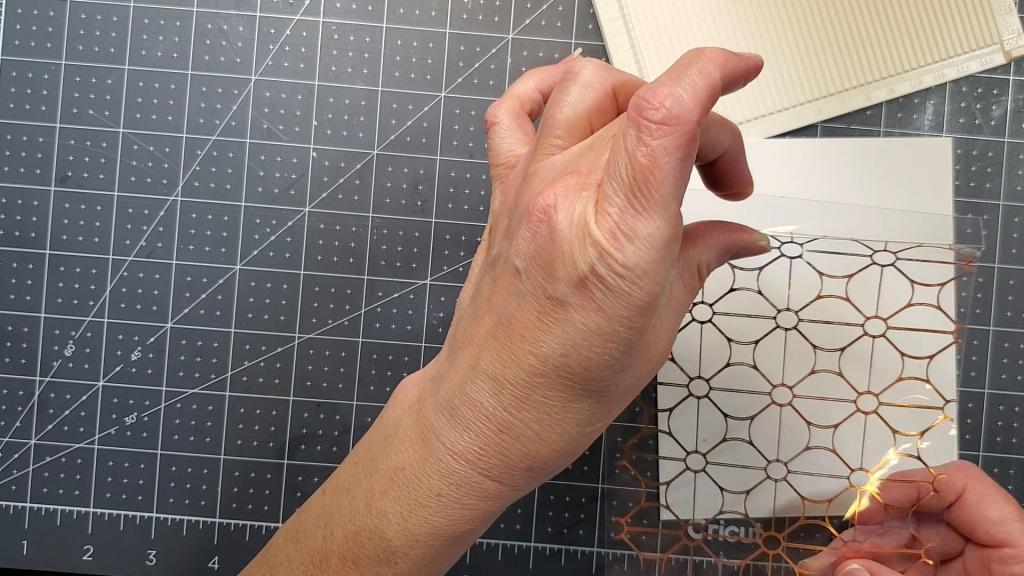
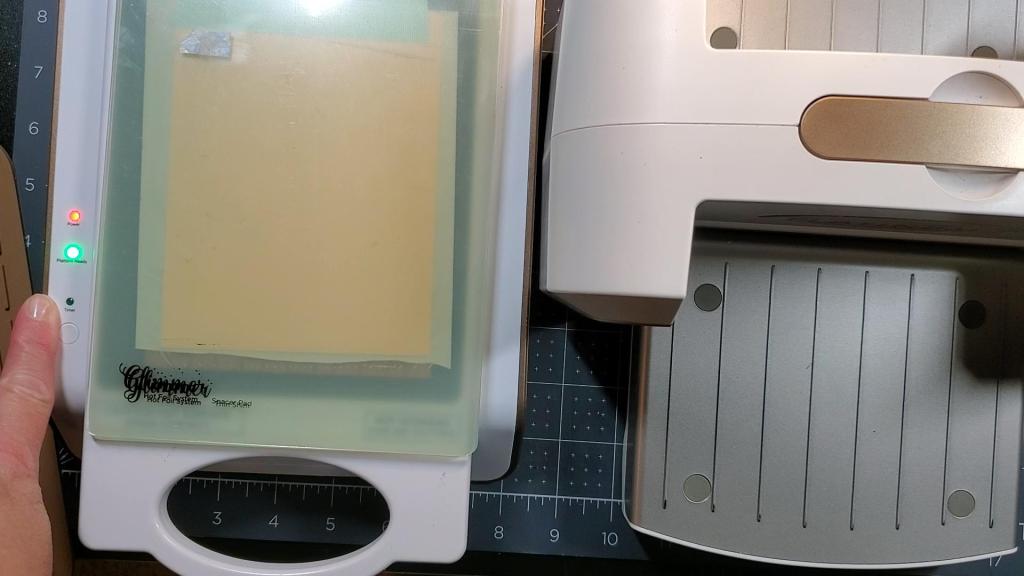
The second layer is the heat resistant acetate with the glimmered/foiled Geometric Flower Background design created with the Geometric Flower Background hot plate and glimmer hot foil in blush color.
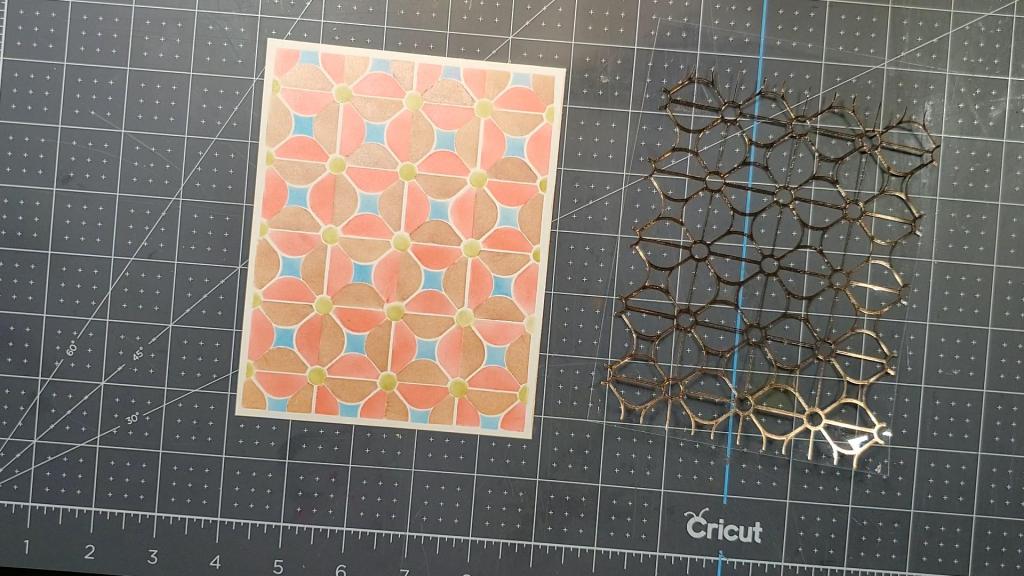
The bottom layer is the card panel with the colored flowers. They were colored using the Gelatos Metallic colors by Faber-Castell.
To adhere the acetate to the card panel, I cut the acetate to a size a bit larger than the card panel. I scored it at the top at about 1/4″ to create a flap to fold over the top of the panel. I used scor tape to adhere the flap to the back of the panel.
Please enjoy the video of the card being made:
Affiliate Links These links are FREE for you to use and I will receive a small portion of any purchases you make using Amazon and Share a Sale links. As an Amazon Associate I earn from qualifying purchases.
GLIMMER HOT PLATES / FOIL Geometric Flower Background Glimmer Hot Foil Plate: https://shrsl.com/3rcpv
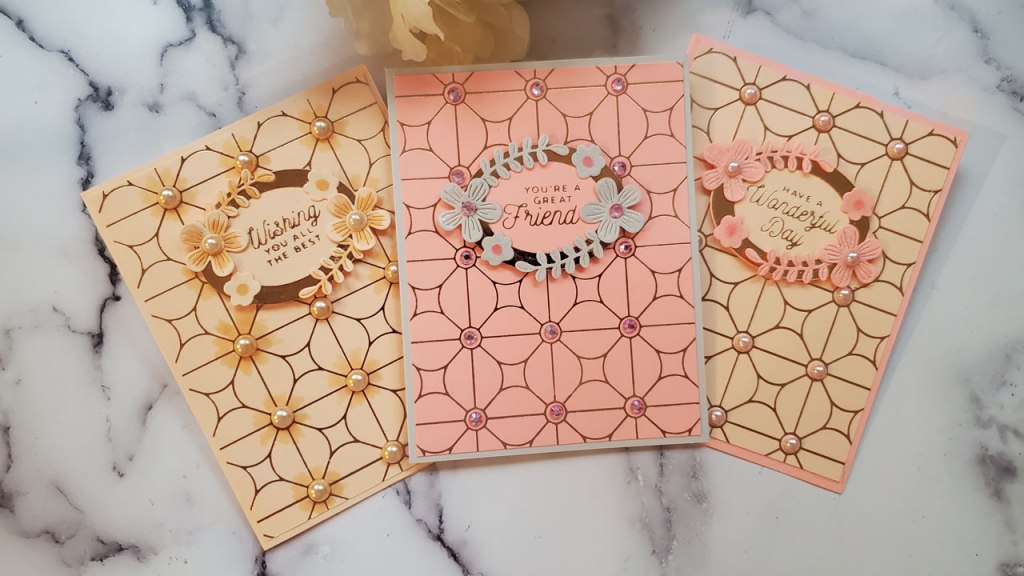
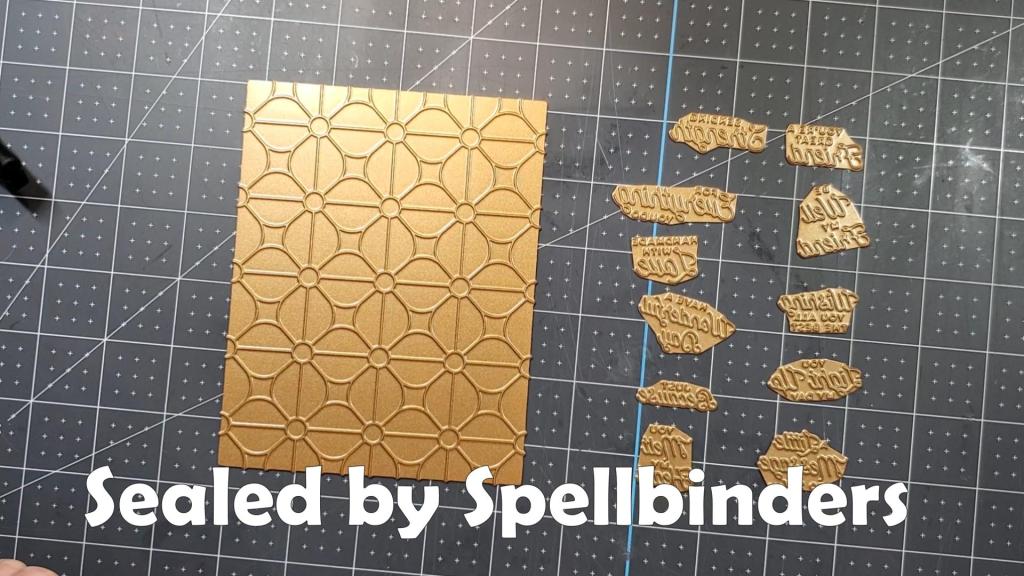
Hello and welcome! I’m making some elegant cards today with the new release, “Sealed by Spellbinders.” This collection is all about wax seals, but it includes gorgeous glimmer hot foil plates as well as coordinating stencils to help you color them. Of course there are dies, I mean it’s Spellbinders! They also have some beautiful brushed cardstock and envelopes in navy, silver, white, and rose gold. Go check it out: https://shrsl.com/3rctk. I used pearls and gemstones to embellish the cards, which I colored using alcohol markers to match the cardstock.
The background on these cards were foiled using the Geometric Flower Background Glimmer Hot Foil Plate, which imprints the design into the cardstock as well as foiling it. This created a gorgeous debossed look you don’t get with regular hot foiling. The sentiments were done with the Sealed Glimmer Sentiments Hot Foil Plates. I used glimmer hot foil in blush color.
The cardstock is from the Astrobrights Dreamy paper pack which includes assorted colors of cardstock which are acid and lignin free. I chose the Punchy Peach, Bubble Gum, and Gray colors for my cards. I purchased this cardstock from Walmart. I love how the colors work so well together.
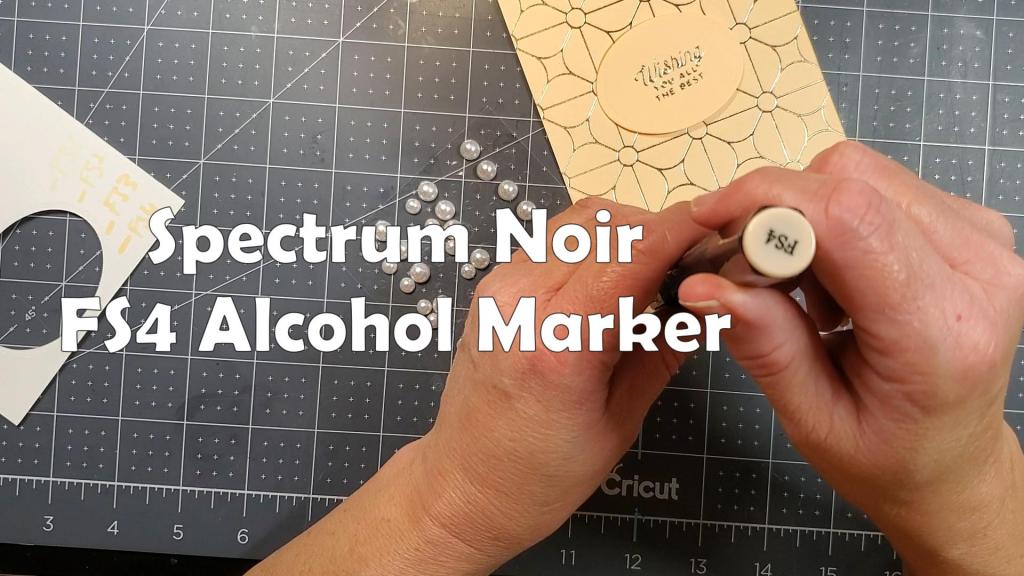
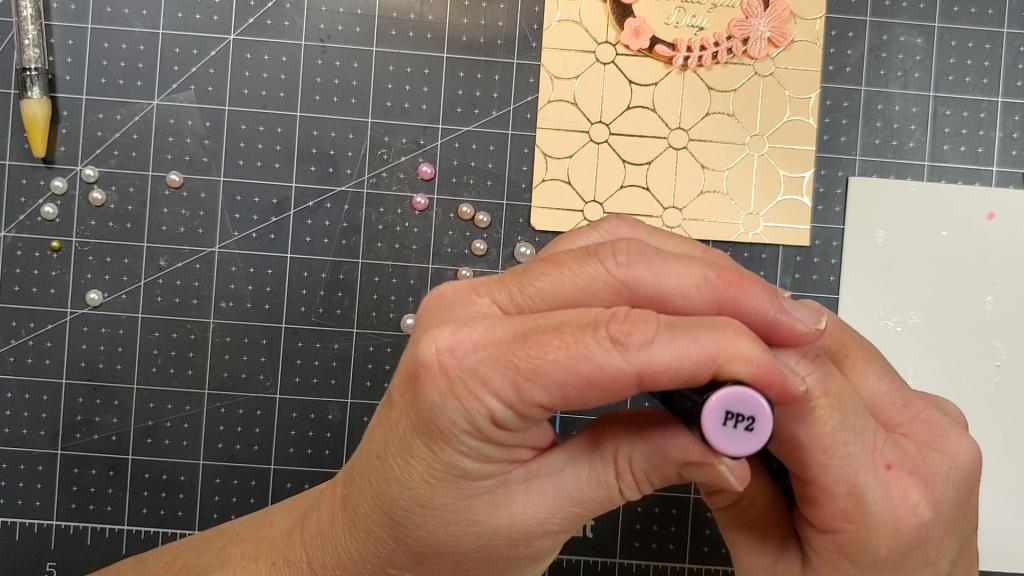
The cards feature elegant pearls, which I colored using my Spectrum Noir alcohol markers which I’ve had for years. In fact they make different ones now. The pearls on the peach card were colored with the FS4 marker. The pearls on the peachy pink card were colored with the FS6 marker, and the gems on the pink and grey card were colored with the PP2 marker. You can get the pearls already colored at Spellbinders.
The oval with the sentiment was cut with the Nestabilities Small Classic Ovals Dies. I created a frame for the oval by stacking two dies together.
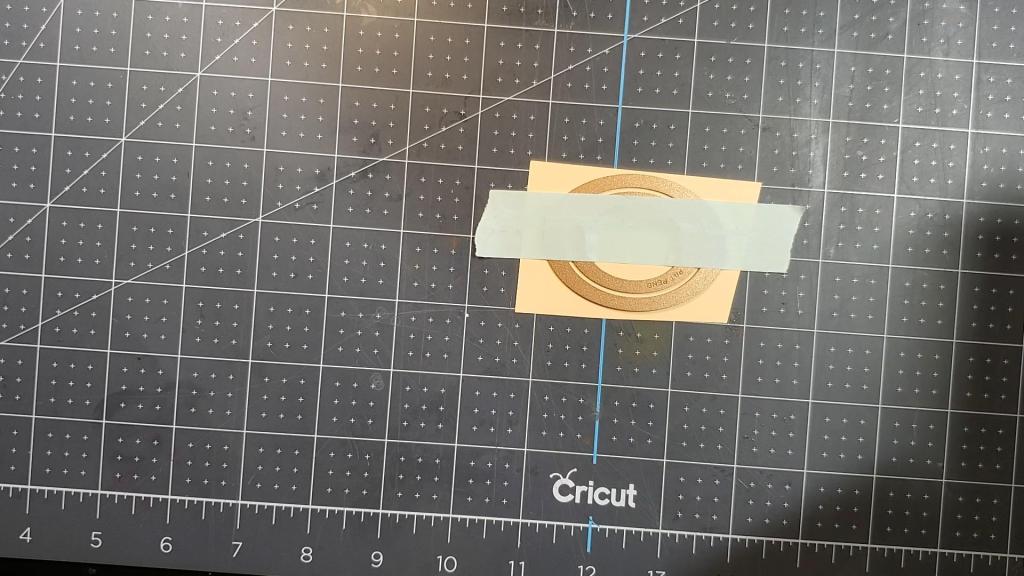
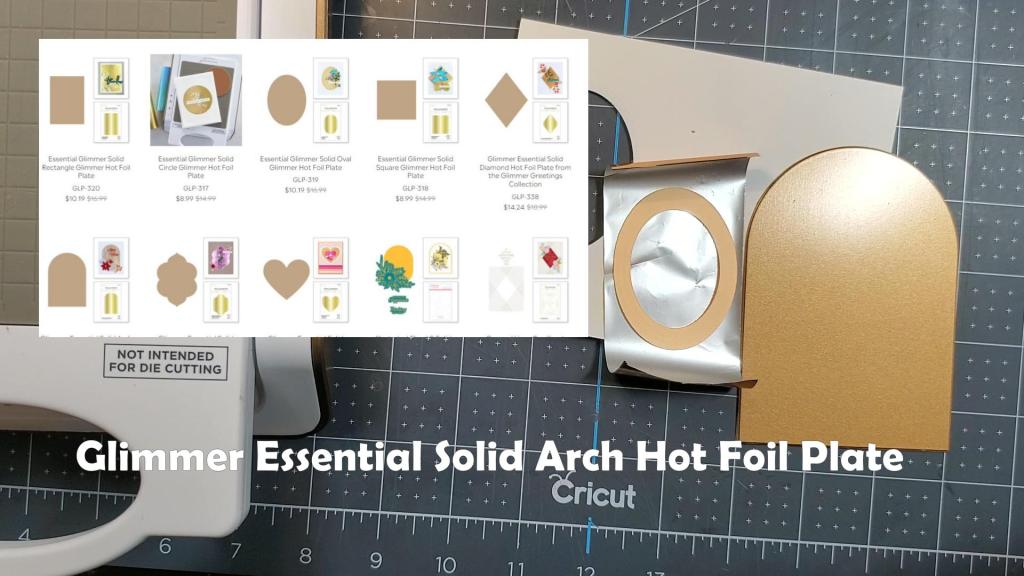
I then decided to add some blush foil to the frame, however, it didn’t foil well because the dies I chose to use also emboss the shape. Since the recessed areas were not able to be foiled, I would recommend using oval dies that do not emboss to create the frame. You need a flat surface to get a solid foiling. I achieved the foiled frame by using a solid hot plate. I used the Glimmer Essentials Solid Arch, but you can use any shape of solid hot plate you have as long as it’s large enough to cover the oval frame.
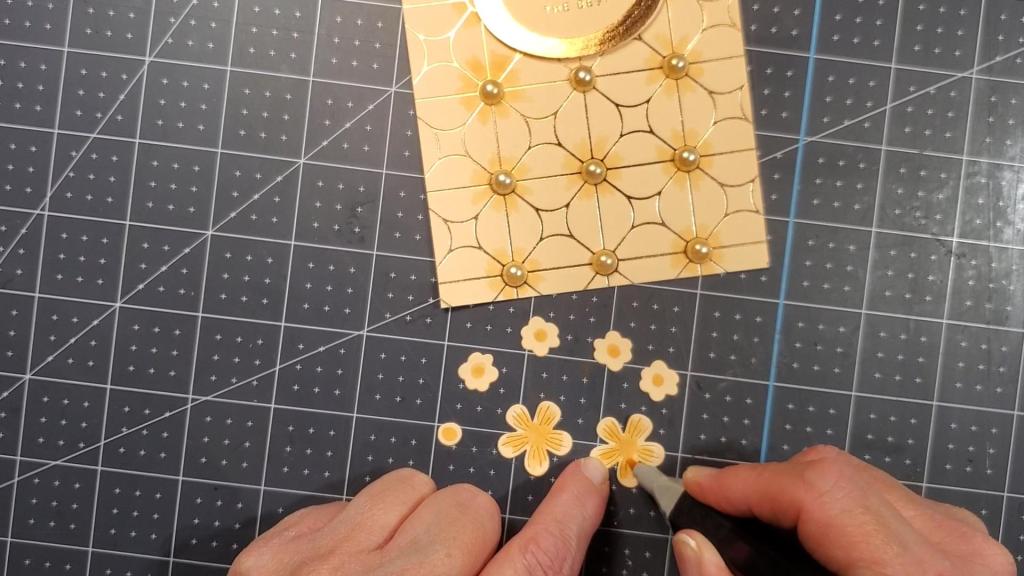
I added some flower and leaf die cuts to embellish the oval. They were cut using the Be Bold Etched dies from Spellbinders. I added some color to some of them using my alcohol markers and some sparkle to some using the Zig Wink of Stella glitter brush pen in clear.
I hope you were inspired to create something of your own. Please enjoy the video of these cards being made on YouTube:
Affiliate Links These links are FREE for you to use and I will receive a small portion of any purchases you make using Amazon and Share a Sale links. As an Amazon Associate I earn from qualifying purchases.
Spellbinders NEST-S4-112 Nestabilities Small Classic Ovals Die: https://amzn.to/2XVjyJx ( I recommend using a different oval dies that do not emboss for the oval frame if you plan to foil your frame.)
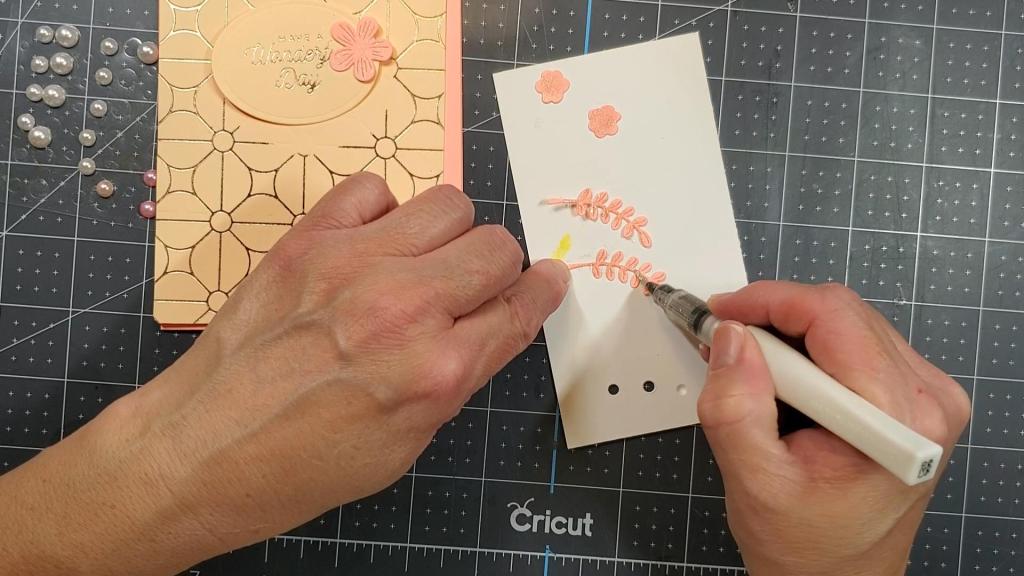
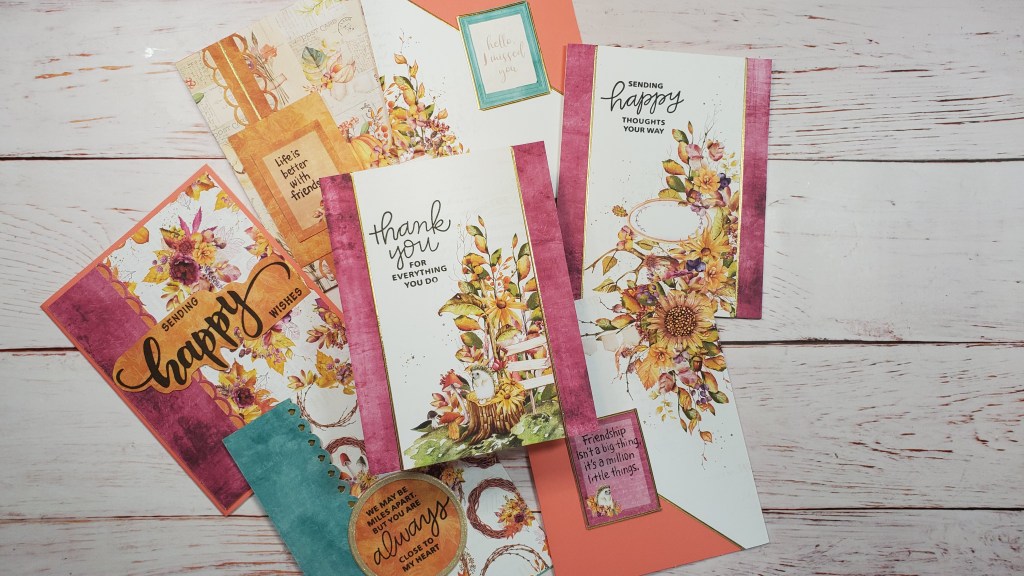
I love the colors of Autumn. Today’s cards feature some beautiful patterned papers with gorgeous fall colors from P13. They make it in a 12″ x 12″ format as well as the 6″ x 6″ format.
Those reddish purples and turquoise colors are so beautiful! The layout on these cards is fairly basic. I simply added some decorative borders along the edges of the panels. I did this in two ways. First, I used a paper punch I’ve had for quite some time. The strip of paper measures 1.25″ by 5.5″ before it was cut with the punch.
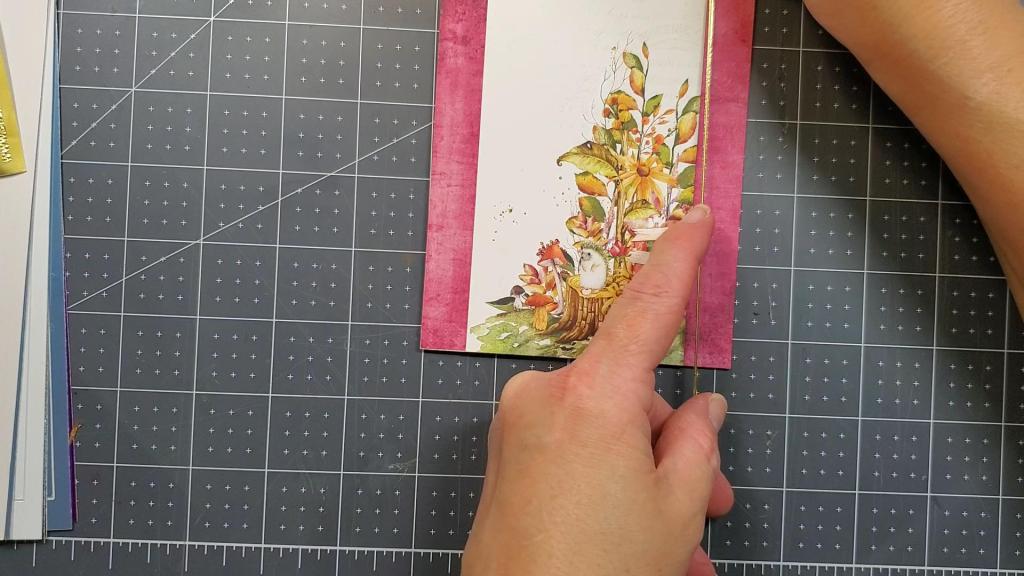
Second, I used straight line border stickers in gold. This technique adds some definition between the layers on the cards. I also used the border stickers to frame two sentiments which were stamped on rectangles that I cut from the patterned paper.
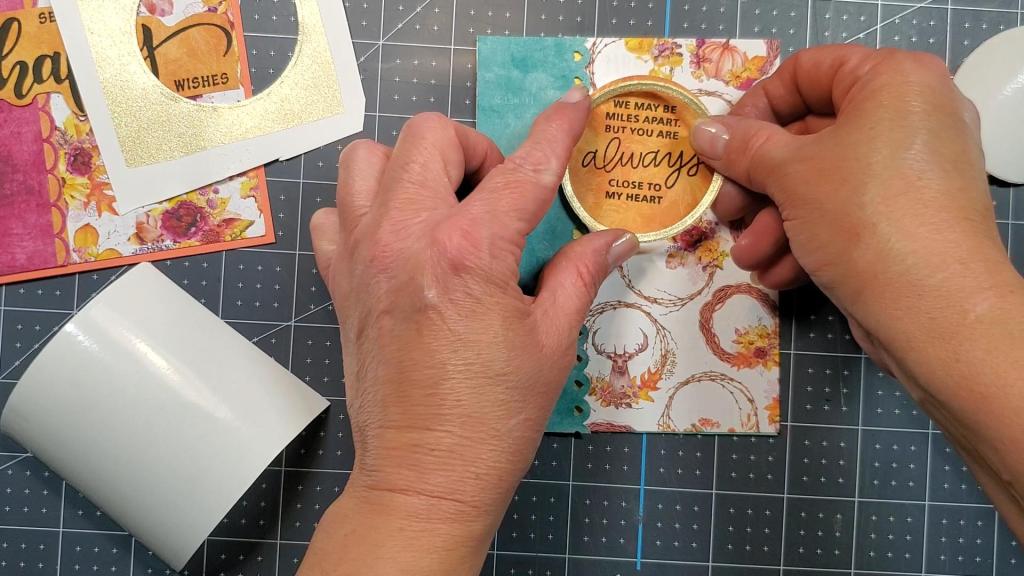
The two strips of reddish purplish paper seen above measure 1.5″ x 5.5″ each. The card below shows how I framed the circle sentiment in gold vinyl by first adhering the gold vinyl to cardstock and then cutting out a circle frame by using two circle dies, one inside the other. The strips of turquoise and reddish purplish paper seen below measure approximately 1.75″ x 5.5″ before using the border punch.
I also used some of the gold border stickers to go under the punched out hearts, which you can see in the turquoise panel above. For the reddish purplish panel with the scalloped edge, I just cut a strip of the orangish yellow patterned paper from the paper pad.
To see these cards being made, please watch the video:
Affiliate Links
These links are FREE for you to use and I will receive a small portion of any purchases you make using Amazon and Share a Sale links. As an Amazon Associate I earn from qualifying purchases.
Gold Border Stickers: The ones I used are from Starform, a Dutch company. I can’t find them on Amazon so here is an alternative, https://amzn.to/3qhB3nw
Here is another alternative, but these look thicker than the ones I used. Anitas Outline Peel Off Craft Stickers – Straight Line Borders Gold: https://amzn.to/3BWOoUm
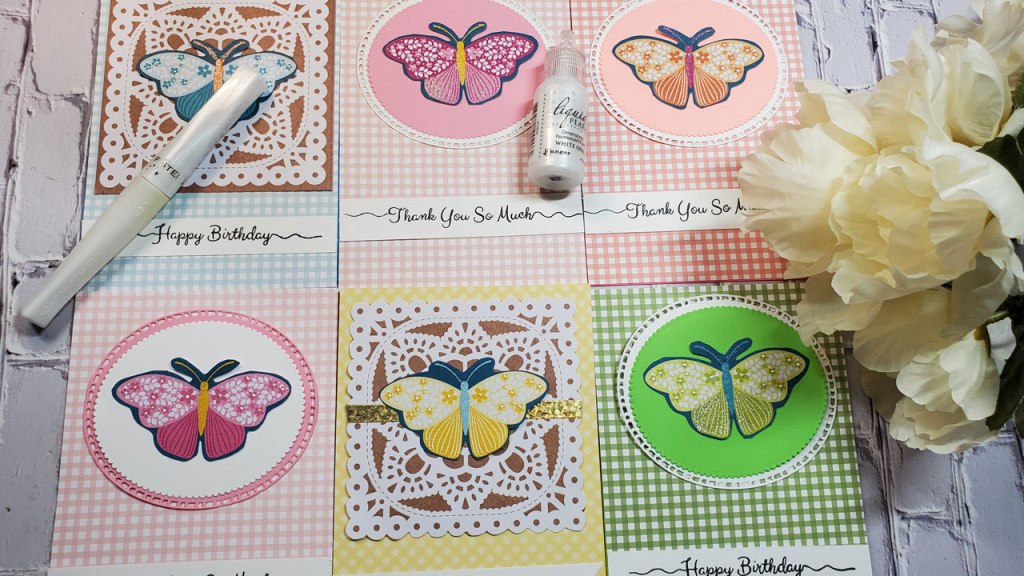
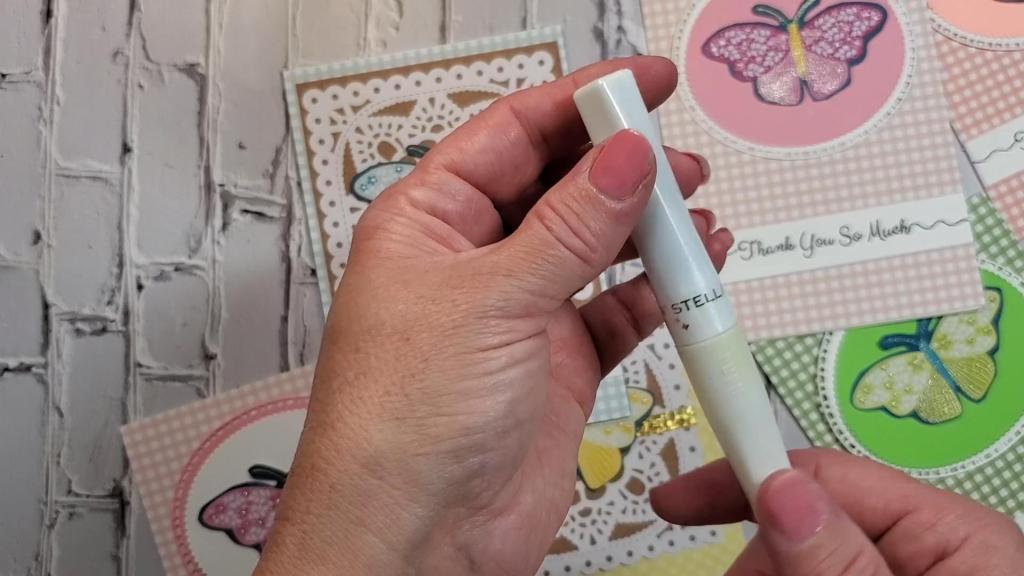
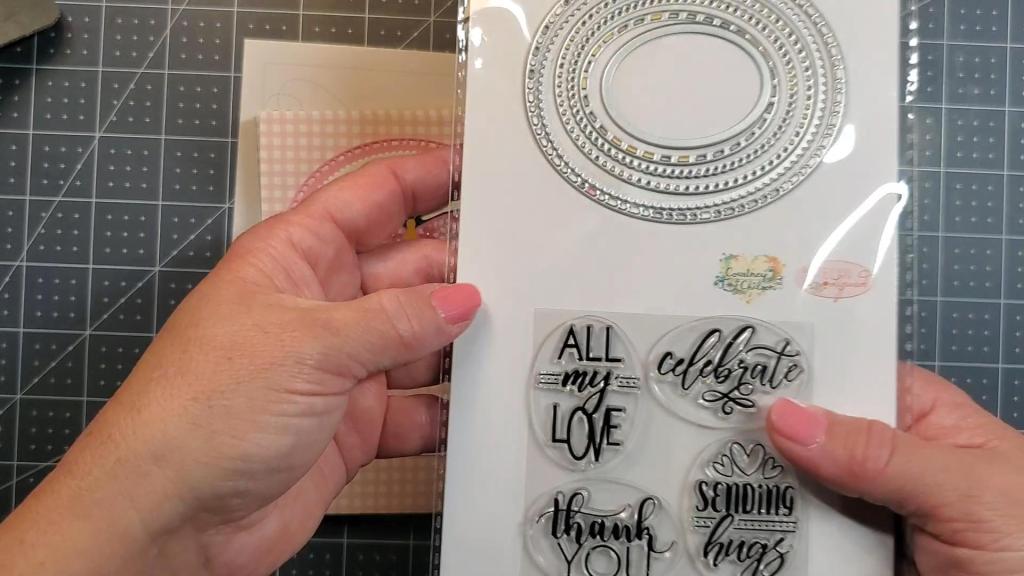
As you can see from the photo above, I varied the background on two of the cards. You’ll see a brown “lacey” looking pattern behind the yellow and blue butterfly, I fussy cut all around the edges of brown lacey pattern on the yellow card but I did not on the blue one. The butterflies are beautiful, but to kick it up a notch, I used a Zig Wink of Stella Glitter Brush Pen to add some sparkle to them.
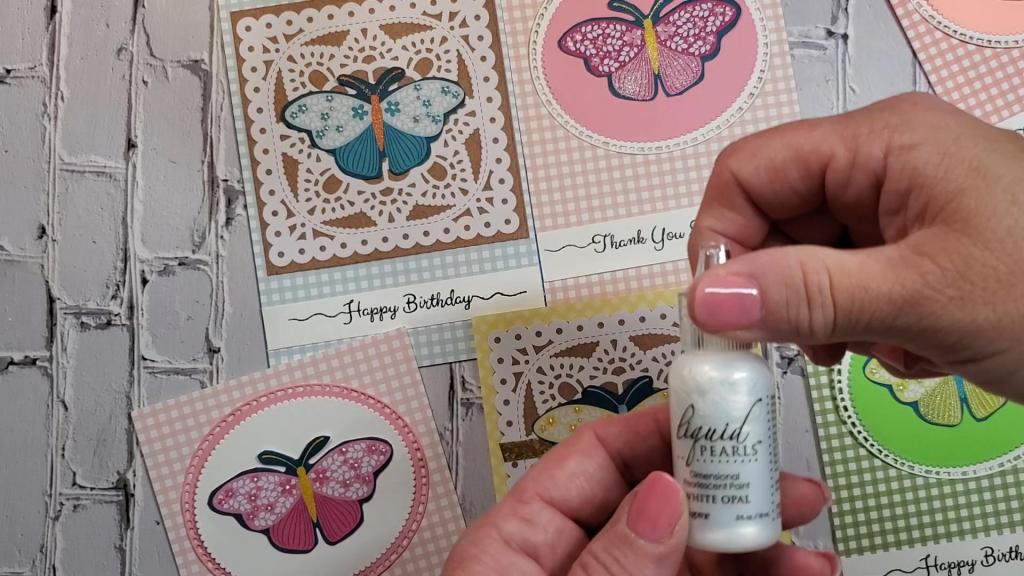
In addition, I used some Liquid Pearls to the centers of the flowers which appear on the butterflies wings.
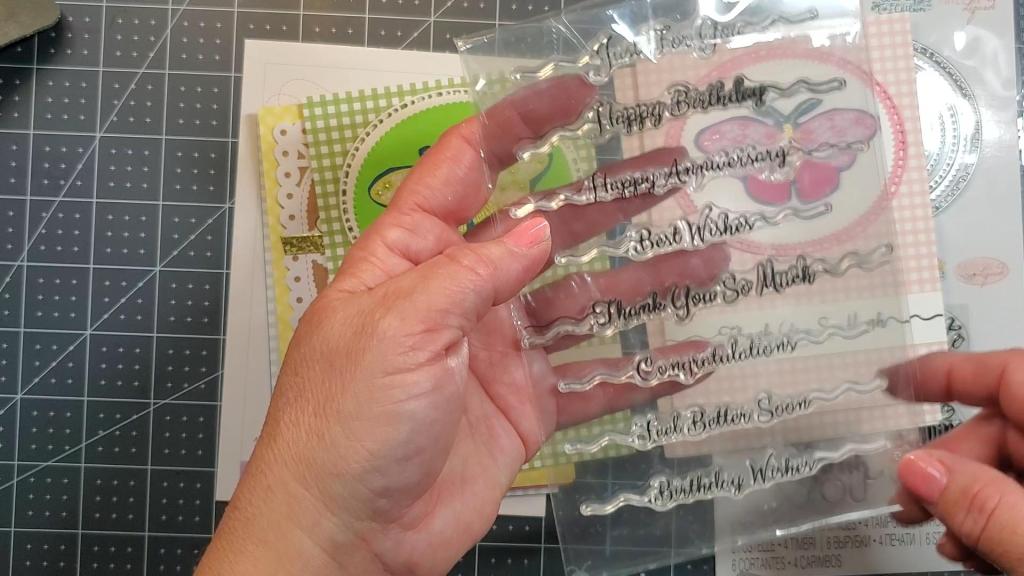
The greetings were stamped with black ink using stamps from Amazon.
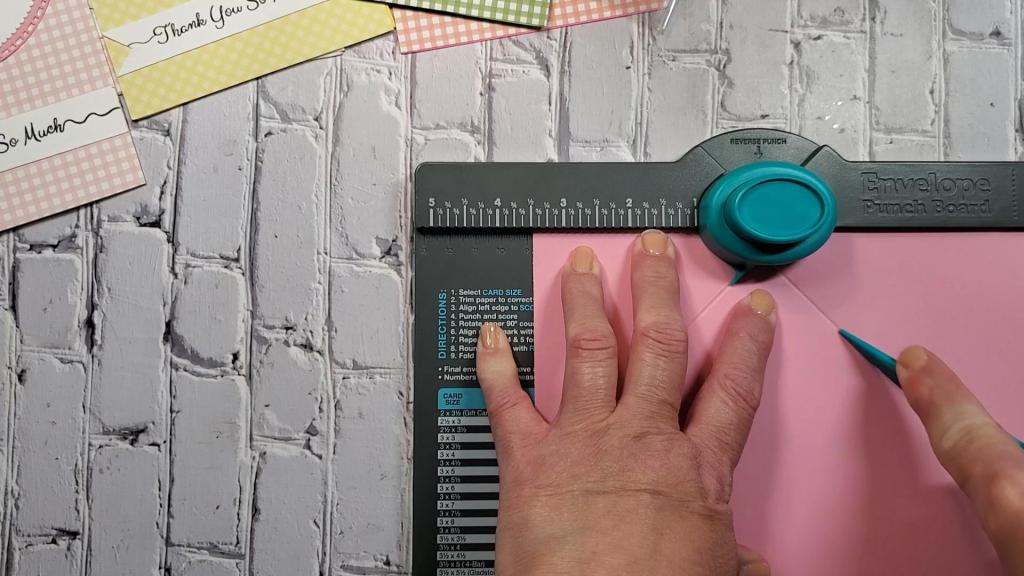
Since these cards are an a-typical size: 4.25″ by 6″, I used an app on my Android phone to find the proper measurements to make envelopes for them. It is an app by Stefan Steinborn called, “Envelope Punch Board Calculator” designed to be used with the We R Memory Keepers Envelope Punch Board. Just enter the size of the card you want to make an envelope for and it will give you the size of paper to start with and where to score.
You can see the envelope being made on the punch board below. Of course, you’ll have to cut the paper to the proper size before doing this step. You can see this process in the YouTube video below the photo.
Affiliate Links These links are FREE for you to use and I will receive a small portion of any purchases you make using Amazon and Share a Sale links. As an Amazon Associate I earn from qualifying purchases.
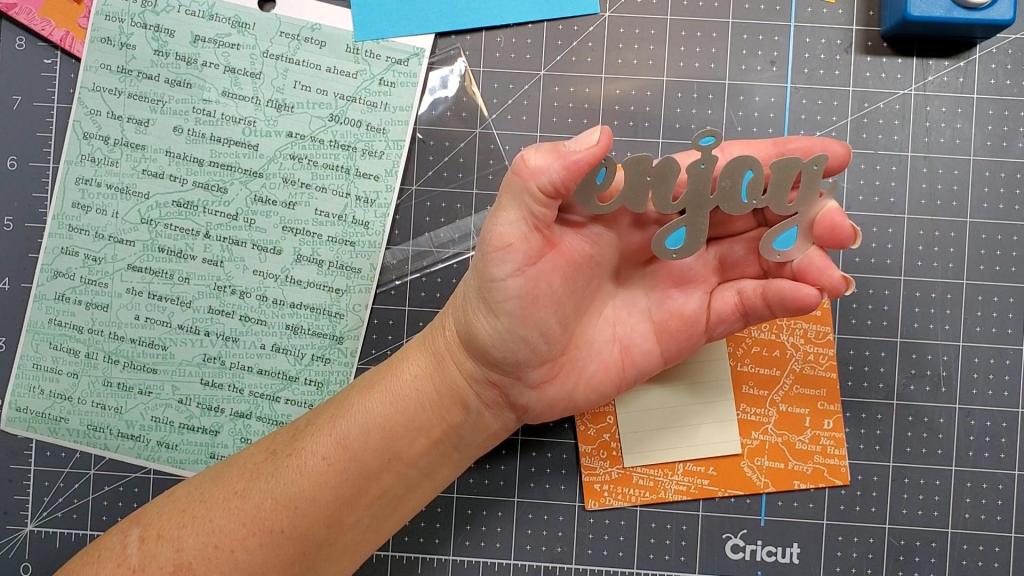
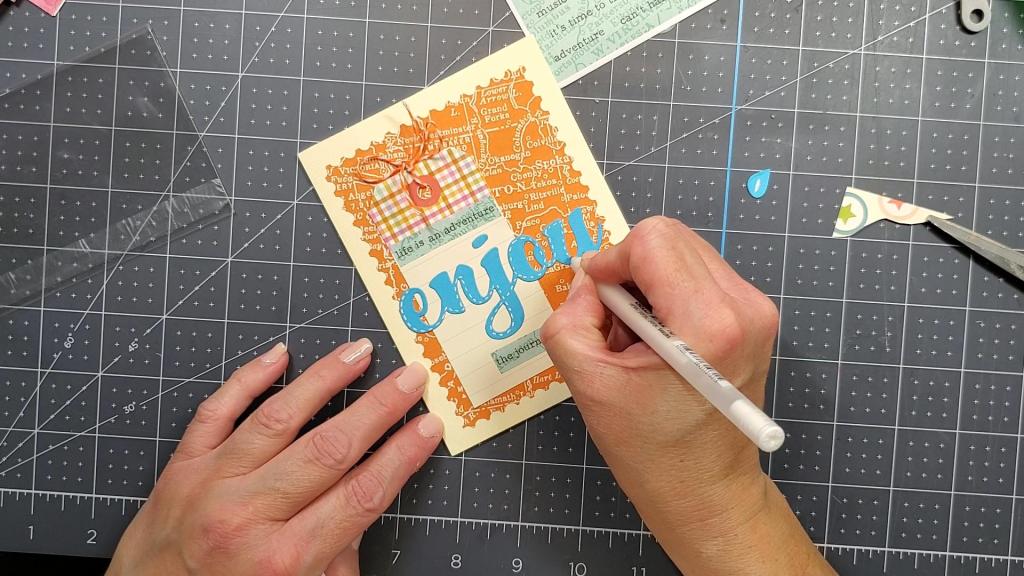
It’s always a lot of fun to make greeting cards by hand, but it’s even more fun to make a card that isn’t typical. Today’s card has a theme that is not typical for most greeting cards. It says, “Life’s and adventure. Enjoy the Journey.” It could be used to congratulate someone who is starting out on a new path in life or to bring encouragement to someone who’s had a set back or disappointment. I used the “Let;s Go” collection from Simple Stories which came in the September 2022 SCT Sampler kit I subscribe to once a month. The theme is travel and adventure, so it would be perfect for scrapbooking a trip or vacation. As you can see in the photo below, the background paper is a map.
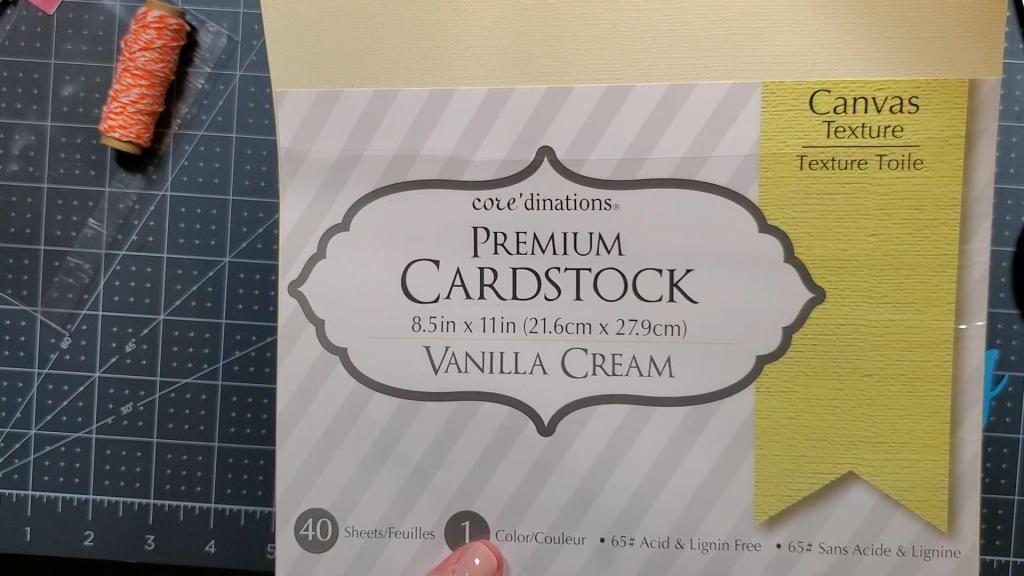
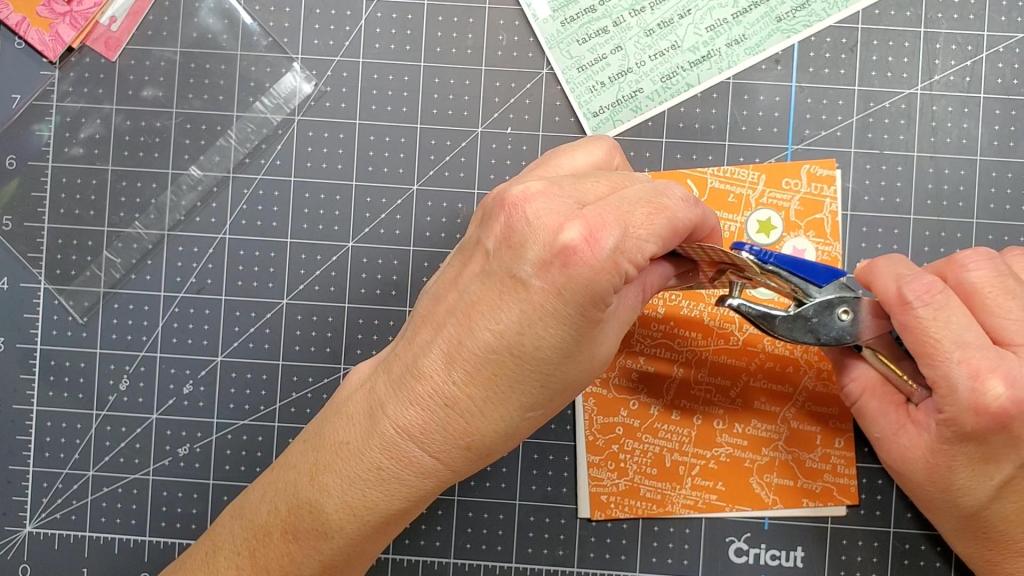
This card was easy and fun to make, but it seem like I say that a lot. I guess I just really really like making cards. I used a border punch from American Crafts to put the fancy edge on the orange pattern paper. Beneath the orange paper is a vanilla cream paper that has some texture to it. I cut the word enjoy with the die that came in the SCT Sampler. I used a white gelly roll gel pen to add white dashes all around the word enjoy. The tag and stars are from the paper collection from Simple Stories called, “Let’s Go.” I just trimmed about 1/4″ off the left and right side of the tag to slim it up, and used a hole punch to punch the hole at the top. The words are stickers from the same collection. The stars were on a piece of pattern paper and I used a circle punch to punch them out. The bow is tied with baker’s twine in an orange color to match the back panel.
Check out the video of the card being made on YouTube.
Affiliate Links These links are FREE for you to use and I will receive a small portion of any purchases you make using Amazon and Share a Sale links. As an Amazon Associate I earn from qualifying purchases.
Link to subscribe to the SCT Sampler: https://scrapbookandcards.com/sct-sampler/ (I’m not an affiliate with SCT. I just subscribe to the sampler with my own money).