The pattern paper I’m using for this card is a rainbow image. I think it’s bright and beautiful, happy and fun!
This card is super easy to make. You’ll need the pattern paper. It’s from Spellbinders card kit of the month for August 2021 called, “Art School”. Then you’ll need the stamp set from Spellbinders called, “Let’s Celebrate Sentiments.” Next, you’ll need some black ink and some acrylic blocks. Finally, you’ll need some puffy heart stickers or any stickers you’d like to use to decorate the card. Also, don’t forget your cardbase. I used heavy weight cardstock to create the cardbase. You can make your own cardbase or buy them.
The stamps are flexible, so I just bent them slightly before putting them on my acrylic block so they would follow the curve of the rainbow. When the stamping was done, I placed the puffy heart stickers. Have fun making this card. I sure did!
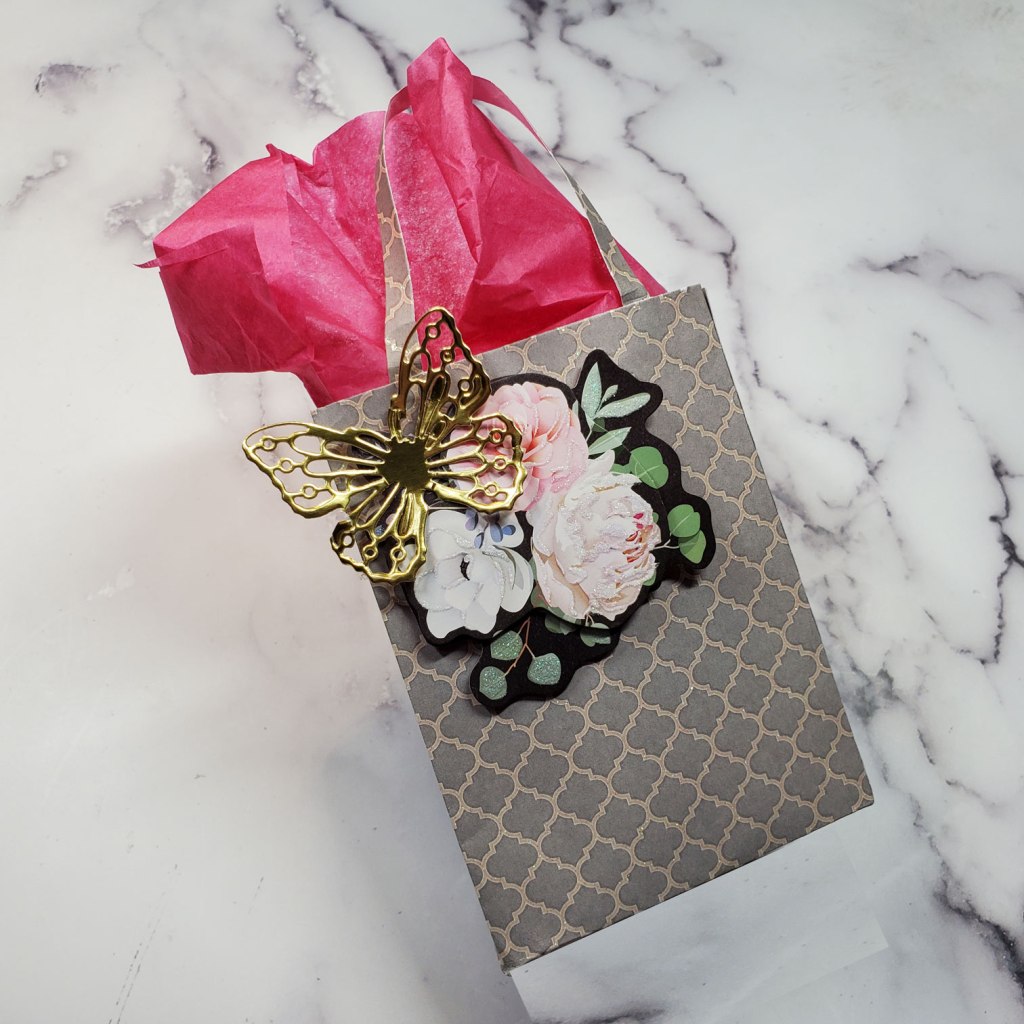
This die is a great addition to anyone’s crafting supplies. With it, you can create a sweet little gift bag that actually holds more weight than you might think. I tested it with a bottle of lotion that was about 6 ounces. It’s perfect for almost any occasion.
I used the die with some patterned paper to create the gift bag. Then, I used some die cut shapes and dimensional floral stickers to decorate the bag: all of which came from Spellbinders products. The pattern paper is from the Beauty is Everywhere paper pad. The flowers and butterfly are from the Spellbinders Card Kit of the Month for December 2021, which happens to be the kit the paper pad comes from and shares the name, Beauty is Everywhere.
You need two sheets of the pattern paper, and luckily, you’ll get two of each pattern in this paper pad. Then you’ll die cut the pattern twice and fold on the score lines to create the overall shape. Next, you’ll need some scor-tape or some other strong adhesive to adhere the pieces together. The handles for the bag are made using the narrow die. You’ll cut this one out twice, too. The dies make this project a simple one, but explaining how to put the bag together in words is not simple…so the video below will demonstrate that for you!
Affiliate Links These links are FREE for you to use and I will receive a small portion of any purchases you make using Amazon and Share a Sale links. As an Amazon Associate I earn from qualifying purchases.
Spellbinders Gift Bag Etched Dies from the Celebrate You Collection: https://shrsl.com/3fh4j
Spellbinders Beauty is Everywhere Card Kit of the Month Dec 2021: https://shrsl.com/3fh4o (If you buy this kit, you’ll receive the paper pad listed above, so you don’t need to buy it separately)
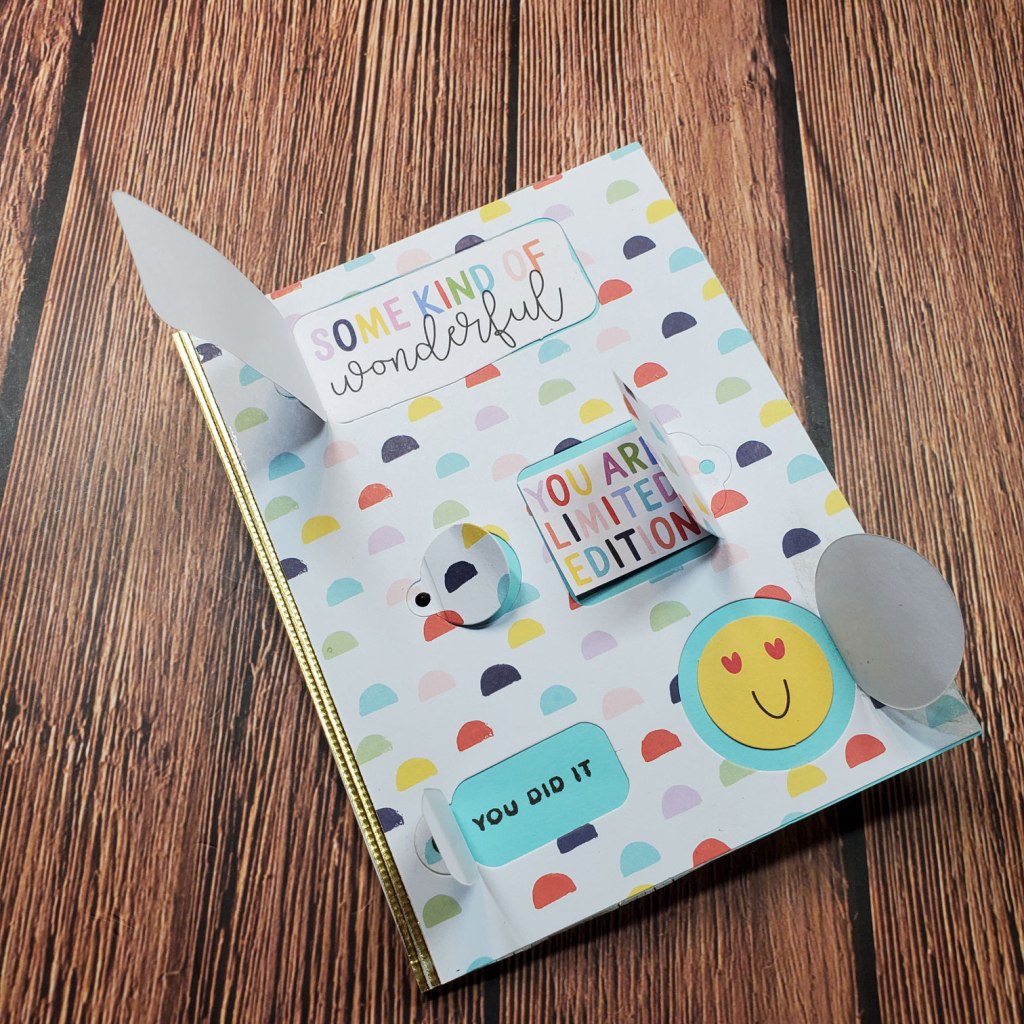
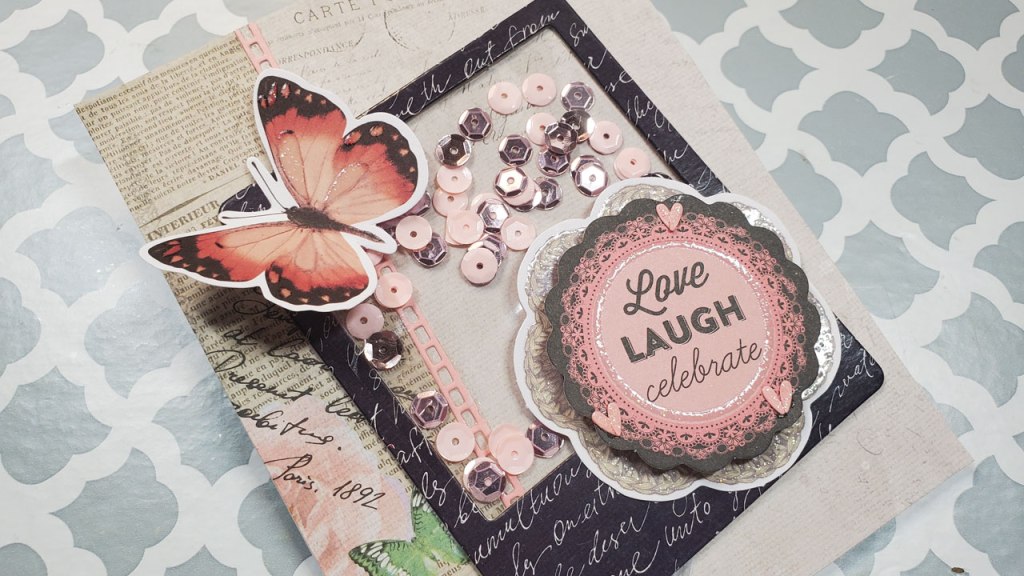
I used the Spellbinders Assorted Tag Etched Dies to create “flaps” on the front of a card that the receiver could open and read a stamped message. The messages are from the Spellbinders card kit of the month It was fun and I’m sure it will bring a smile to the person who receives it. The process of making it is very simple. It’s almost like creating a puzzle.
Just use a piece of pattern paper cut to the size of your card. Then, place the dies on the pattern paper where you want them. I placed them so that the largest tag is on the top row and there are two in the second and third row. The flaps each open opposite each other, like cabinet doors. Use a die cutting machine to cut them out and save them for the final step. Next, adhere a piece of colored cardstock that matches your pattern paper to your card base. Now, place your pattern paper over the colored cardstock and trace the outline of the tags with a pencil so you’ll know where to stamp the sentiments or place the images or stickers. (I didn’t do it this way and it was more difficult as a result).
Once the outlines are done, stamp your sentiments or images or place your stickers or die cut shapes and erase the pencil lines. You are ready to adhere the pattern paper over the images. Everything should be aligned perfectly. Before you adhere the tags, you’ll want to score each one just below the little hole at the top of the tag so they flip open easily. The last step is to adhere the tags into the space where they were originally cut out of the pattern paper…just like a puzzle. The trick here is to only apply adhesive to the top of each tag so the rest of it will open. To top it off, I used some Crystal Nuvo Drops in black to cover the open holes in each of the tags.
To add some pizzazz to this card, I used the long “string” die with some gold mirrored cardstock to create two thin borders which I adhered to the left side of the card. This is not how this die was intended to be used, but I like to use things in creative ways, and this was what my mind came up with for this die and card.
Affiliate Links:
These links are FREE for you to use and I will receive a small portion of any purchases you make using Amazon and Share a Sale links. As an Amazon Associate I earn from qualifying purchases.
I’m making a sweet card that can be used anytime for someone you love! The supplies came from the SCT sampler for February 2022. That is the kit from Scrapbook and Cards Today. They put together a kit of samples each month from current craft companies. It’s fun to get these because each one is current and also because it’s nice to get new goodies each month!
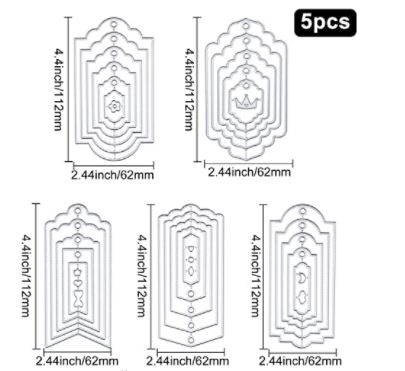
In the video, you’ll see that I used the patterned paper and a piece of ephermera from the kit, but I also used a butterfly sticker from Dollar Tree and some tag dies from Amazon.com, shown below.
I chose to embellish my card with some purple paper embellishments (the purple heart and dots) using my own purple cardstock.
Affiliate Links These links are FREE for you to use and I will receive a small portion of any purchases you make using Amazon and Share a Sale links. As an Amazon Associate I earn from qualifying purchases.
If you’d like to purchase items from the SCT sampler collections separately, you can do so with these links:
Here is another card for Valentine’s Day or just to say, “I love you!” I used my supplies and those from the SCT Sampler for February 2022.
Affiliate Links These links are FREE for you to use and I will receive a small portion of any purchases you make using Amazon and Share a Sale links. As an Amazon Associate I earn from qualifying purchases.
If you’d like to purchase items from the SCT sampler collections separately, you can do so with these links:
Cardstock/Paper/Vellum Neenah Solar White Classic Crest 110lb Cardstock (for the card base): https://amzn.to/3ljFvfv Paper Junkie Colored Vellum Assorted Colors: https://amzn.to/2LE8AX6
Dies / Die Cut Shapes / Die Cutting Machine Spellbinders Platinum 6 Die Cutting Machine: https://shrsl.com/3atf4
With this subscription, you receive samples from various companies in the industry. This kit features samples from Doodlebug Designs and Simple Stories. They cut down 12 x 12 sheets of their pattern papers to 6 x 6 and include those samples in the kit. There is also a die from SCT. Many scrapbookers enjoy this kit, but so do many cardmakers. I am a cardmaker and will make several cards from these supplies, so stay tuned for those upcoming videos.
Affiliate Links These links are FREE for you to use and I will receive a small portion of any purchases you make using Amazon and Share a Sale links. As an Amazon Associate I earn from qualifying purchases.
If you’d like to purchase items from the SCT sampler collections separately, you can do so with these links:
Cardstock/Paper/Vellum Neenah Solar White Classic Crest 110lb Cardstock (for the card base): https://amzn.to/3ljFvfv
Dies / Die Cut Shapes / Die Cutting Machine Spellbinders Platinum 6 Die Cutting Machine: https://shrsl.com/3atf4 (This is the small machine-it can’t be used with the steel rule dies because they are too big)
The die cut flowers are from the Spellbinders Card Kit of the Month for April 2021 called Sincerely Yours: https://shrsl.com/306nf
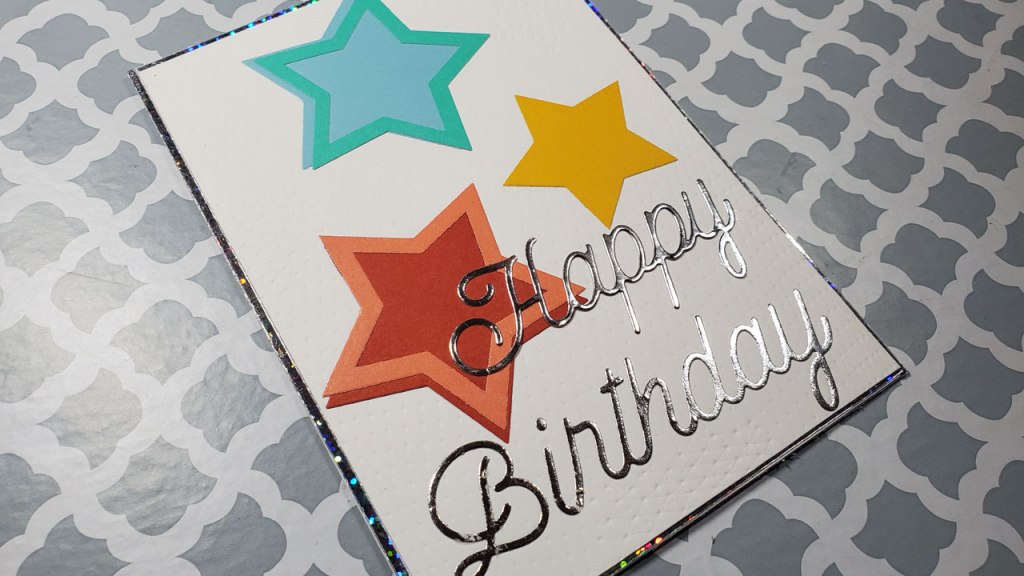
Make a fun, playful card for someone’s Happy Birthday. All you need are stars dies, cardstock in white and mirror silver, and an onion bag to add texture to the white cardstock. I’m using Neenah Solar White cardstock in 110lb for the cardbase and 80lb for the front panel and Scrapbook.com “Playful” cardstock paper pad for the stars. The mirror silver cardstock is from Craft Perfect by Tonic Studios. Use the star dies to cut out stars from colored cardstock, then layer the dies to cut out star frames. Next, use the onion bag and a die cutting machine with the embossing pad and plate to emboss the texture onto a piece of white cardstock measuring 5″ x 7″.
Layout the stars on the front panel in a way that is pleasing to your eye. I chose to use 3 stars two large and one small, along with a frame for the 2 larger stars. I offset the frames from the stars. Adhere those to your card panel. Then cut out the word Happy Birthday from mirror silver cardstock using the Scrapbook.com word dies and adhere them to your card panel. Trim the panel 1/8″ on all sides.
Then,, use some holographic border stickers to put a silver holographic border all the way around the cardbase. Finally, adhere the card panel to the cardbase. Viola, you’re done!
Affiliate Links These links are FREE for you to use and I will receive a small portion of any purchases you make using Amazon and Share a Sale links. As an Amazon Associate I earn from qualifying purchases.
Cardstock & Vellum Neenah Solar White Classic Crest 110lb Cardstock (for the card base): https://amzn.to/3ljFvfv Craft Perfect Silver Mirrored Cardstock by Tonic Studios: unavailable Alternative from amazon: https://amzn.to/3uR8JKY
Scrapbook.com – Magic Mat – Standard – Cutting Pad for Select Machines – 6.125 x 8.75 – 2 Pack https://shrsl.com/3dx2u (PLEASE NOTE THESE MATS WORK WITH CERTAIN MACHINES SO CHECK THE DETAILED INFORMATION BEFORE YOU BUY)
Onion bag cut to size – used to emboss a pattern on the background panel of the card
Simple, quick, and beautiful…just the way it should be to make a handmade card! That’s the way I’d describe the card for today. The flowers are 3_D Pop up stickers from the Dollar Tree.
As you can see from the image above, I deliberated between a sticker and a heat embossed word for the greeting. Which one do you like better?
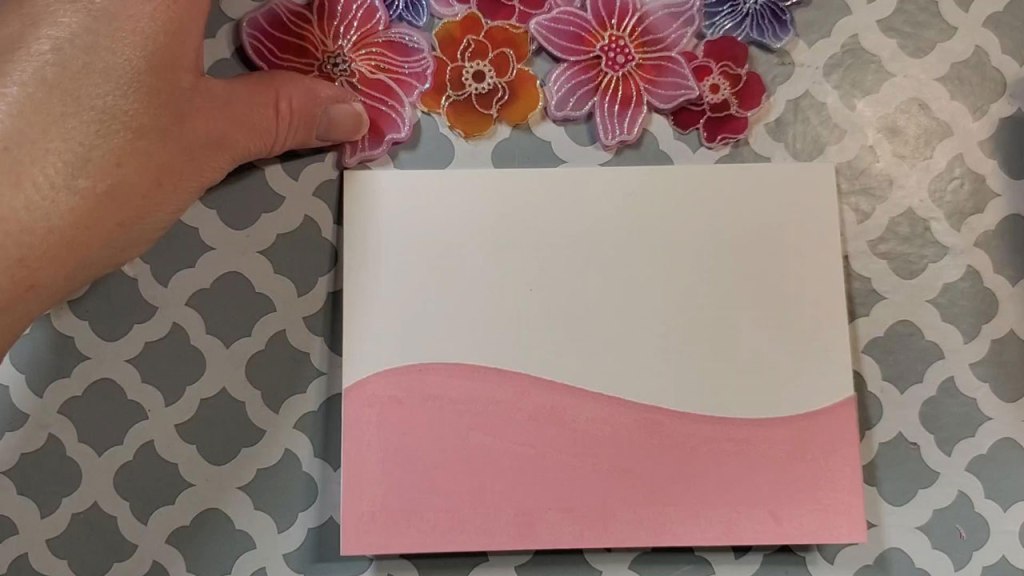
This card was made using two colors of vellum: pink and frosted white. The pink was cut with a die from Avery Elle called, “Dotted Borders” which cuts a curved line. The curve isn’t visible once the card is complete, it simply gives us a guide for placing the flowers. I adhered the vellum with vellum adhesive from plus corporation.
Once the flowers were placed, I trimmed the white frosted vellum to size (about 5.5″ x 3″) and heat embossed the word “love” from a stamp set from the dollar tree. I show a word sticker as an option in the photos. Next, I put vellum adhesive only along the bottom edge of the frosted white vellum and put it on my card-base. I had to lift up a couple of the stickers and replace them but that was easy and didn’t cause a problem. Watch how the card was made in the video below:
Affiliate Links These links are FREE for you to use and I will receive a small portion of any purchases you make using Amazon and Share a Sale links. As an Amazon Associate I earn from qualifying purchases.
Stickers/Stamps Flower Stickers: Dollar Tree https://shrsl.com/3dqat (This link is for buying in bulk) Love Stamp (clear acryic): Dollar Tree https://shrsl.com/3dqaw (This link is for buying in bulk) LOVE sticker in pink: Simple Stories “My Valentine” Collection: retired out of print
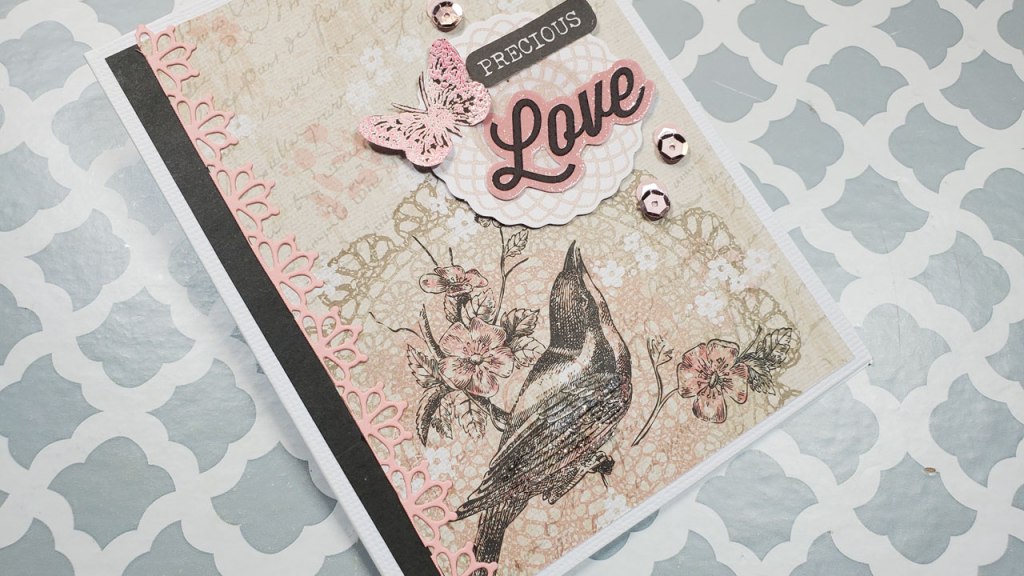
Valentine’s Day is around the corner! Today’s card is perfect for the occasion or any special occasion! I made it using supplies from the December 2021 Card Kit of the Month from Spellbinders called, “Beauty Everywhere.”
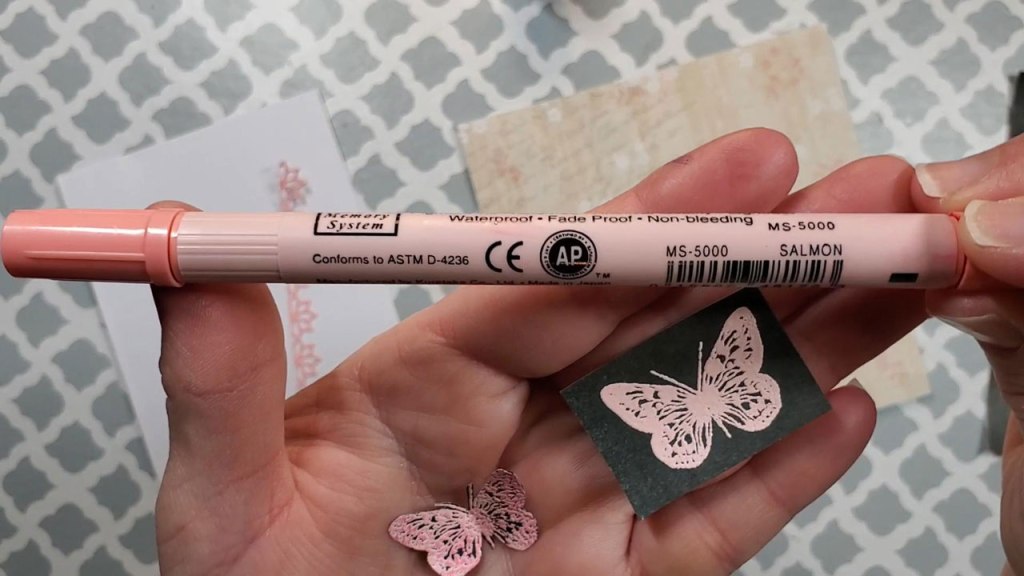
I used two pieces of pattern paper from the kit along with the die cut shapes (the doily and the words and the sequins). The butterfly is a stamp from the kit that I stamped with versa mark ink and heat embossed with pink embossing powder. Now, I didn’t have an embossing powder that matched exactly the pink color already on the pattern paper, so I used a Zig Memory System waterproof marker in salmon to color over the embossed butterfly and wiped off the excess ink with my finger before the ink dried.
The bird and flowers were black and white, but I used a Zig clean color brush marker (watercolor marker) in light carmine and a paint brush with water to achieve the right color of pink for those images. I added some glittery shine to the breast of the bird with Scrapbook.com’s pops of color in glitter silver.
The pretty pink vertical border aligned with the black edge was die cut with the die and pink cardstock from the kit. (I just trimmed off part of the die cut, which you can see in the video below.
To see an unboxing of the Card Kit of the Month:
Affiliate Links These links are FREE for you to use and I will receive a small portion of any purchases you make using Amazon and Share a Sale links. As an Amazon Associate I earn from qualifying purchases.
Adhesive
Scrapbook Adhesives by 3L 3L EZ Runner Permanent Adhesive, Value Pack: https://amzn.to/3c0Uvg4
Dies / Die Cut Shapes / Die Cutting Machine Spellbinders Platinum 6 Die Cutting Machine: https://shrsl.com/3atf4 The die I used to cut the pink border came in the card kit of the month, linked below
If you’d like to buy just the paper pad or the die cut shapes here are this link: Paper pad or die cut shapes: https://shrsl.com/3dmiz (The chipboard frames are not sold separately).
Markers/Paint Brush Zig Memory System Scroll and Brush Markers (I used salmon color): https://amzn.to/2M8eeA2 (These are waterproof and will work on top of embossing)
If you’d like to buy just the paper pad or the die cut shapes here are this link: Paper pad or die cut shapes: https://shrsl.com/3dmiz (The chipboard frames are not sold separately).
Today’s card is made using supplies from Spellbinders Card Kit of the Month for December 2021 called, “Beauty is Everywhere.”
The card looks complex, but it is actually pretty simple. All the items you see on the card came in the kit. You can purchase this kit a la carte at Spellbinders Paper Arts. You can also subscribe to a monthly subscription to get these kits each month.
Check out the video to see how the card was made:
Affiliate Links These links are FREE for you to use and I will receive a small portion of any purchases you make using Amazon and Share a Sale links. As an Amazon Associate I earn from qualifying purchases.
The die I used to cut the pink border came in the card kit of the month, linked below If you’d like to buy just the paper pad or the die cut shapes here are this link: Paper pad or die cut shapes: https://shrsl.com/3dmiz (The chipboard frames are not sold separately).
If you’d like to buy just the paper pad or the die cut shapes here are this link: Paper pad or die cut shapes: https://shrsl.com/3dmiz (The chipboard frames are not sold separately).