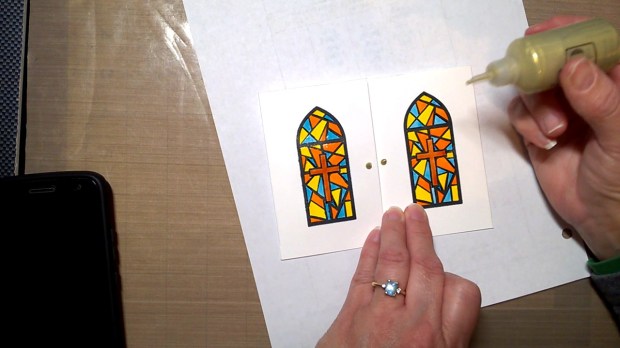
Stained glass is so beautiful! I’ve wanted to do a stained glass card for a long time, so I’m so thankful that Maymay Made It produced one. It is a color laying stamp, but on this card I only used the outline stamp with some Sakura Glaze pens to color in the section of the window. The inside of the card features cute little faces from a Stampabilities stamp set called “Stick Family” I purchases at hobby lobby a while ago. Can’t find it for purchase, but they do have some stick family stickers for sale. Check out the YouTube video to see the card being made and like and subscribe!
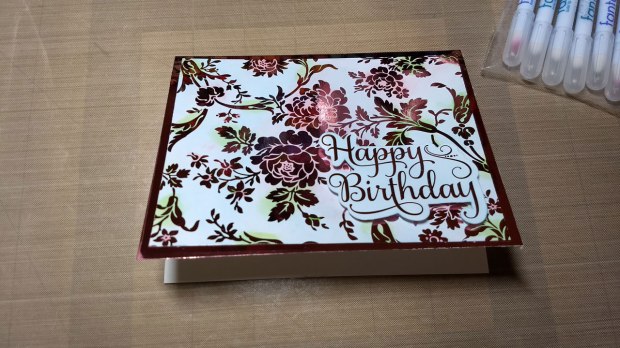
I love foiling! The result is simply gorgeous. Coloring before foiling, however, takes it to a whole new level. In the following card, I applied distress ink using fingertip sponge daubers to a pre-printed toner image before foiling it with a pretty pinkish/magenta foil. As you can see, the results were beautiful. :0) I used images designed by Anna Griffin along with her Minc machine, which I purchased through HSN. However, you can also use a regular laminator to foil. If you can’t find the Anna Griffin images, I know that Gina K Designs also does these. She calls them foil mates. I linked them below. However, if you have a laser printer that prints with a toner cartridge, then you can print your own images and foil those!!! I did this for a birthday card and I plan to blog it soon, so check back often for it.
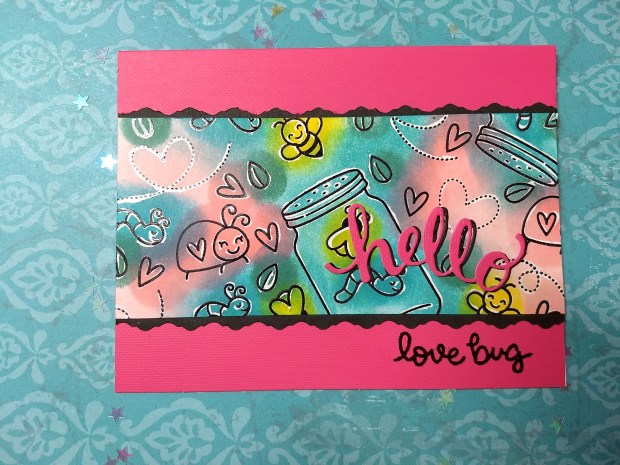
Today I have a card featuring the Lawn Fawn Bugs and Kisses stamp set. First, I created a background with these adorable little images. When creating a background, it is a good idea to choose a stamp set that had large, medium, and small images so you can create balance on your project and fill up empty space with the smaller images. Second, I traced the lines with a Sakura Glaze pen in clear ink. You could just heat emboss them with a clear embossing powder. After the ink was dry, I used fingertip sponge daubers and Distress Ink to color my images. The Glaze pen resisted the color so the black lines were still visible after applying the Distress Ink. What a cute background! Third, I matted my background image with black cardstock that had been trimmed with a victorian edged blade to give more interest to the card and make it a bit more fancy. Fourth, I adhered the panel to my card-base, which was a pre-cut and folded card from a set I purchased at Michael’s over the holiday. You can find it on Amazon too. Fifth, I cut out the word hello using the Hero Arts Stamp and Cut “Hello” set from another card of the same color which I can use to make a second card after removing the die cut from it. I matted the colored hello die cut with a black hello die cut to create a shadow for the word. This makes it more defined against that busy background. Finally, I heat embossed the bottom sentiment, “love bug” in black embossing powder. You can find a list of supplies below the YouTube video. I am an Amazon affiliate. Enjoy!
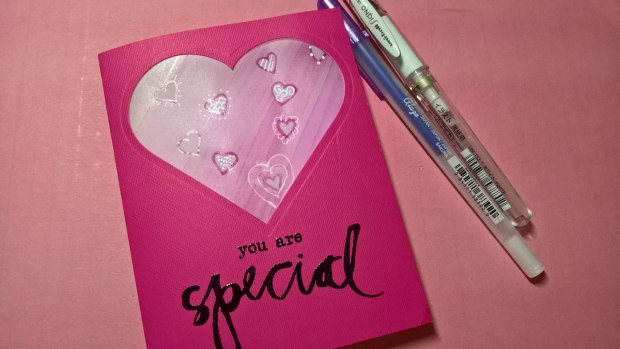
Happy Early Valentine’s Day! Today I have a subtraction technique with alcohol markers on vellum. First, I laid down some color on my vellum after cutting it to the size I needed. Then I used a heart stencil and some q-tips with rubbing alcohol to remove the ink. This created cute little see-through hearts on the vellum. As you can see below, I cut a heart-shaped window on the front of my card with Sizzix Framelits heart dies and adhered the colored vellum behind it to create a window card. The hearts were cute, but I wanted them to stand out more, so I traced them with a Sakura glaze pen and then added some doodles with a Uniball Signo white gel pen. These last steps are totally optional. Enjoy the video below the image. The products I used are listed under the video (I am an Amazon affiliate).
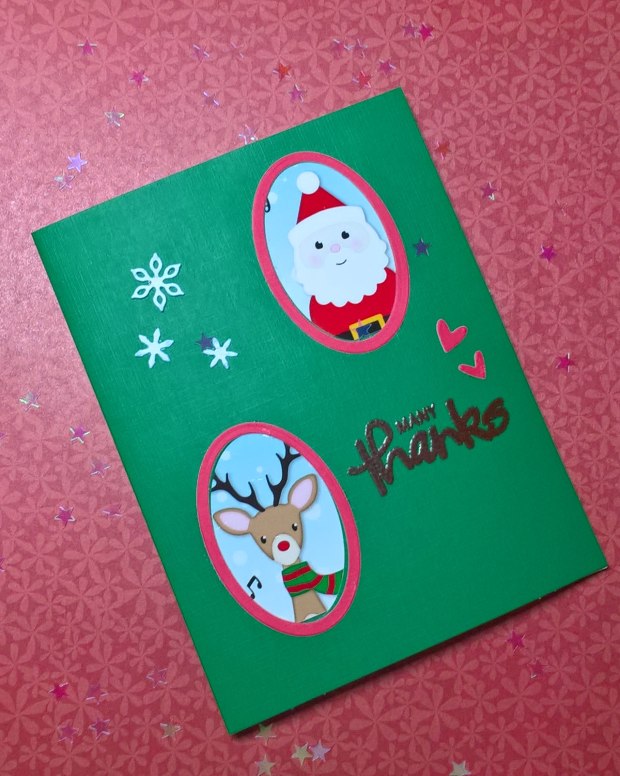
I received a postcard from Simon Says Stamp which had printed on it these adorable little Christmas images of Santa, a reindeer, and snowman. I used them to create this Christmas thank you card. Upon researching at their website, I found that they are actually wafer dies, not stamps, and there are a bunch of other characters in this line such as a monkey, a hippo, a bear, and more. Check them out if you’re interested. I think they can be used for lots of other types of cards. (I am not a Simon Says Stamp affiliate, just love their products. I am an Amazon affiliate.) Links for the products I used can be found under the video I’ve posted below.
The products I used on this card (I am an Amazon affiliate):
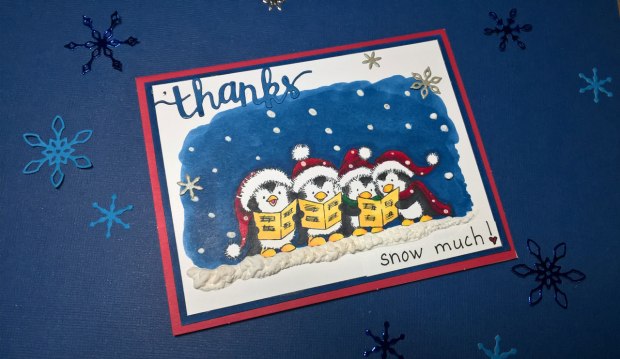
Here is an adorable thank you card for all those penguin lovers. Although I am not a coloring specialist, I love coloring. So, I used Spectrum Noir alcohol markers to color the image after I had stamped it on Spectrum Noir paper with memento dye ink in tuxedo black. The markers I used come from the basic sets as well as the expanded ones.(lights, darks, brights, pastels). Here is a link to a chart which shows which sets the markers come from (https://goo.gl/Un3MPR)and there is a list below the image and video which shows the exact markers I used to color the image.
The products I used on this card (or similar items) are listed below. (I am an Amazon affiliate).
Spectrum noir paper: http://amzn.to/2C4C9qL
Spectrum noir Alcohol markers(I used markers from this set as well as from the brights, lights, darks, pastels): http://amzn.to/2EsjcQB
Please visit my blog for a link to a chart of all colors and which set they are in: https://www.greetingstar.org
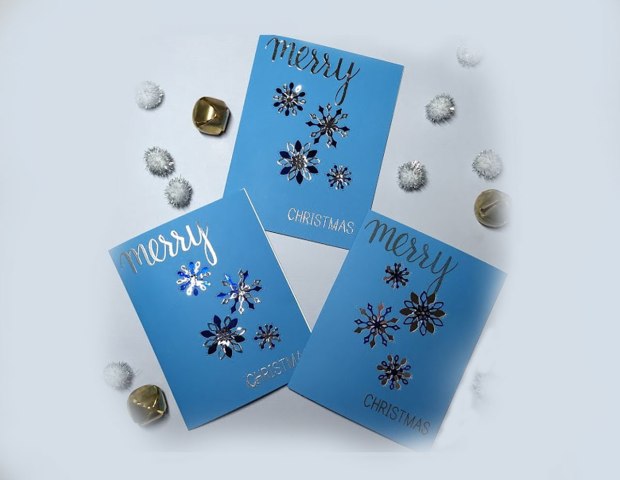
My second Christmas card uses another Poppystamps die, the Stitched Snowflake Cutouts die. I couldn’t find it for purchase on their website, so it must be retired, but it is still available online at other retailers with a quick search. This is a fairly quick and simple card. I used the die to cut out the snowflakes from the front panel of a pre-scored blue card. I saved the die cuts for use on another project. Then, I glued a piece blue foil on the inside, front of the card so it would show through the snowflake cutouts on the front of the card. To give it more pizzazz, I cut out some more snowflakes from another blue foil piece and adhered them over the snowflake cutouts on the front of the card at a different angle. I was very pleased with the look. Finally, I chose three different ways to apply a greeting to the front of the card: heat embossing, die cut and ink, and plain ink. Hope you enjoy! The image is below followed by my YouTube video and finally the links to the products I used on the card (I am an Amazon affiliate).
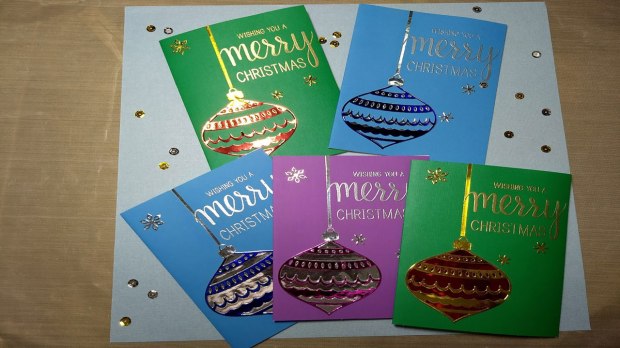
Merry Christmas to all! My card for today is made using a die cut from Poppystamps called Basilica Ornament Die. I used dollar store foil paper and some double-sided adhesive to make the ornament for the card. You can see in the image below that I used two colors of foil and laid the “barebones” die cut over the whole die cut to get a two-colored ornament. I chose to use blue with silver, purple with silver, and then also a gold with red. Your imagination is the limit! The YouTube video is below the image and I’ve listed the products I used below that (I am an Amazon affiliate).
Foil paper (not thermal) from Oriental Trading Company (I couldn’t tell if the pack has a yellow or gold foil paper): https://goo.gl/123NKc
Silhouette Double-Sided Adhesive Paper: http://amzn.to/2BbOdWO
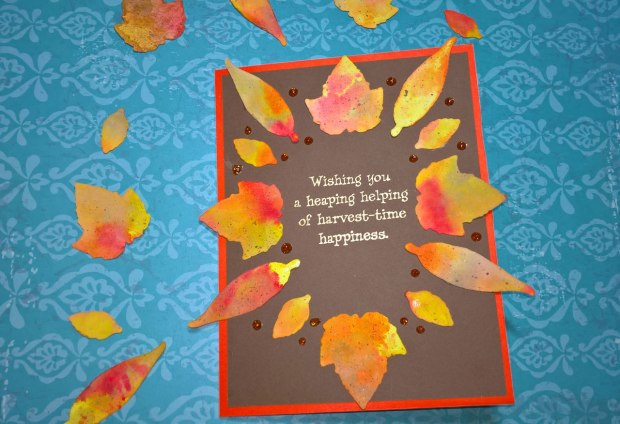
My final fall themed card uses the leaf die cuts from the previous card I made (see post below this one). To color the leaves, I used distress ink in mustard seed, fired brick, frayed burlap, and dried marigold. I “smooshed” the ink pads onto my craft mat and then spraying them with water. By dragging the die cut leaves through the water activated ink, I was able to get all those gorgeous fall color onto the white cardstock leaves. Tip: add the light colors first…yellow being number one, and brown last. Otherwise, you’ll never get the yellow to show through the darker colors. Once they were dry, I used a brown Zig Clean Color Brush pen to flick some brown dots onto them…but you can use any water based marker you have. Finally, I arranged the leaves into a circle shape to create a fall leaf wreath. I used Glossy Accents to adhere them to the brown front panel. I matted the front panel to an orange cardstock and then adhered them both to the card base. I used lightweight cardstock for the colored backgrounds and Neenah solar white 110lb for the cardbase. Colored paper would work just as well. The sentiment is from a Words to the Rescue stamp set. It was stamped using Versamark ink and then I used gold embossing powder and a Darice heat gun to set it. Finally, I added some inexpensive glittery embellishments called Beads in a Bottle by Tulip. Now, onto Christmas cards next! Please see the YouTube video below and the products I used are listed below that.
This fall card has…surprise….leaves as the focal point. The Hero Arts Color Layering Grateful Leaves stamp set and coordinating dies are so beautiful, I had use them to create the leaf windows on the front “cover” panel. The sentiment, “Happy Fall Y’all,” comes from a Sizzix framelits die set with stamps by Jen Long. I cut it out using an Art C stamp and cut set and then popped it up using foam tape. The background panel was created by taking some inexpensive ink pads directly to the cardstock to create the fall colors. They included all the “earth-tone” colors I love. I then added the “vines” on the leaves by stamping them in gold ink. Finally, I used a brown Zig Clean Color Brush pen by Kuretake to flick some brown spots onto the back panel to make the leaves look like they were deteriorating…just like real fall leaves. Enjoy the YouTube video below the image. The products I used are listed below the video.
The Products I used on this card:
Sizzix 661630 Framelits Die Set with Stamps, Happy Fall Y’all by Jen Long (5/Pk) http://amzn.to/2i6LWnA

 https://www.hobbylobby.com/Scrapbook-Paper-Crafts/Stickers/Stick-Family-Stickers/p/18958


 Today I have a card featuring the Lawn Fawn Bugs and Kisses stamp set. First, I created a background with these adorable little images. When creating a background, it is a good idea to choose a stamp set that had large, medium, and small images so you can create balance on your project and fill up empty space with the smaller images. Second, I traced the lines with a Sakura Glaze pen in clear ink. You could just heat emboss them with a clear embossing powder. After the ink was dry, I used fingertip sponge daubers and Distress Ink to color my images. The Glaze pen resisted the color so the black lines were still visible after applying the Distress Ink. What a cute background! Third, I matted my background image with black cardstock that had been trimmed with a victorian edged blade to give more interest to the card and make it a bit more fancy. Fourth, I adhered the panel to my card-base, which was a pre-cut and folded card from a set I purchased at Michael’s over the holiday. You can find it on Amazon too. Fifth, I cut out the word hello using the Hero Arts Stamp and Cut “Hello” set from another card of the same color which I can use to make a second card after removing the die cut from it. I matted the colored hello die cut with a black hello die cut to create a shadow for the word. This makes it more defined against that busy background. Finally, I heat embossed the bottom sentiment, “love bug” in black embossing powder. You can find a list of supplies below the YouTube video. I am an Amazon affiliate. Enjoy!