Christmas can’t get here fast enough this year! 2020 has been a rough ride. I hope you are all hanging on to your hats. Even though it’s only September, I just had to do some Christmas cards because they cheer me up. These are easy enough for anyone to make. I hope you enjoy watching the video below and try to make some yourself!
Affiliate Links (I receive a portion of the sale on any purchase you make using the links below): Echo Park Here Comes Santa Clause collection:
If you’re looking for something to quiet your mind, making cards is a great way to relax and enjoy yourself. Not feeling creative, you say? Let me give you hand. It’s quick and easy and FUN to use patterned paper to make a handmade greeting card. Check out the video below for instructions. If you don’t have the paper in the video, I have included links below so you can purchase it ( I am an affiliate for Amazon and Scrapbook.com). Or, use what you have on hand. For example, pick a larger print from what you have (like the pumpkin print paper you see in the video). Next, choose a solid, dotted or pin-striped pattern (like the orange paper you see in the video). Then, choose a decorative element like a ribbon, glitter paper, glitter washi-tape (like the gold washi-tape beneath the blue tag in the video). Finally, use another solid paper and clip the edges with a circle punch or cut with decorative edge scissors to create a tag for your card (like the blue tag in the video). That’s all there is to it!
Affiliate Links (I receive a portion of the sale on any purchase you make using the links below):
With Fall around the corner, it’s time to make some Fall cards! The two I have for you today are made with the patterned paper collection called, “Fall Market” by Carta Bella. It’s beautiful, textured paper that comes in the size 12″ x 12″ or a pad of 6″ x 6″, but the small one isn’t textured.
I chose to make a very traditional looking card along with one that’s a bit more fancy. Enjoy the video below and don’t forget to use your imagination and creativity to come up with other ideas for these papers. Examples include home decor projects, gift tags or bags, and much more.
You can purchase the papers with the links below. These are my affiliate links, which means I will receive a small percentage of any sales that occur with the use of these links:
During these unprecedented times, I’d like to share some ideas for things to do to keep your mind occupied and healthy. I’ve used most of the resources below and I listed next to each one free or paid. Some of the free ones do require a registration. Please use at your own risk and always preserve your privacy online. I hope these ideas help you and encourage you. Here are some encouraging verses from the bible:
Psalm 67 God be merciful unto us, and bless us; and cause his face to shine upon us; Selah. That thy way may be known upon earth, thy saving health among all nations. Let the people praise thee, O God; let all the people praise thee. O let the nations be glad and sing for joy: for thou shalt judge the people righteously, and govern the nations upon earth. Selah. Let the people praise thee, O God; let all the people praise thee. Then shall the earth yield her increase; and God, even our own God, shall bless us. God shall bless us; and all the ends of the earth shall fear him.
Read the bible/Study the bible/Pray
(Romans 10:13 or “whoever callson the name of theLordshall be saved.)
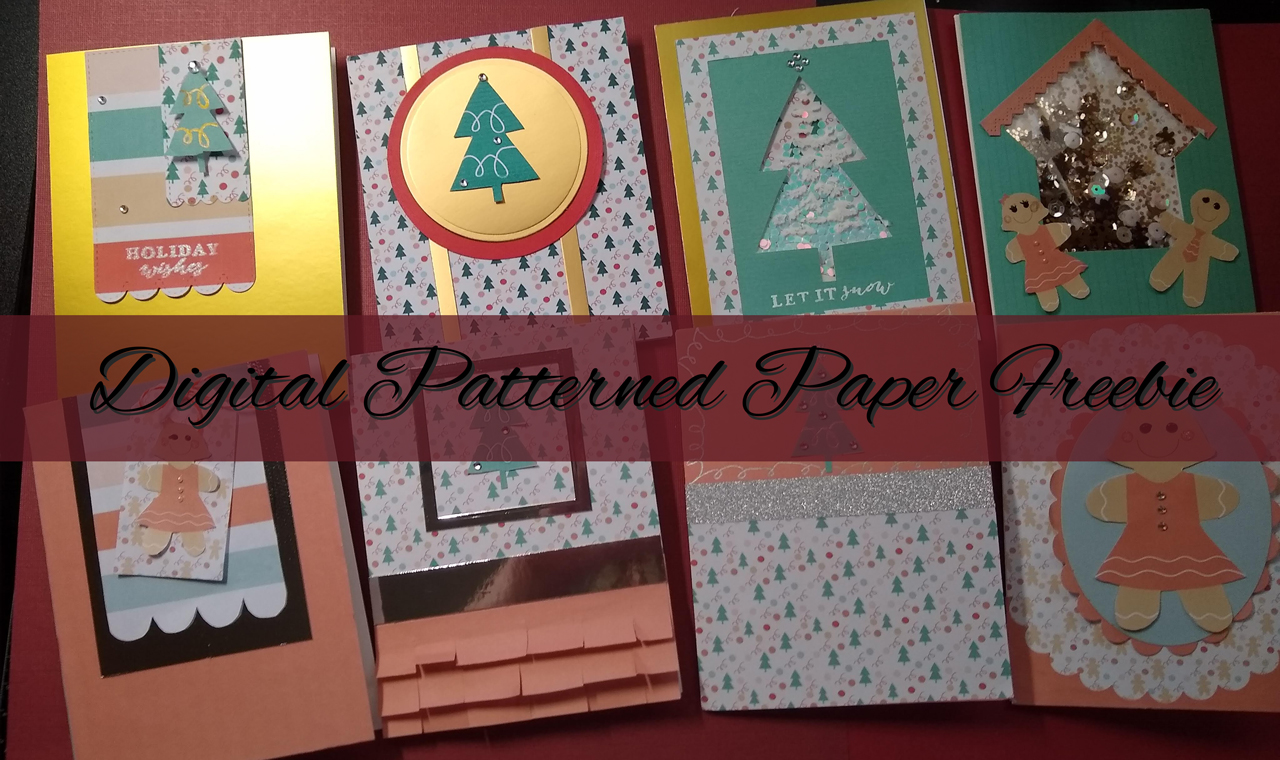
Yesterday was World Cardmaking Day! Hooray! I had a lot of fun the past week making Christmas cards with some patterned paper I designed myself on my computer using Inkscape. It is a free digital graphics program like Adobe Illustrator. Did I mention it is free? Just head on over to Inkscape.org to get yours. I like it because it’s free! You can create SVG files that can be cut in electronic cutting machines like the Silhouette Cameo. There are tons of videos on YouTube showing how to use the program and there are tutorials at their website too.
Anyhoo, on to my crafts. I made a video showing how I made the cards. If you’d like a copy of the images and paper, just
Click the YouTube video below
Subscribe to my YouTube channel
Send an email to greetingstar@greetingstar.org to request the file. Don’t forget to give me your email so I can send it to you :0)
Products I used on these cards are listed below. I am an Amazon.com and Scrabook.com affiliate. The links are free for you to use. If you click on them and make a purchase, I will receive a small percentage of the sale. Thank you for your support :0)
My patterned paper design (see above to get your free copy)
I know I’ve been doing a lot of watercoloring lately. I can’t help it. It’s such a fun way to make a card. This time, I added details with a silver gel pen to create some highlights. I think it makes the circles look like balloons. You could try a white gel pen instead. The little lines I added around the circles give the whole thing some movement, which makes the circles look like they are floating around and bumping into each other. It shouts celebration!
I matted the card with some silver pearl paper by Cricut and then adhered that to the cardbase. I used Neenah Solar White 110lb carstock for the cardbase. There are lots of variations you can do with this card. You can change up the color scheme to fit your occasion, use a die cut greeting instead of hand lettering, overlap the circles to create a bokeh effect. As always, your imagination is the only limit.
Give this card a try. I’m sure you’ll find it fun to do. It is easy enough for kids to do, but anyone will enjoy making it. If you’d like to see a video, click on the YoutTube video below.
I am an Amazon.com and Scrabook.com affiliate. The links are free for you to use. If you click on them and make a purchase, I will receive a small percentage of the sale. Thank you for your support :0)
For the brush pens: there are so many on the market to choose from. I really like the Zig memory System I have, but they are expensive. I have the big set which I will link for you below, but I also link the newer brushables which come in a smaller quantity, and cost less.
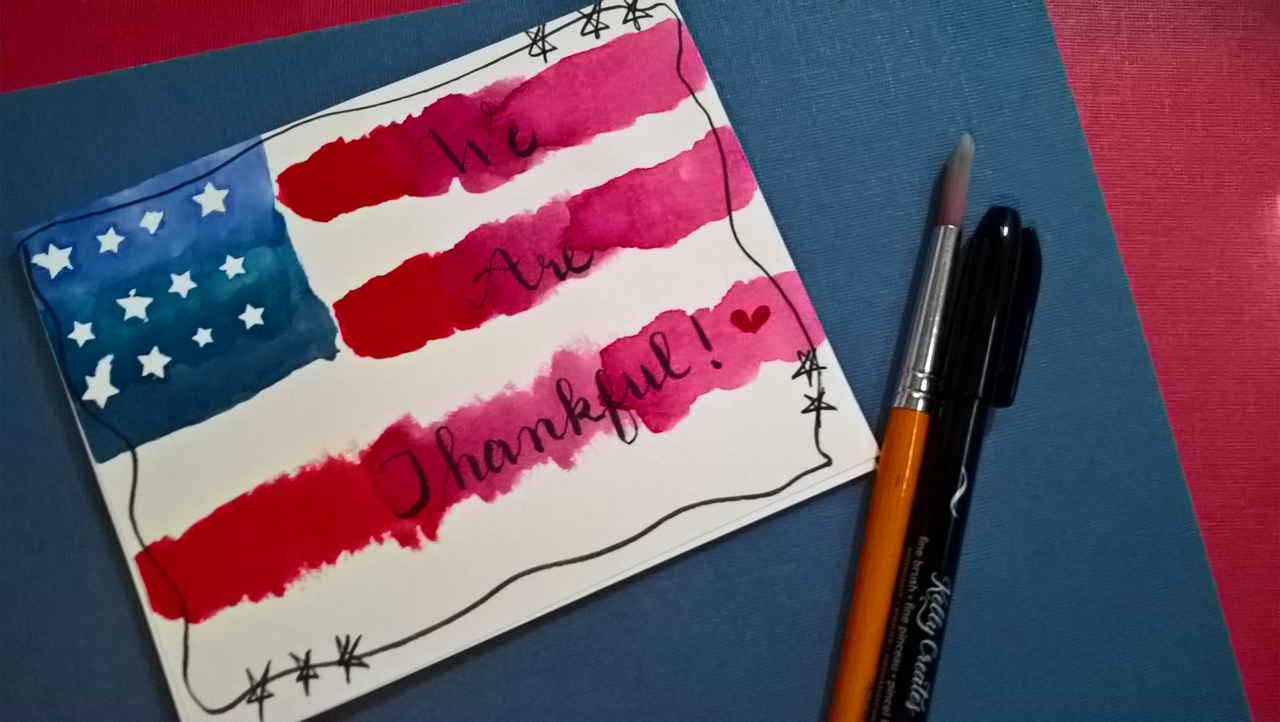
God Bless America and all those who have sacrificed to make and keep us free! To celebrate Memorial Day 2019, why don’t you make an EASY watercolor greeting card to share with loved ones and friends? You can use any watercolors you have on hand, even Crayola brand. It makes a great project for anyone, even for kids. If you don’t have anyone to give a card to, you can turn this into a decoration for an event by using larger pieces of watercolor paper or even a canvas.
Watercolors are so versatile. You can create beautiful gradients with just one color by adding a little more water each time you lay down some color. Or you can kick it up a notch by using less water to create very saturated, vibrant, and shiny colors on your card. I experimented and did both with these cards, and I also used three different shades of red and three different shades of blue. Check out the video below to see how it’s done. The supplies I used are linked below the video (I am an Amazon affiliate).
One word of caution, in order to prevent the colors from running together and making shades or hues you don’t want, be sure your wet colors don’t come into contact with each other unless you want them to. On this card, you’ll need to let the blue section of the flag dry before adding the red to prevent the red and blue from mixing and forming into purple.
SUPPLIES:
I am an Amazon and Scrabook.com affiliate. The links are free for you to use. If you click on them and make a purchase, I will receive a small percentage of the sale. Thank you for your support :0)
For the brush pens: there are so many on the market to choose from. I really like the Zig memory System I have, but they are expensive. I have the big set which I will link for you below, but I also link the newer brushables which come in a smaller quantity, and cost less.
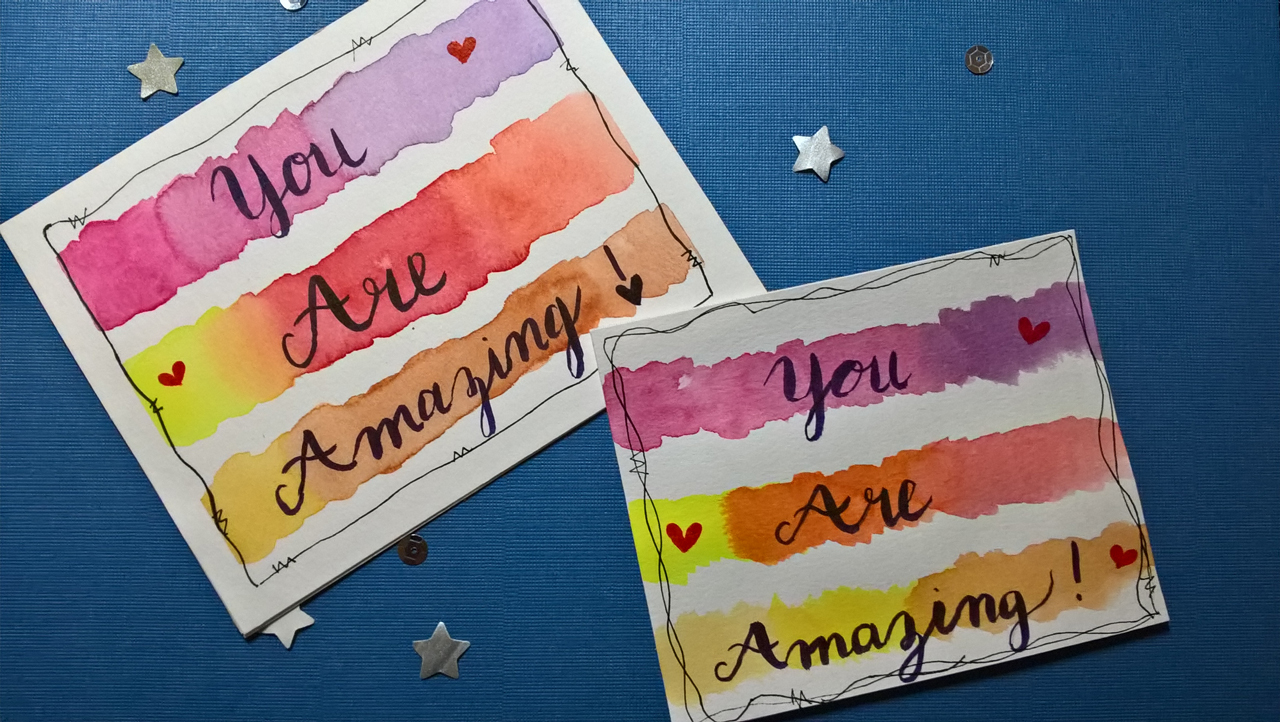
Watercolor and Brush Lettering are two things that I love! Both are intimidating to me, but I tried them anyway. You should too! It is exhilarating to create something beautiful with them, and you CAN do it. For me the key is play. Before you put the pressure on to make something with watercolor or brush lettering, take some time to play with them. Just have fun. See what you can do. You will learn a lot from it. What works, what doesn’t…and that isn’t always the same for everyone. You will develop your own style and preferences through play…and you’ll have fun doing it.
Enough preaching :0) Here is how I did this card.
I used some Canson mixed media paper and trimmed it to 4.25 X 5.5 inches. You can use any watercolor or mixed media paper you have.
To color the gradient, I used three colors in each row. I used was the Gansai Tambi set by Kuretake.
TOP ROW:
Red No.32
Rose Madder No.34
Cobalt Violet No. 46
SECOND ROW:
Lemon Yellow No.40
Red No. 32
Cadmium Scarlet No.31
Use a mixture of about half watercolor with half water to mix your colors on a palette (any piece of plastic, glass, or ceramic will do for a palette).
Apply the colors in the row one at a time, overlapping each one as you go.
Rinse your brush between each row but not while in the same row.
Allow it to dry and then use a brush marker/pen to write a greeting. See my YouTube video below for a demonstration of the hand lettering. Also see the supplies below for a brush lettering workbook to learn brush lettering by Kelly Creates. She also has brushes, but I just used what I already had on hand, which I link below as well :0)
SUPPLIES:
I am an Amazon.com and Scrabook.com affiliate. The links are free for you to use. If you click on them and make a purchase, I will receive a small percentage of the sale. Thank you for your support :0)
Kuretake Gansai Tambi Watercolors: https://amzn.to/2VFJcPE
Colors I used:
TOP ROW:
Red No.32
Rose Madder No.34
Cobalt Violet No. 46
SECOND ROW:
Lemon Yellow No.40
Red No. 32
Cadmium Scarlet No.31
For the brush pens: there are so many on the market to choose from. I really like the Zig memory System I have, but they are expensive. I have the big set which I will link for you below, but I also link the newer brushables which come in a smaller quantity, and cost less.
Zig Memory System Scroll and Brush Markers: https://amzn.to/2M8eeA2
Oh my! That sounds a little strange :0) Don’t get too worried, it is not as weird as you might think (ha, ha). It is a simple stamping technique used to add texture and interest to a plain image. It is a three step process:
Step 1: Ink up a plain, solid stamp. I used a heart shaped stamp by Hero Arts.
Step 2: Stamp it on a stencil that is a pattern. I used a Kaisercraft stencil.
Step 3: Stamp onto another piece of paper to see the beautiful texture created by the stencil.
Watch the video of the process below:
SUPPLIES:
I am an Amazon.com and Scrabook.com affiliate. The links are free for you to use. If you click on them and make a purchase, I will receive a small percentage of the sale. Thank you for your support :0)


 Yesterday was World Cardmaking Day! Hooray! I had a lot of fun the past week making Christmas cards with some patterned paper I designed myself on my computer using Inkscape. It is a free digital graphics program like Adobe Illustrator. Did I mention it is free? Just head on over to Inkscape.org to get yours. I like it because it’s free! You can create SVG files that can be cut in electronic cutting machines like the Silhouette Cameo. There are tons of videos on YouTube showing how to use the program and there are tutorials at their website too.
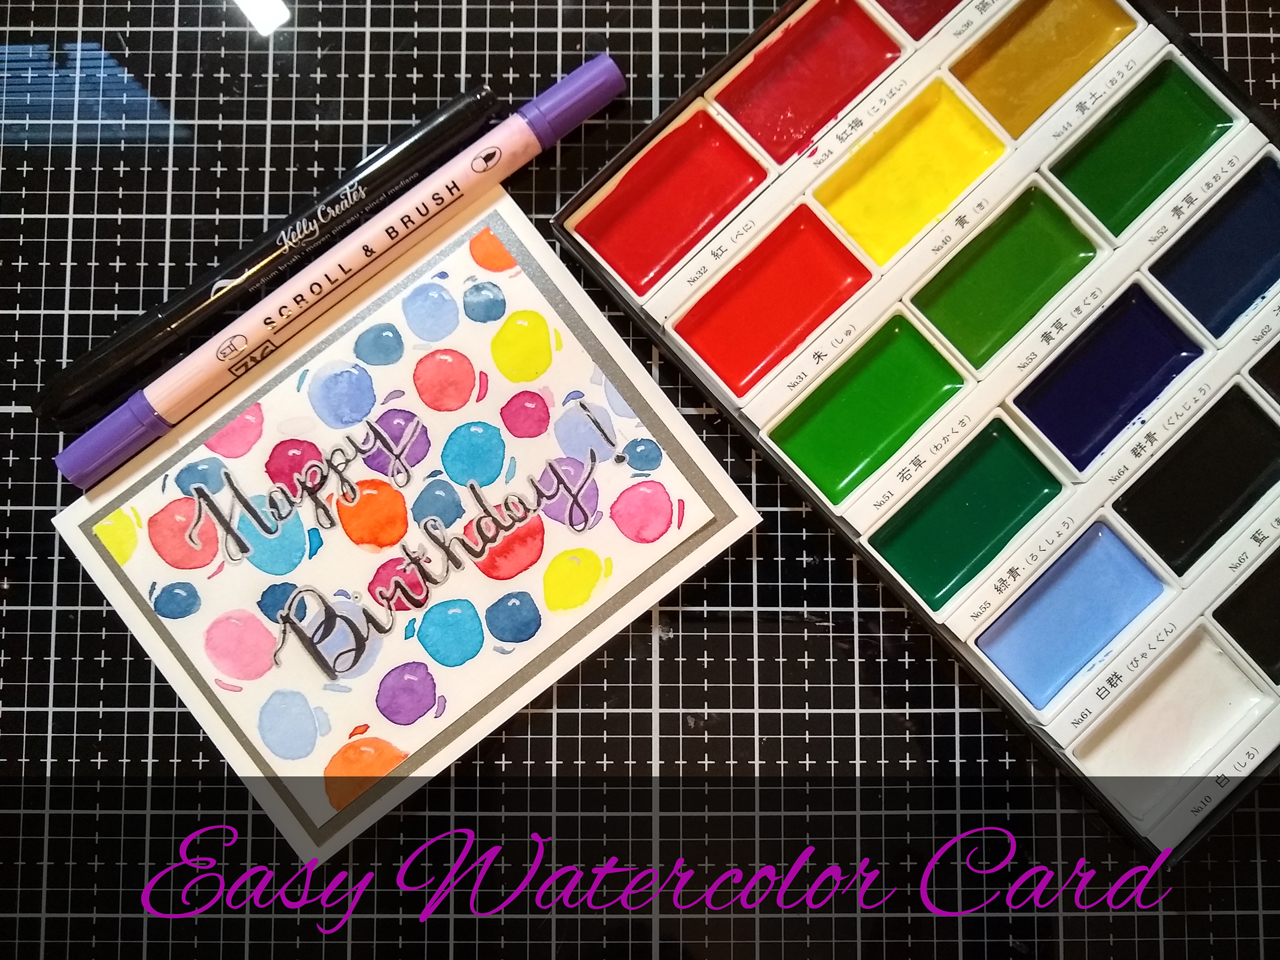 I know I’ve been doing a lot of watercoloring lately. I can’t help it. It’s such a fun way to make a card. This time, I added details with a silver gel pen to create some highlights. I think it makes the circles look like balloons. You could try a white gel pen instead. The little lines I added around the circles give the whole thing some movement, which makes the circles look like they are floating around and bumping into each other. It shouts celebration!


 God Bless America and all those who have sacrificed to make and keep us free! To celebrate Memorial Day 2019, why don’t you make an EASY watercolor greeting card to share with loved ones and friends? You can use any watercolors you have on hand, even Crayola brand. It makes a great project for anyone, even for kids. If you don’t have anyone to give a card to, you can turn this into a decoration for an event by using larger pieces of watercolor paper or even a canvas.

 Oh my! That sounds a little strange :0) Don’t get too worried, it is not as weird as you might think (ha, ha). It is a simple stamping technique used to add texture and interest to a plain image. It is a three step process:


